本文最后更新于 2026年4月12日 中午
皮肤站是什么?其实官网就有皮肤站,在正版用户选择正版的登录后,MC客户端就会到官方皮肤站内下载用户的皮肤。
而外置登录,就是用户在没有正版账号的情况下,使用自己的账号验证,达到用户验证的目的。
本文方案
适用于:
- Java版本Minecraft:包括Spigot、官方版本Minecraft、Forge等。
皮肤站
本文使用blessing-skin-server作为皮肤站,这个其实是LittleSkin的开源社区版本。
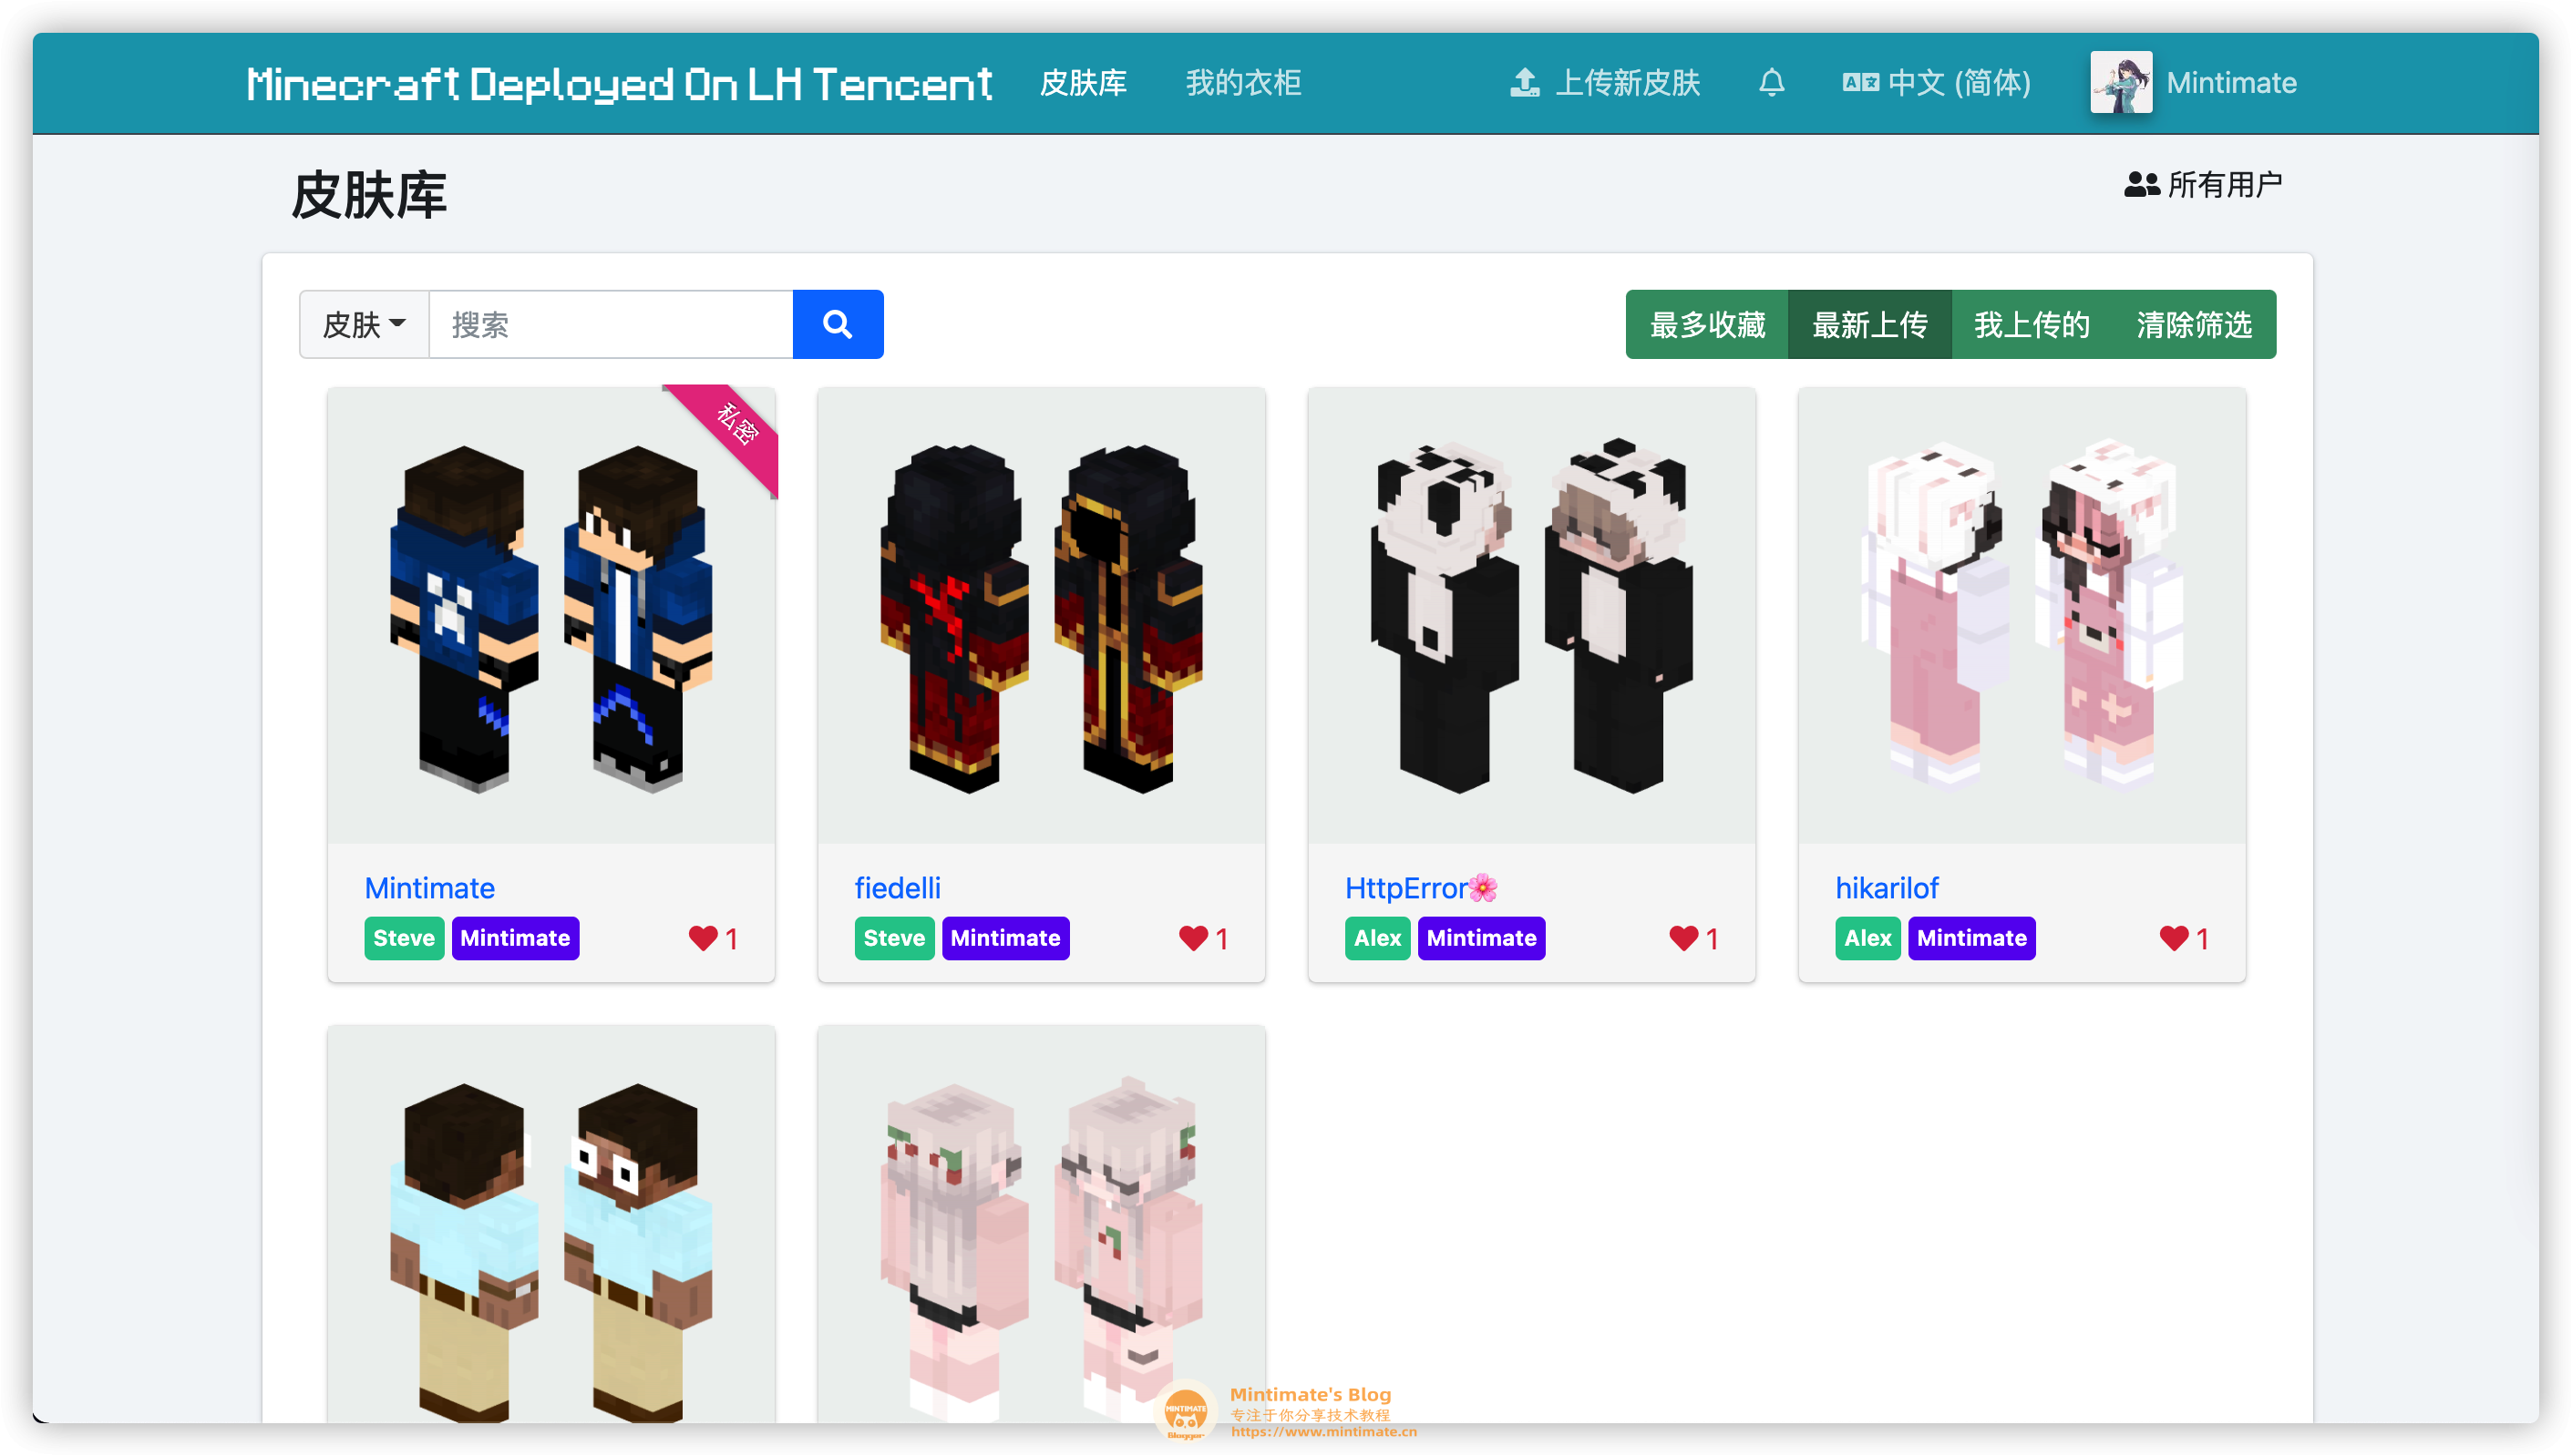
实现效果:
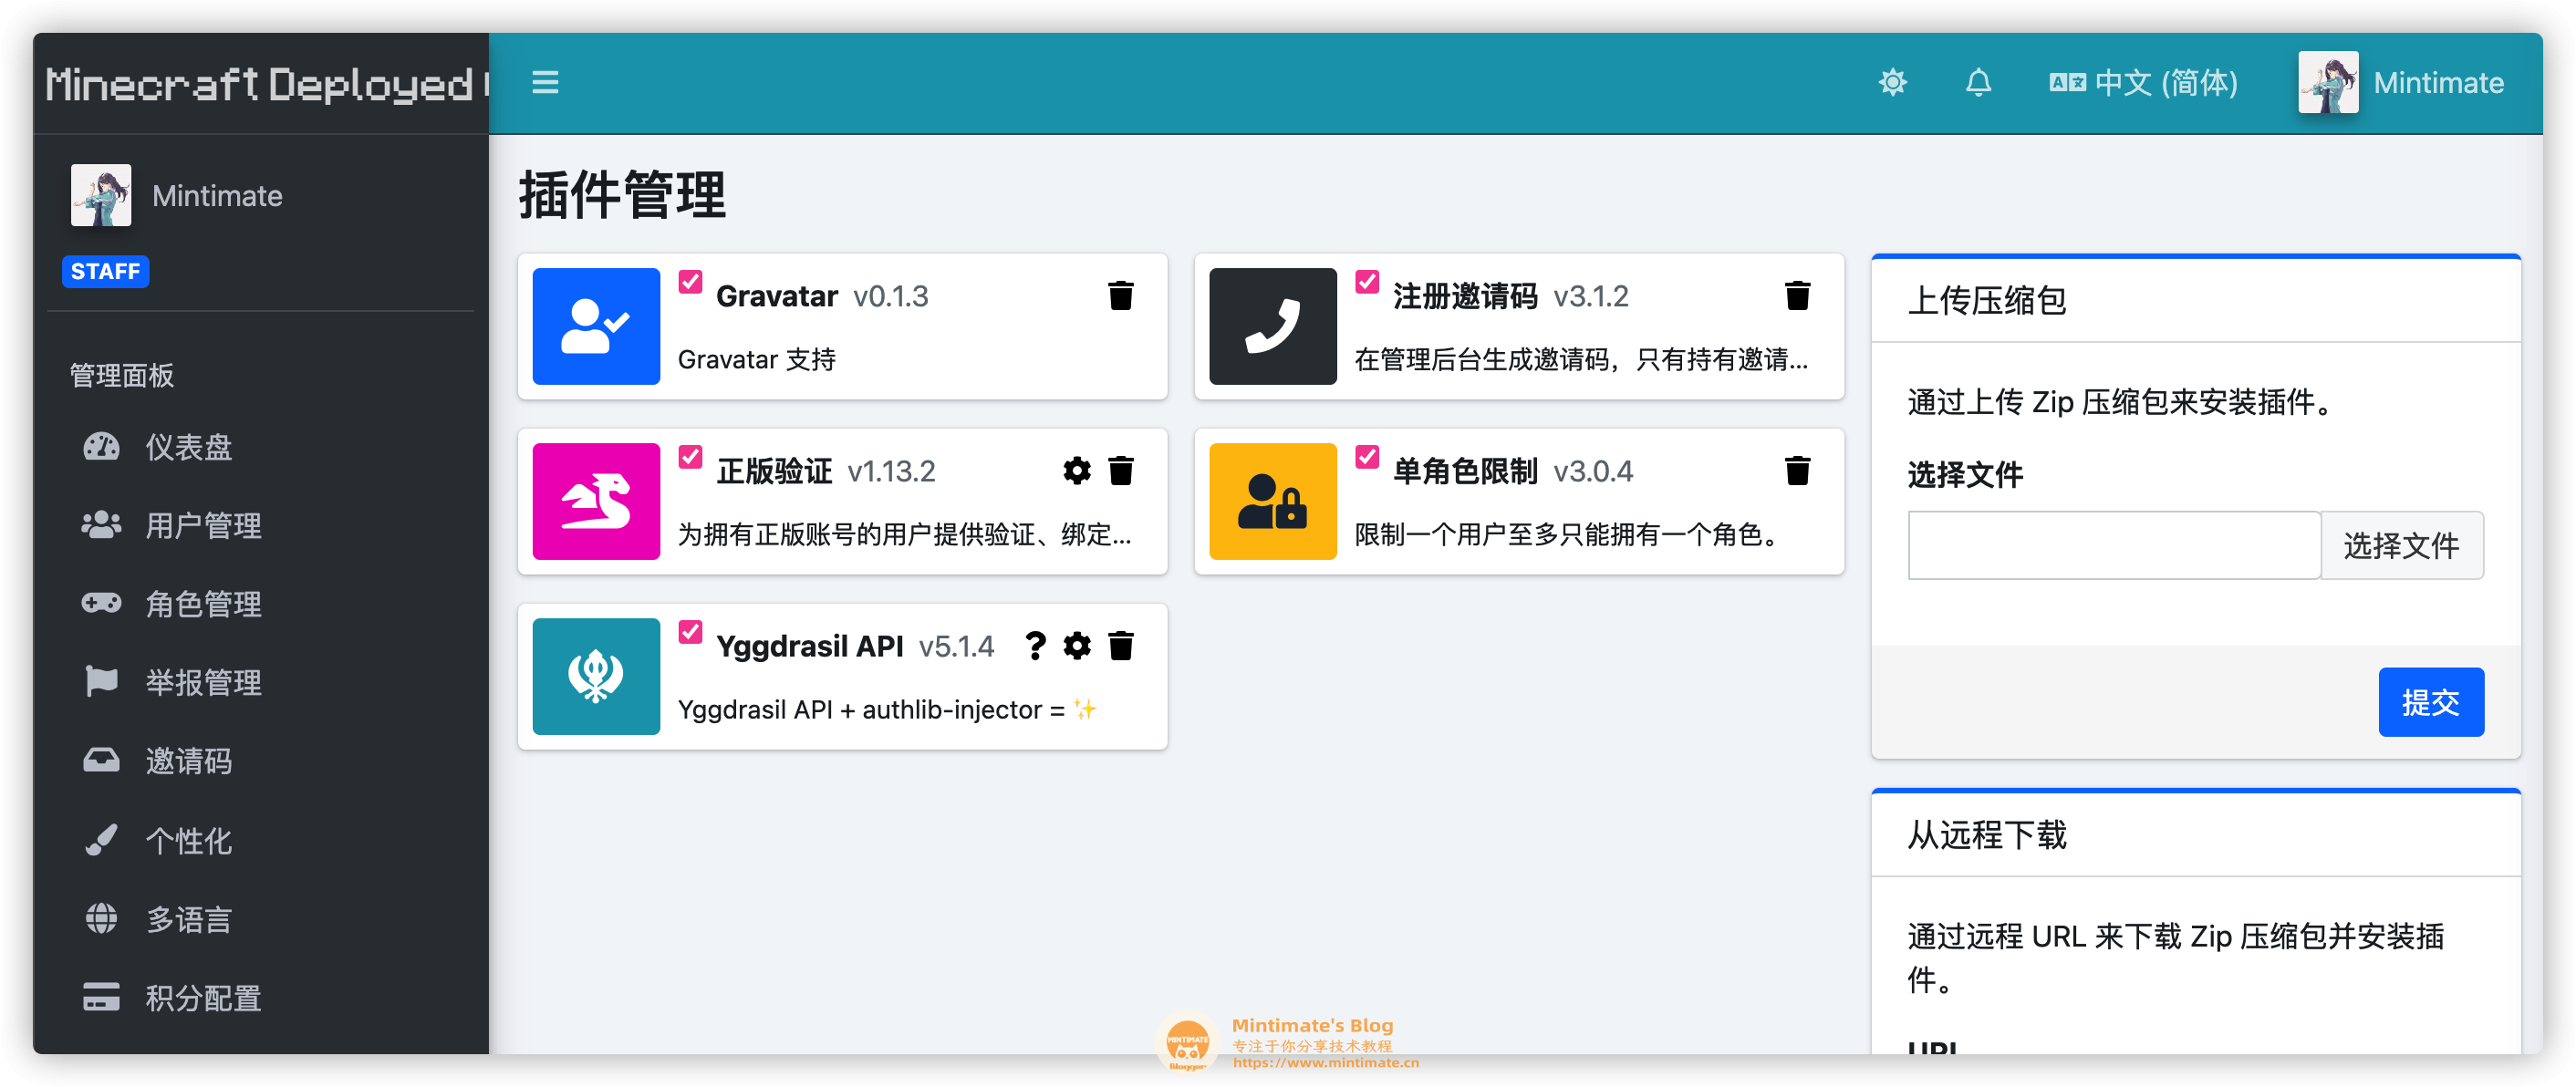
你还可以安装很多插件,实现:邀请码注册、外置登录等等功能:
外置登录
基于前文的皮肤站,我们使用Yggdrasil API实现外部登录
最终效果
最后实现的效果是搭建一个网站,用户可以注册账号,并登录系统进行皮肤的上传、下载以及激活皮肤为角色皮肤。
皮肤站和外置登录配合,就可以达到和正版登录一样的效果:
- 允许用户注册账号
- 允许用户上传和自定义自己游戏皮肤
并且方便服务器管理者规范玩家行为(嘿嘿,防止用户频繁换“马甲”)
支持创作
制作教程不易,如果热心的小伙伴,想支持创作,可以加入我们的「爱发电」电圈(还可以解锁远程协助、好友位😃):
当然,也欢迎在B站或YouTube上关注我们:
更多:
准备工具
准备工具很简单:
- LEMP环境:
- Linux服务器:Debian、CentOS都可以。极其不推荐使用Windows Server。
- Nginx/Apache:推荐使用NNginx环境
- MySQL/MariaDB:可以使用Linux服务器自己搭建,也可以直接买现成的。
- PHP:PHP版本推荐7以上,本文使用PHP7.4(最新皮肤站需要PHP8)
- Minecraft服务器端:如果没有搭建MC服务器,参考:零基础搭建MC服务器
为了照顾小白用户,本文后续采用两个方法搭建:
- 宝塔搭建【推荐小白】:可视化部署LEMP环境,并可视化部署皮肤站和外置登录
- 编译安装【推荐老手】:编译安装LEMP环境,并命令后操作部署皮肤站和外置登录
服务器选择
很多人的个人操作系统是Windwos,所以第一反应会使用Windwos Server:
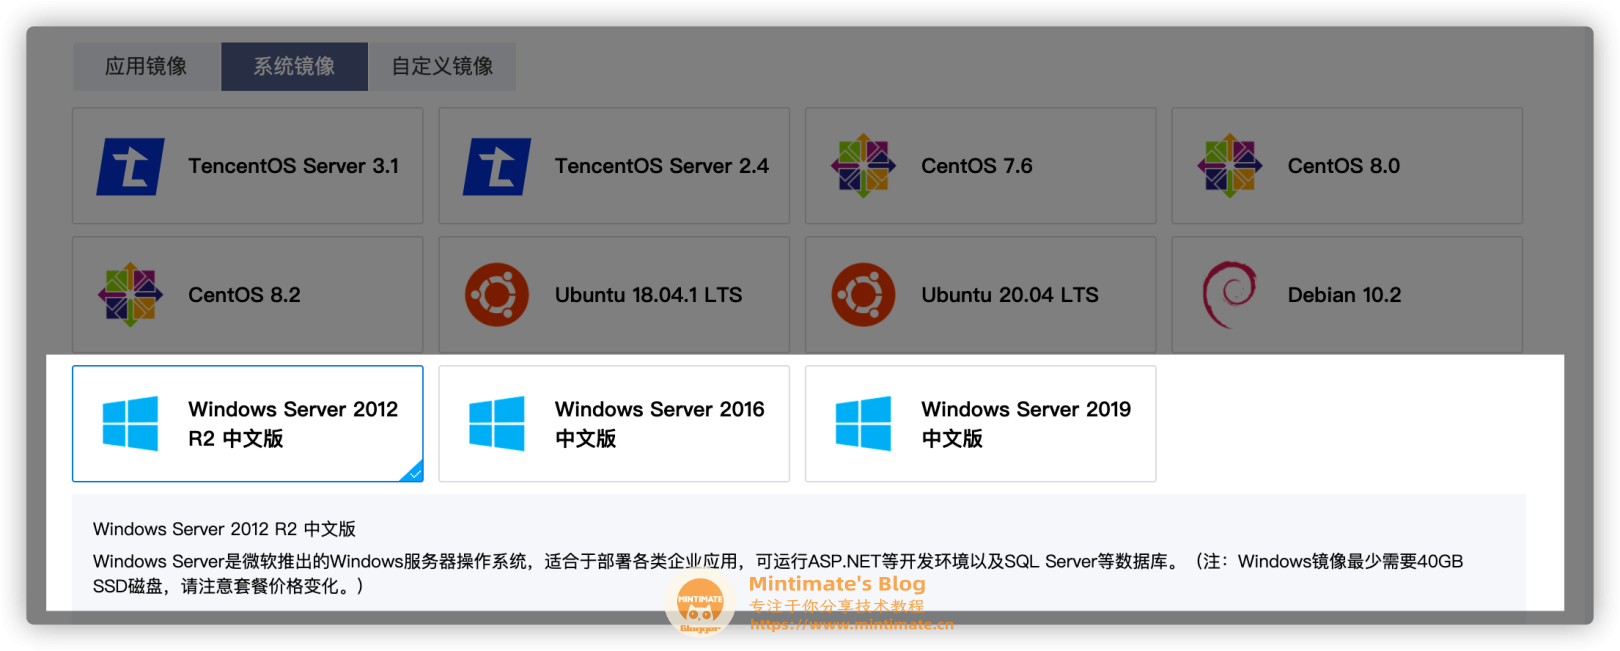
但是,在服务器上“寸土寸金”的情况下,个人不建议使用Windows Server。建议使用Linux,充分发挥服务器性能、资源。而Minecraft基岩版本服务器,官方提供Ubuntu版本的编译版本。
紧急、限时推荐【强烈推荐】:
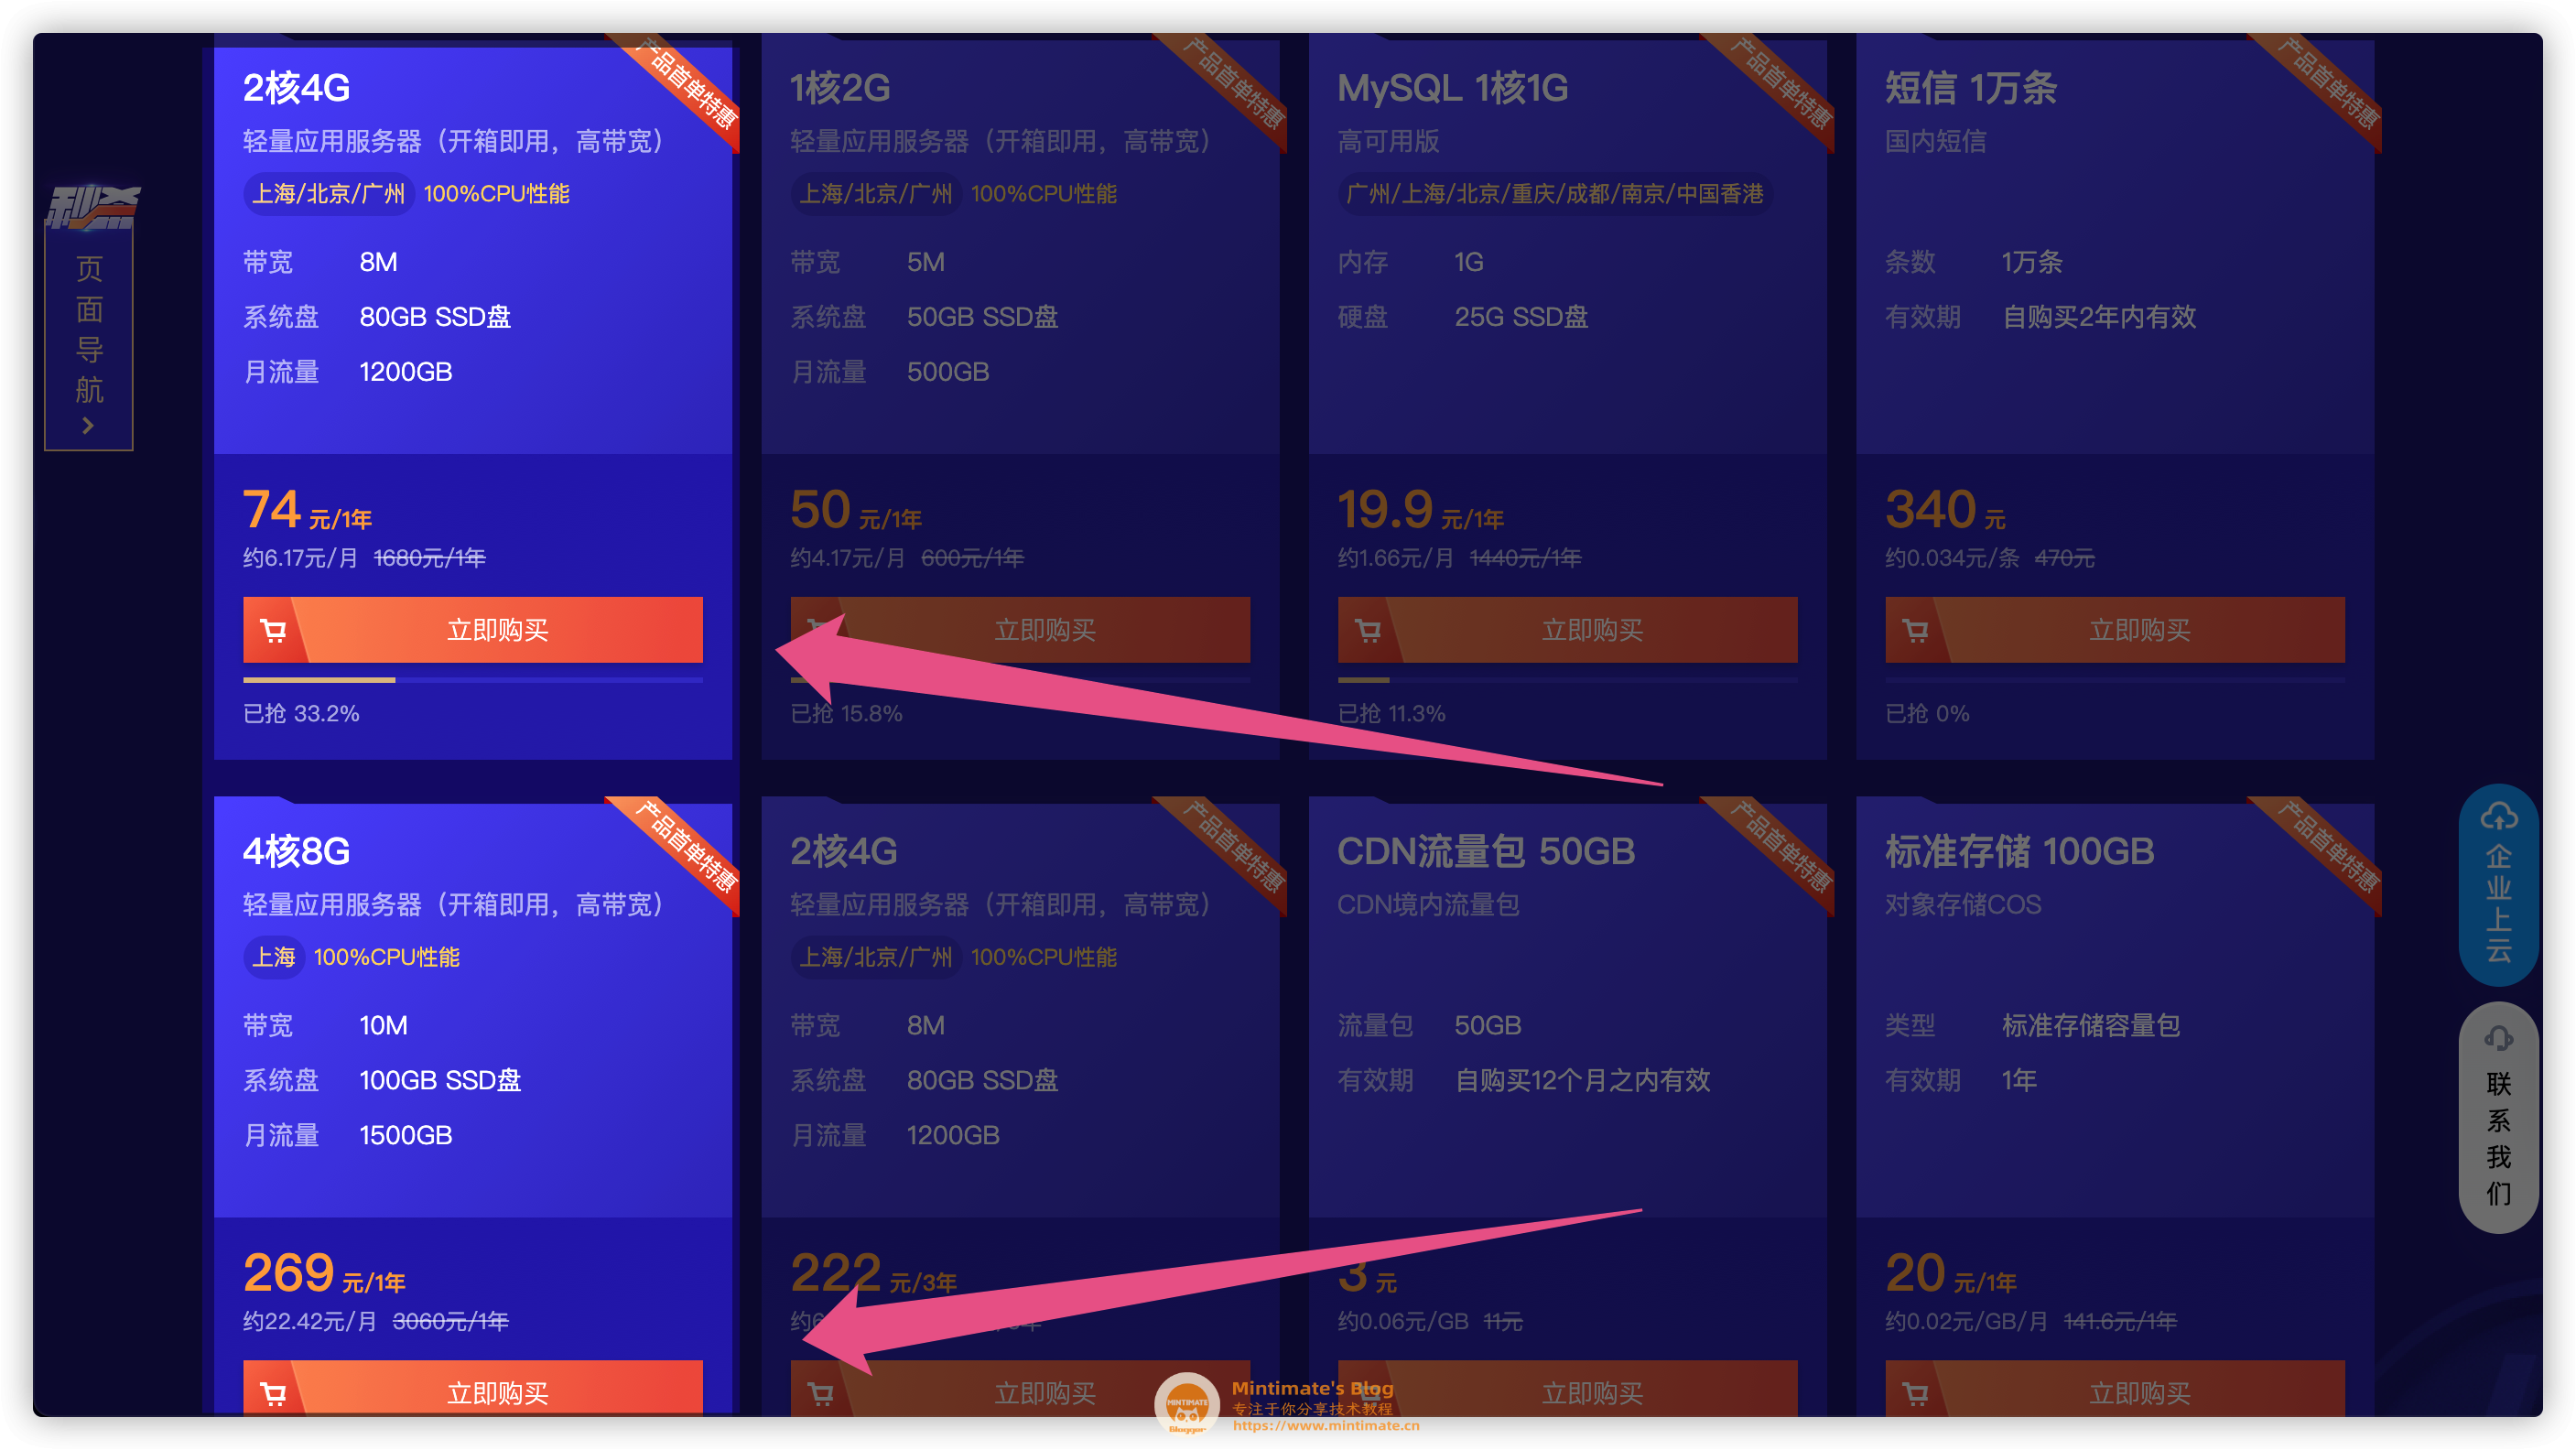
综上,我推荐:
另外,为非学生群体争取到优惠*(੭ˊᵕˋ)੭ଘ:

常识消息:Lighthouse经常动不动给用户免费升级配置嗷,所以建议一次买一年(*≧ω≦)。
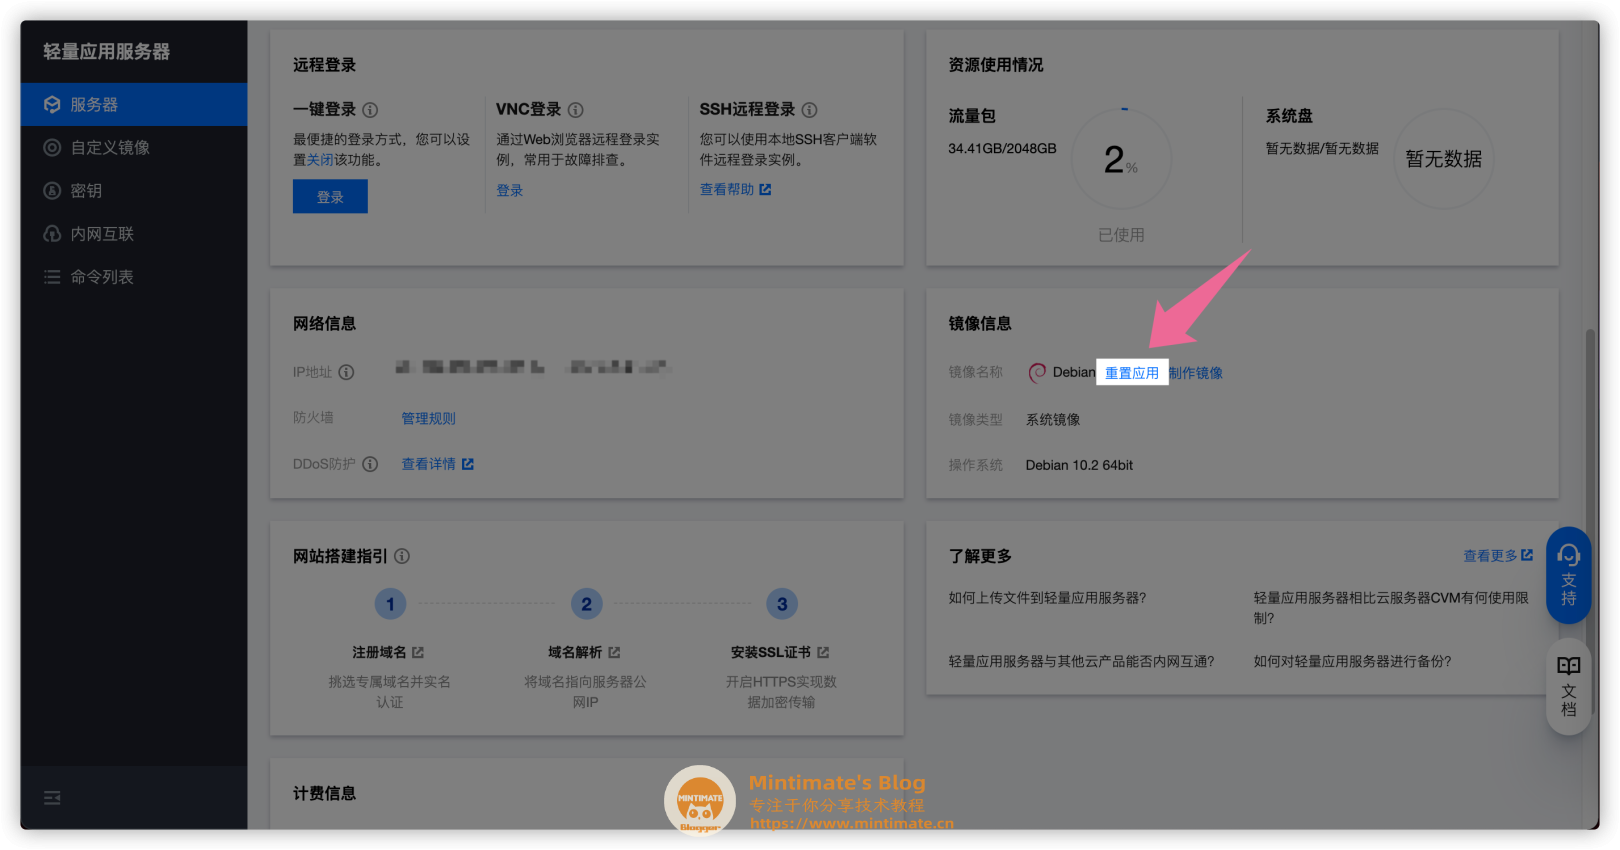
如果你事先购买的Lighthouse是Windwos Server或者是CentOS,想切换至Debian,可以在Lighthouse后台进行重置:
Opt1:宝塔搭建
使用宝塔搭建,相信大家都很熟悉,如果不会搭建宝塔,参考:
LEMP
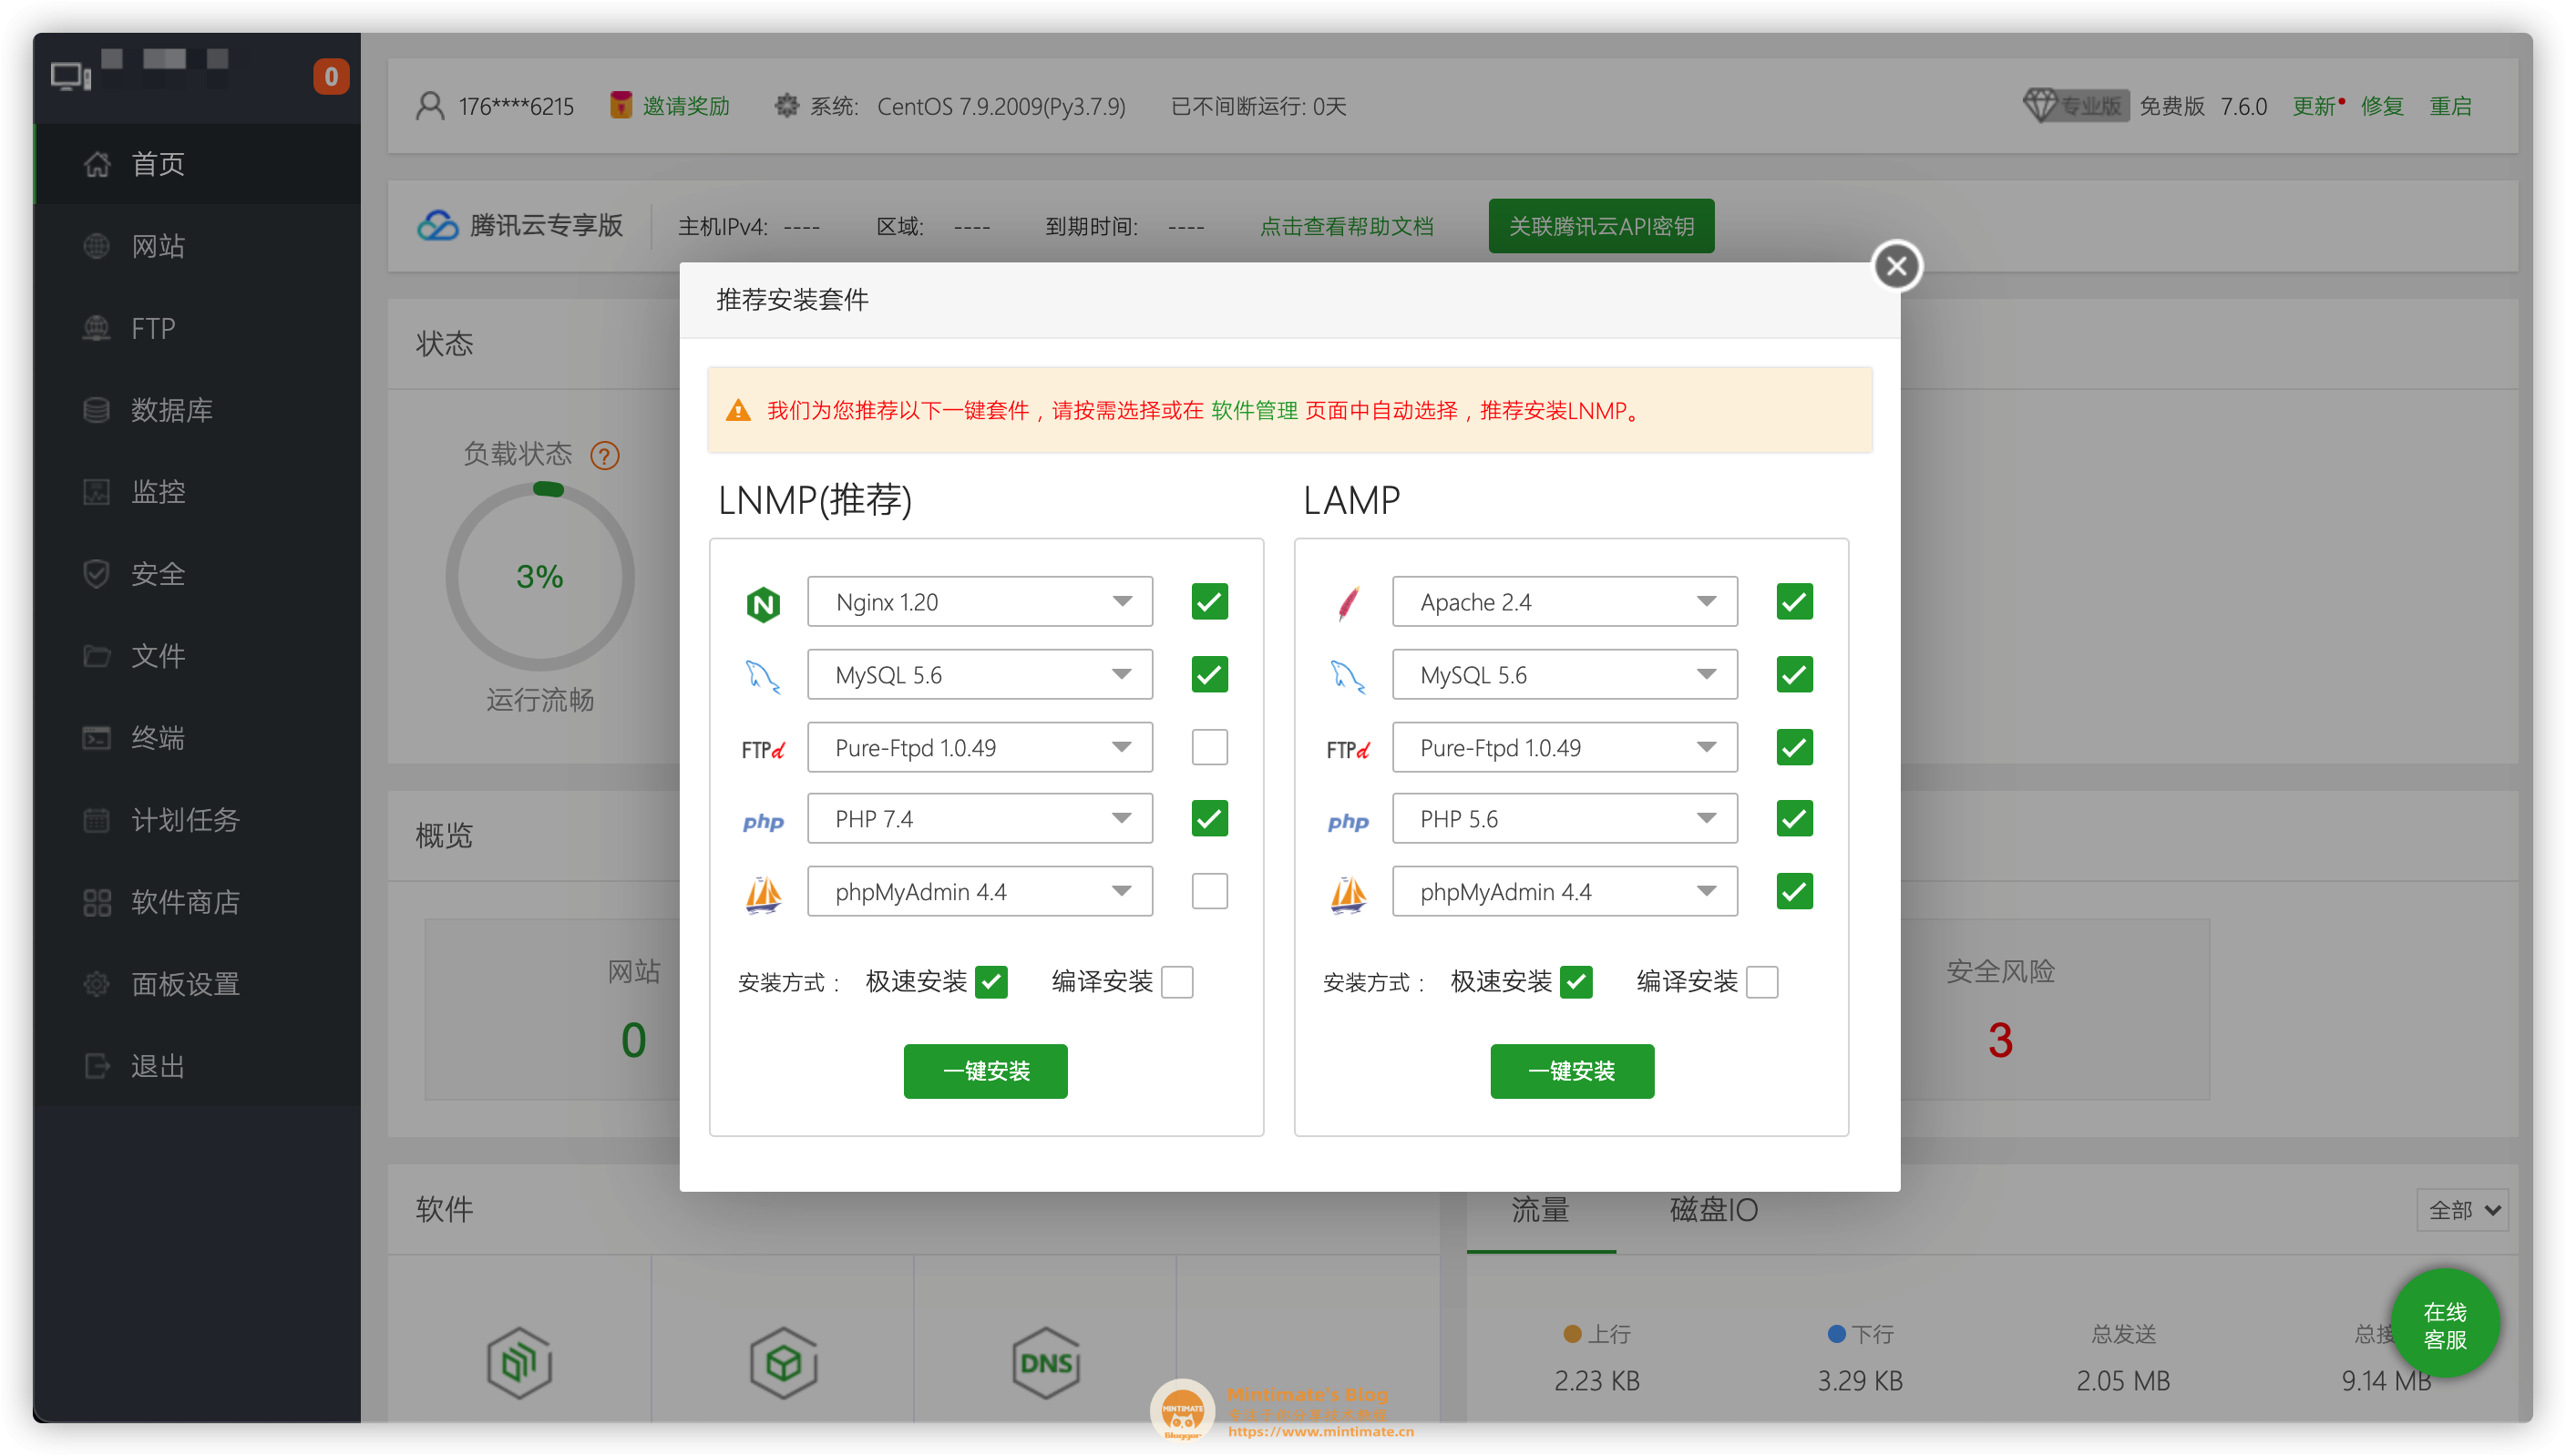
宝塔搭建Ngiinx、PHP和MariaDB/MySQL很简单,可视化搭建:
PHP函数
BlessingSkin需要启用一些PHP函数,但是宝塔面板默认是警用的,我们需要在宝塔面板内删除选项:
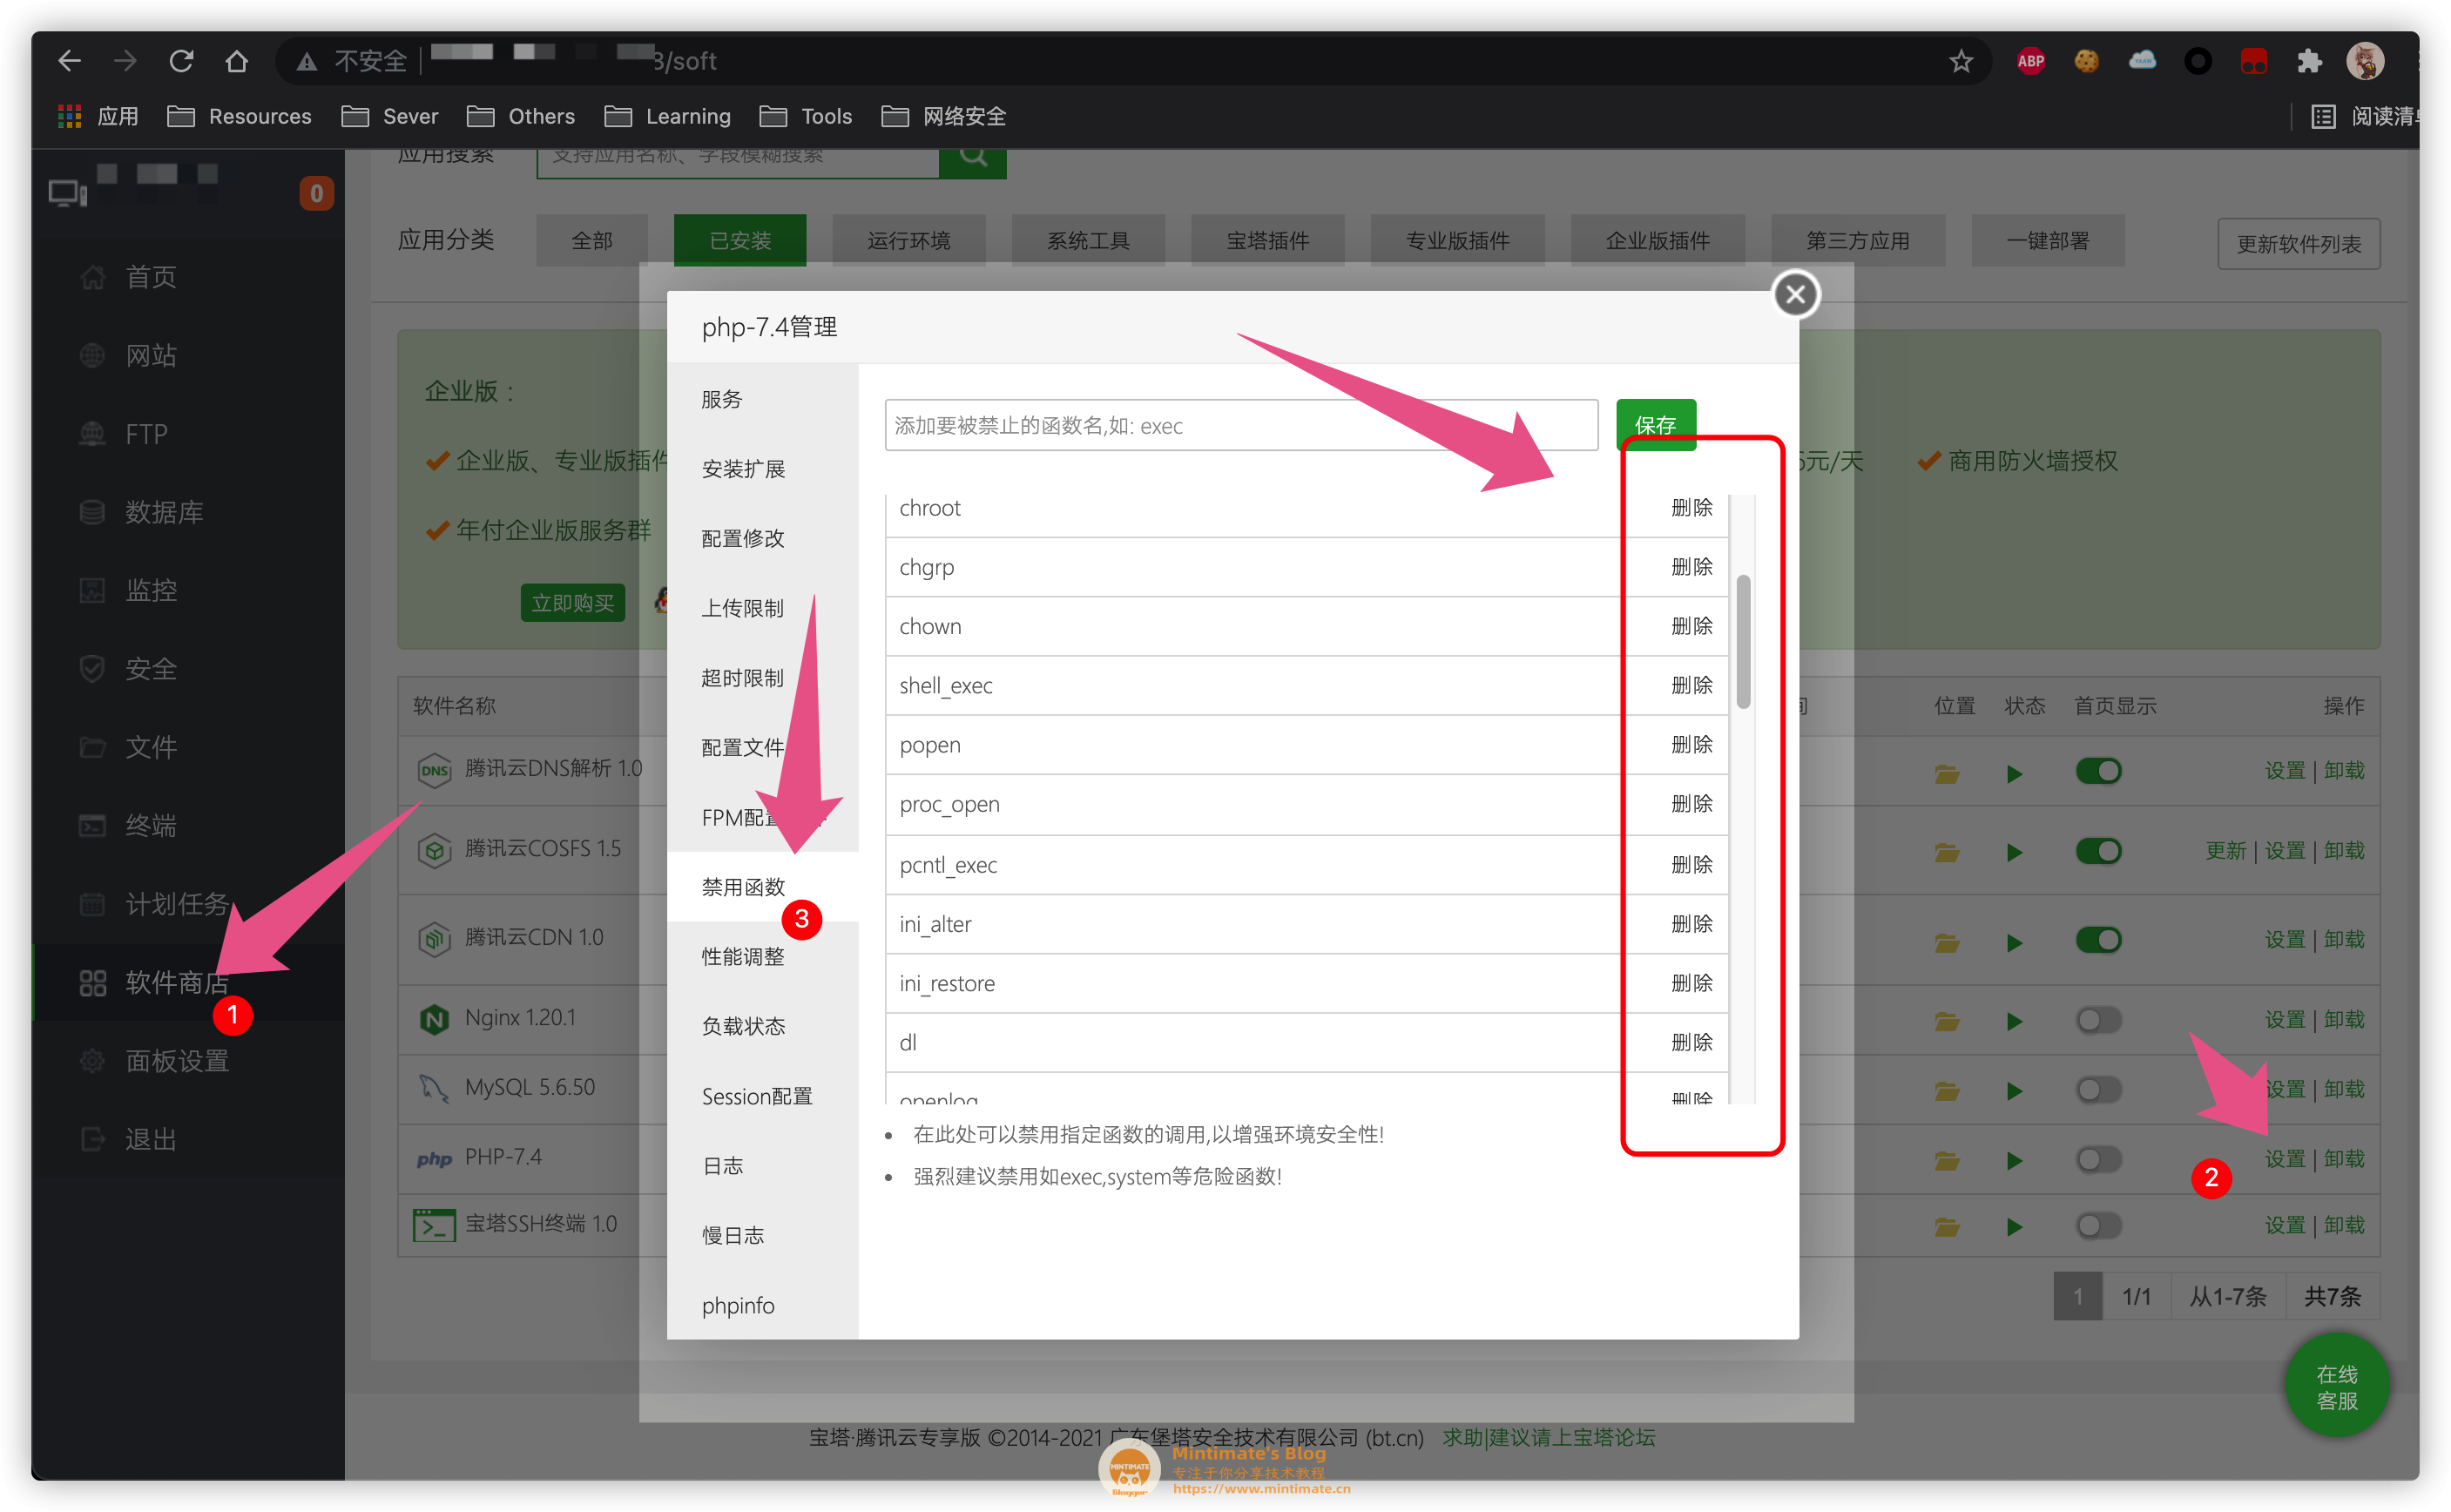
需要启用的函数:
- symlink
- readlink
- putenv
- realpath
并安装扩展:fileinfo:

搭建BlessingSkin
现在我们正式开始搭建,在宝塔的网站选项,新建一个网站:
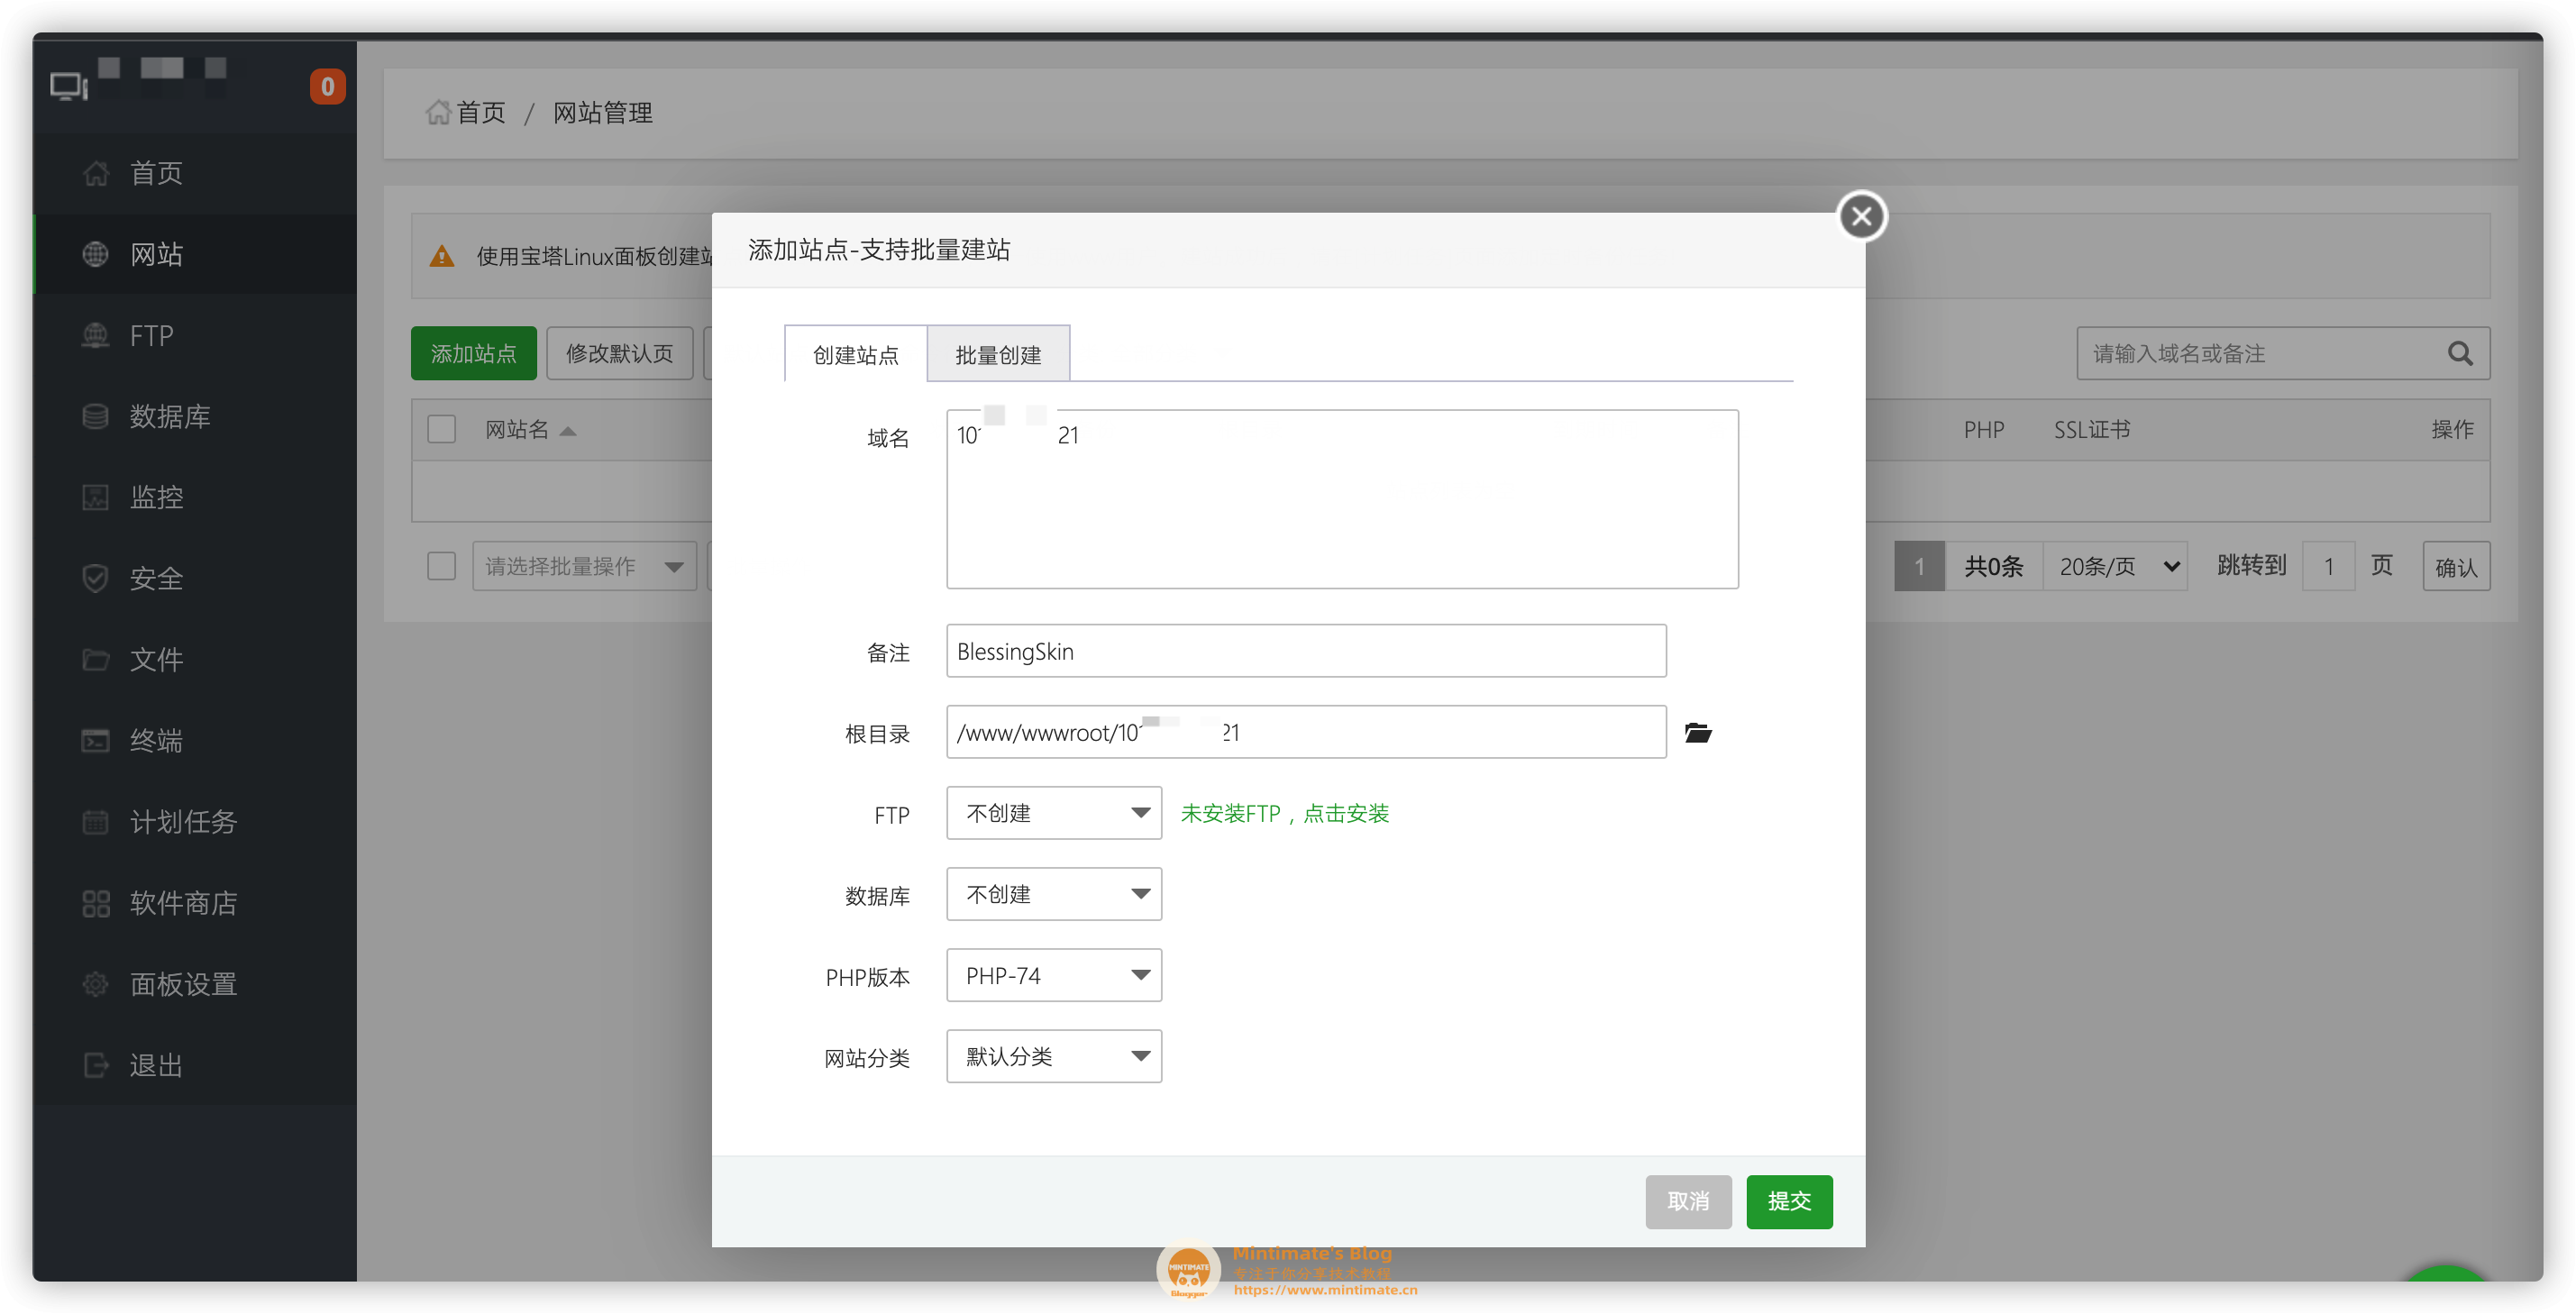
其中:
- 域名:有域名解析到服务器,则填域名;否则,就填IP。
- PHP版本:选择PHP7.4、8.x(6.0以上版本Blessing需要使用PHP8.x)
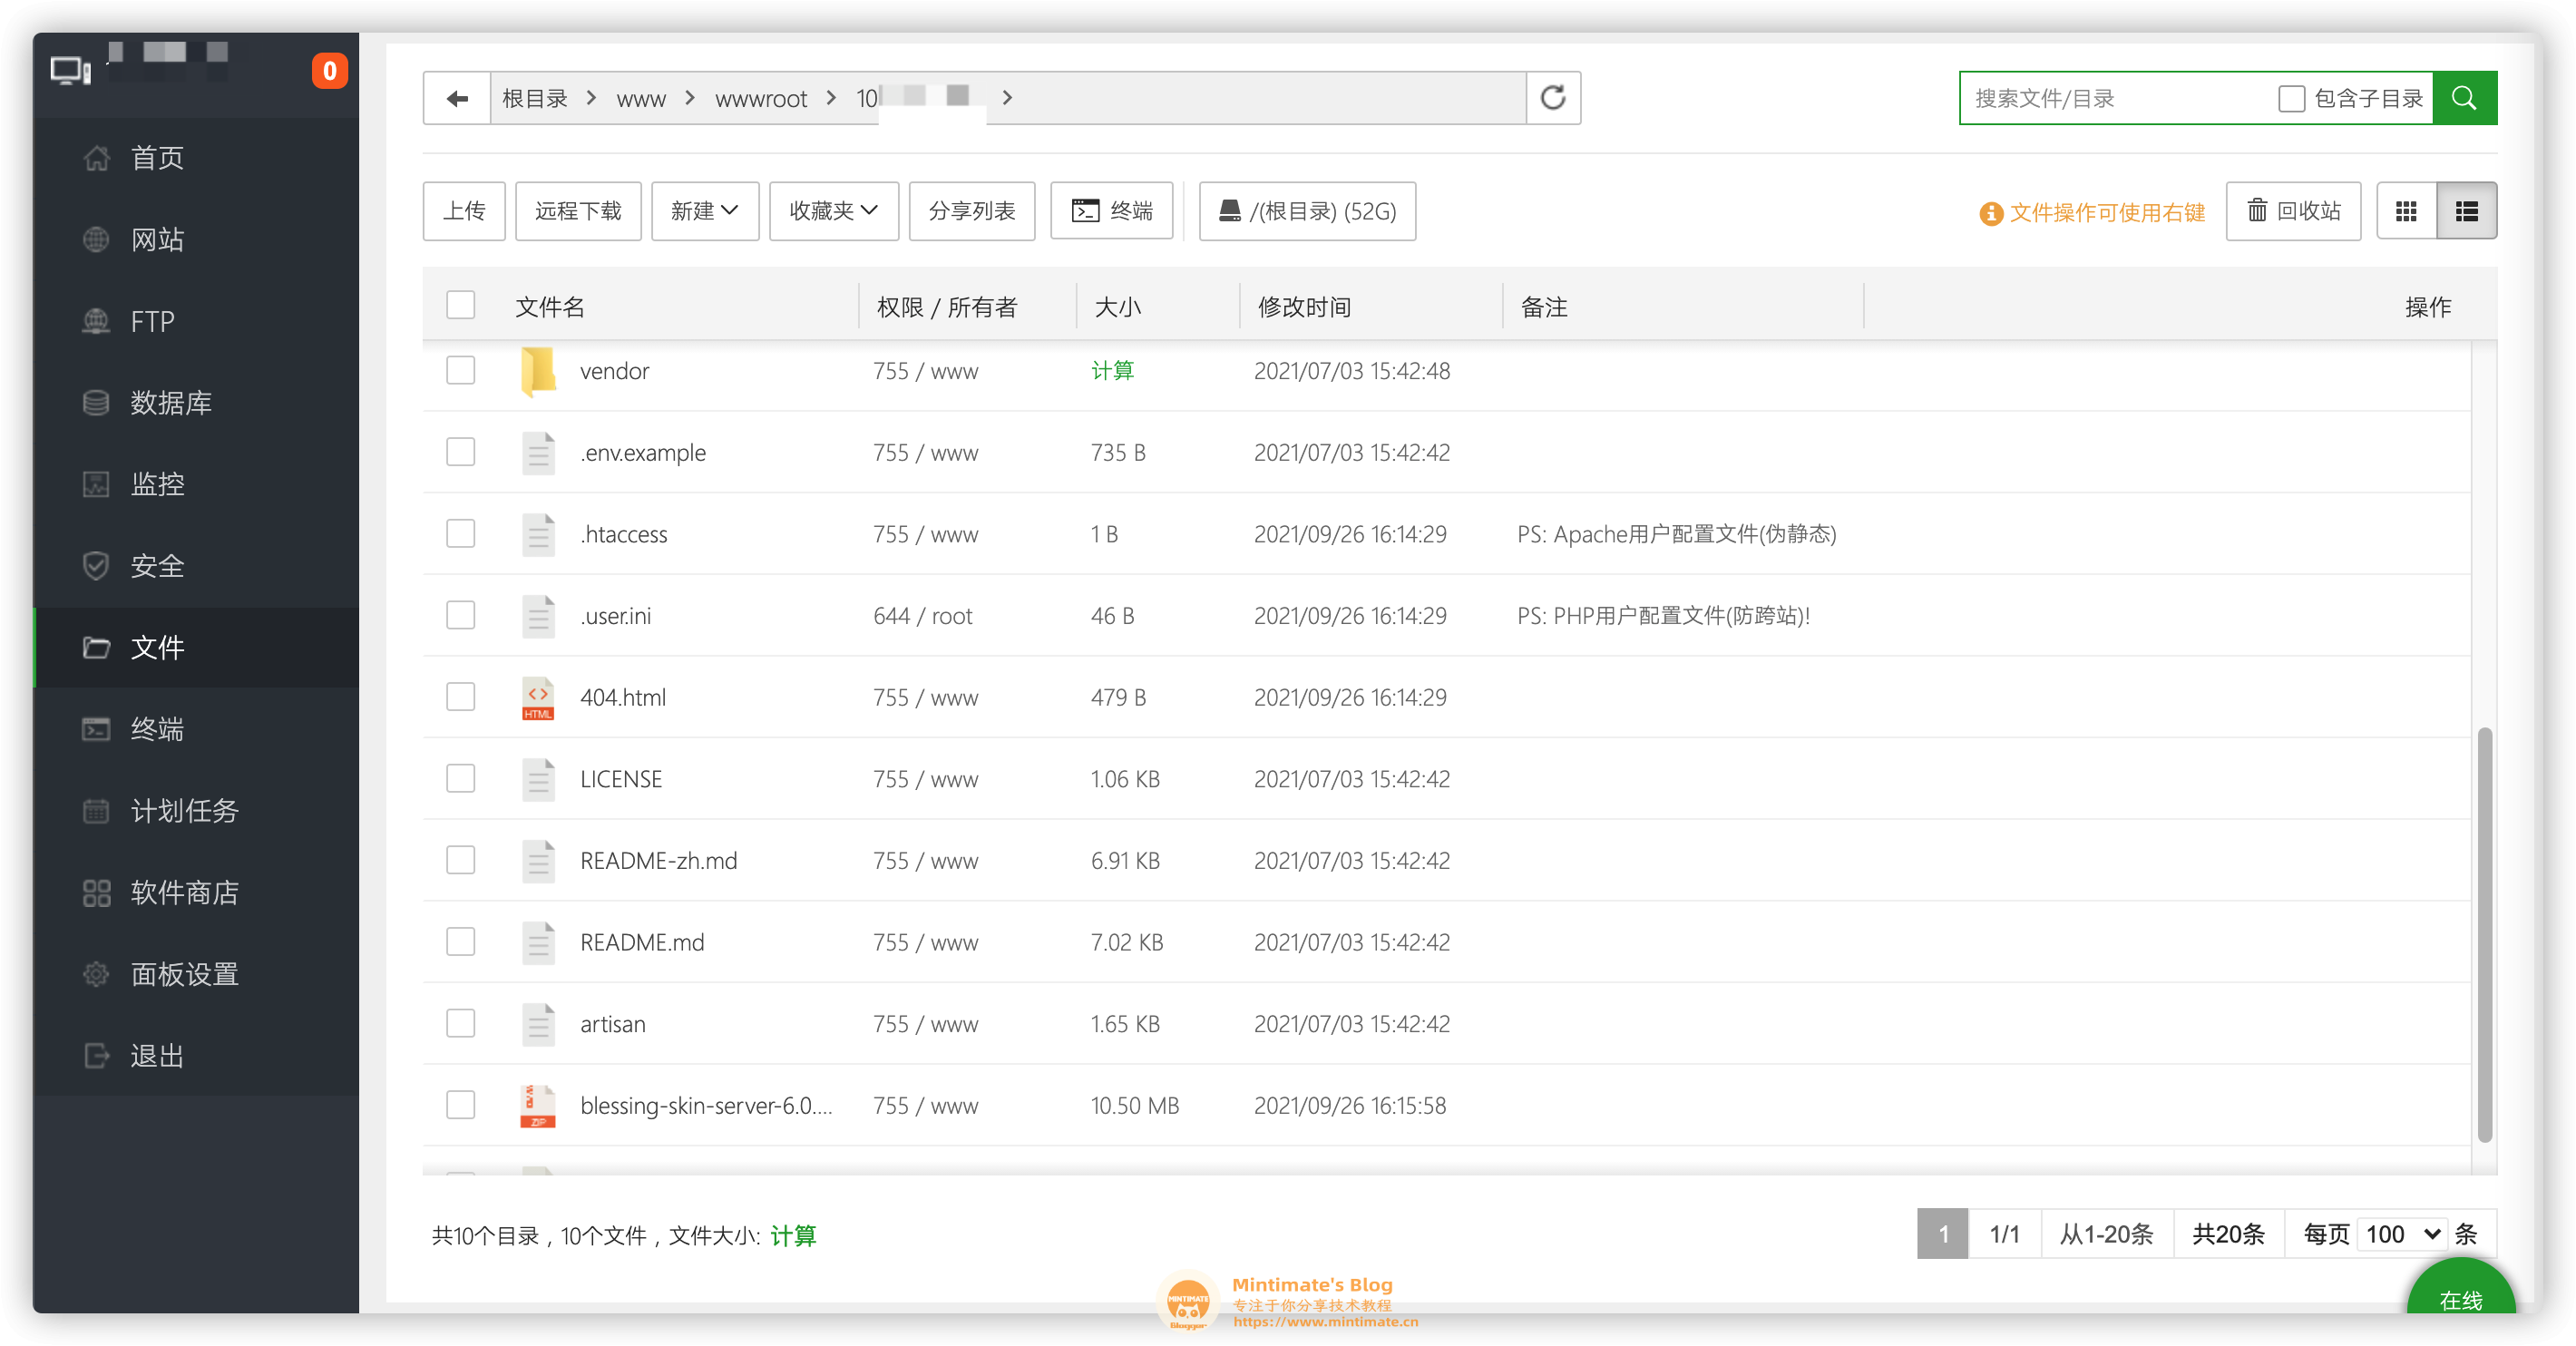
之后,进入网站根目录,下载并解压最新版本的BlessingSkin(如果你无法打开下载页面,镜像下载:https://url57.ctfile.com/d/26158157-45207456-594c32
(访问密码:6146)):
最后,到网站设置内:
伪静态:
1
2
3
| location / {
try_files $uri $uri/ /index.php?$query_string;
}
|
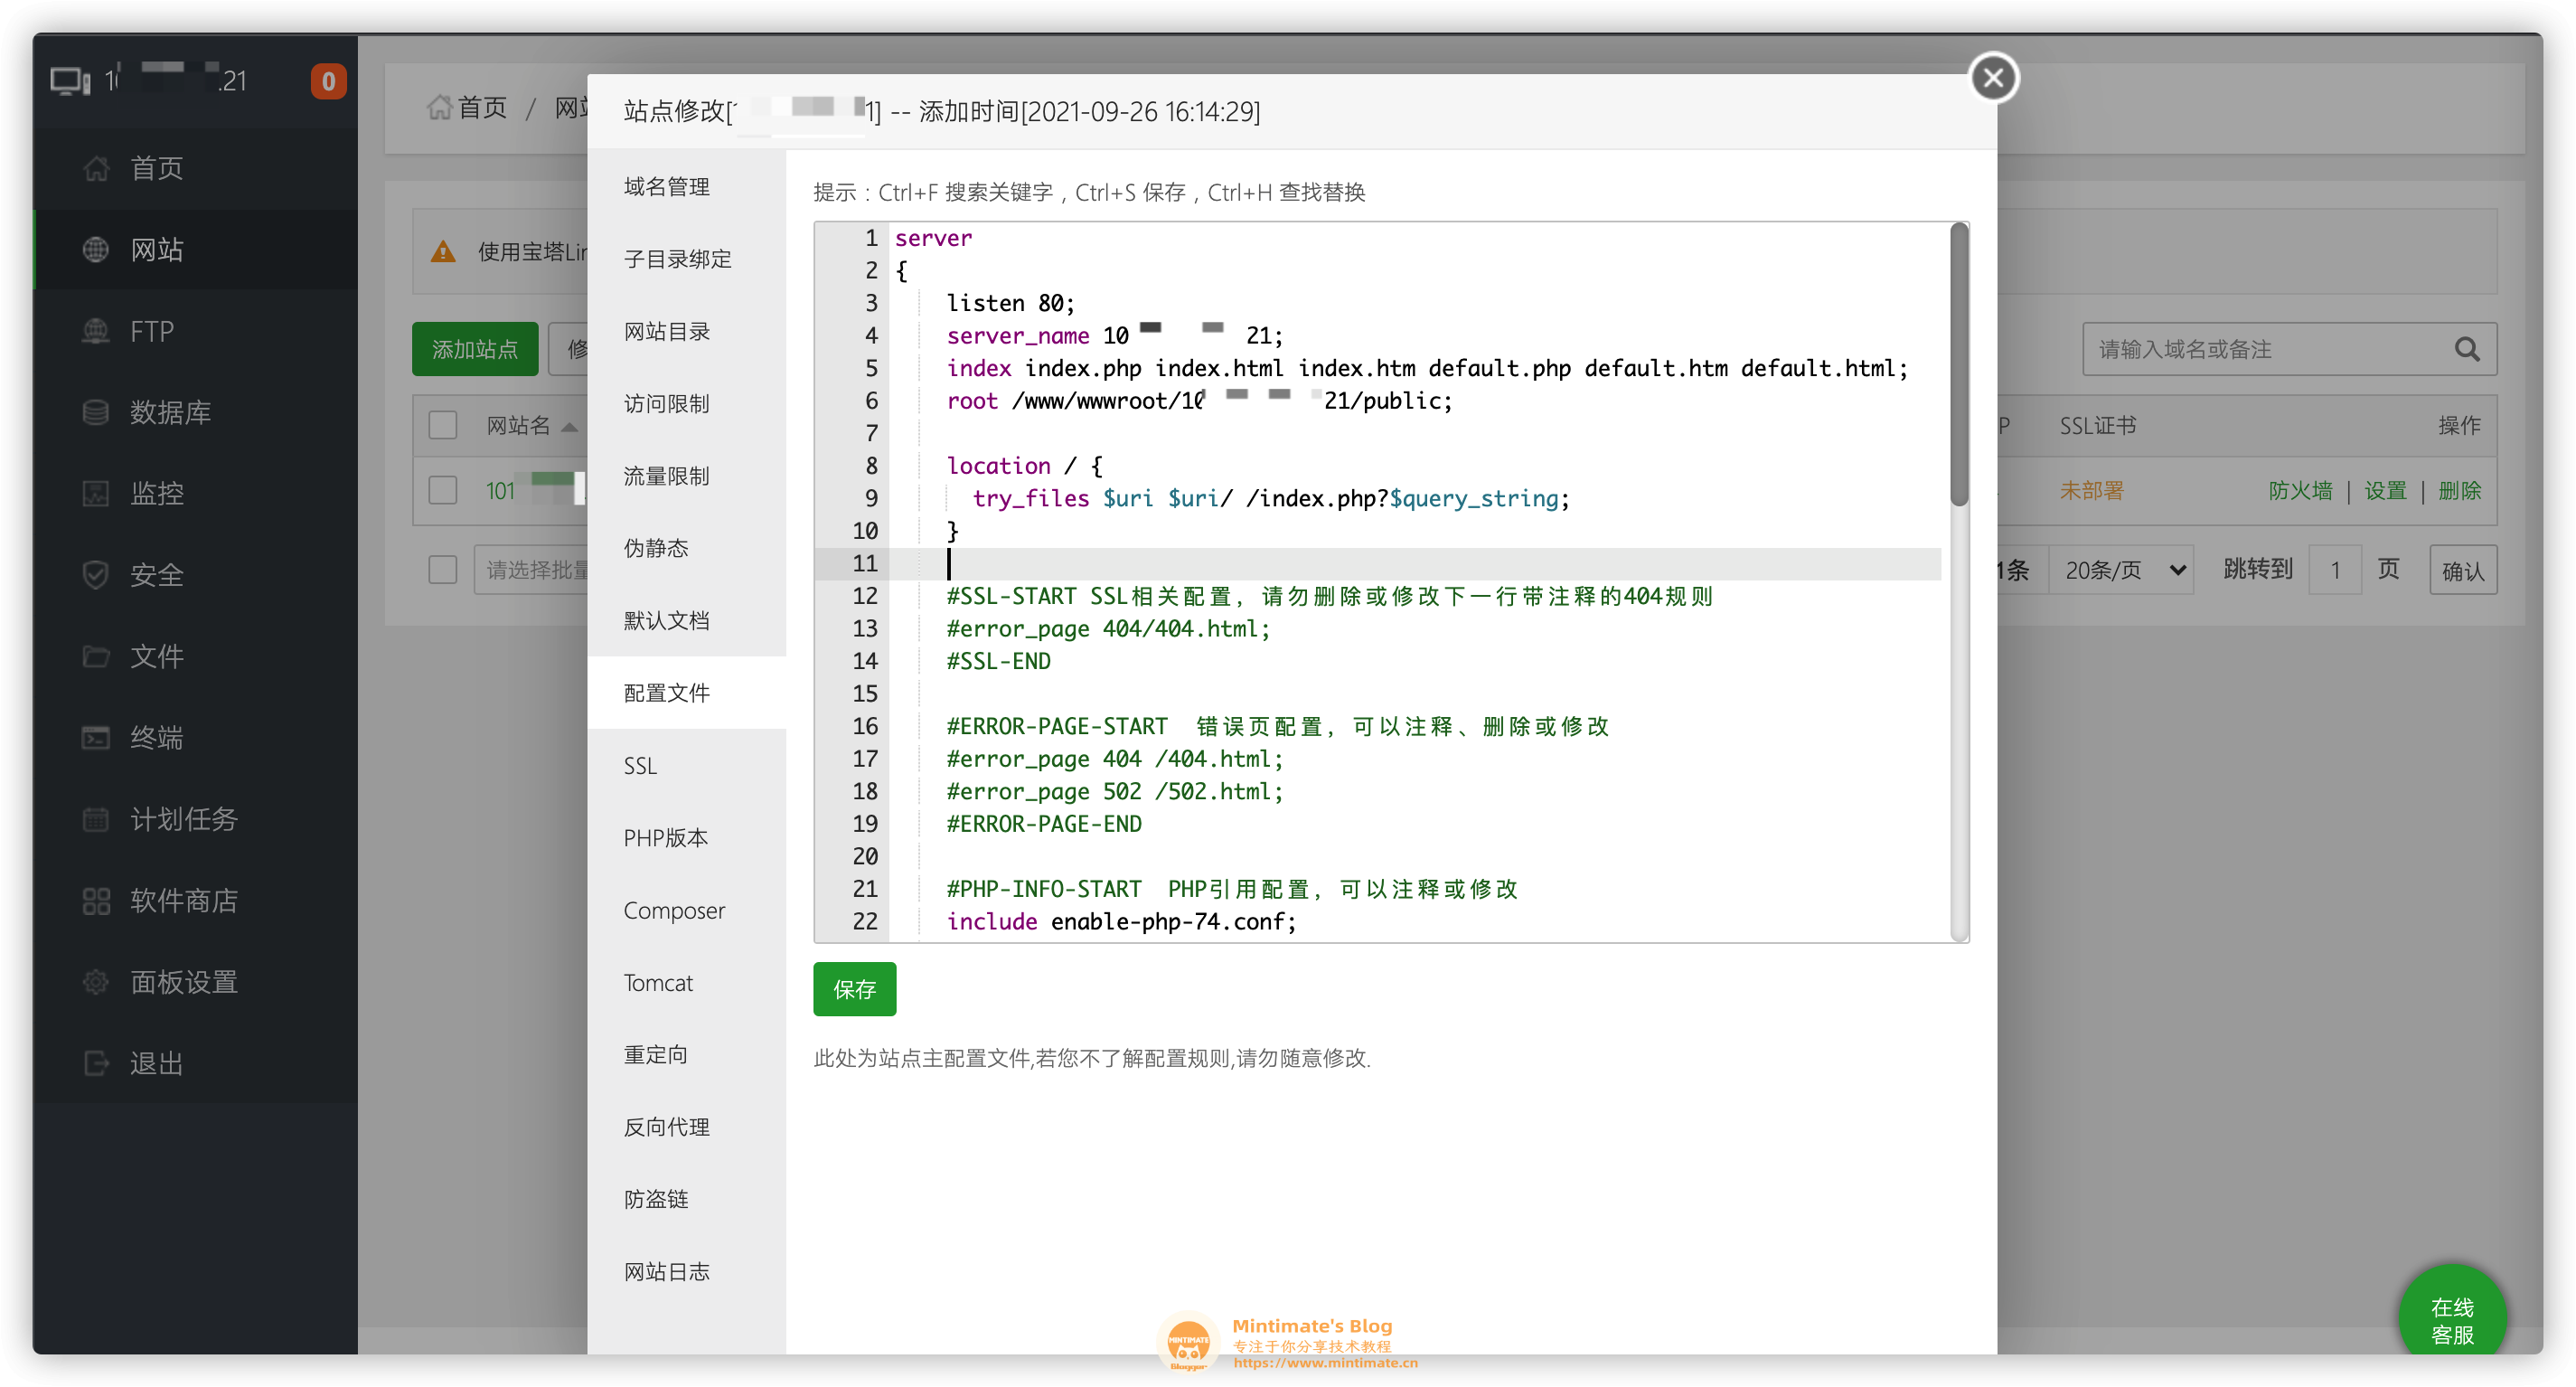
之后,就可以访问网站了:
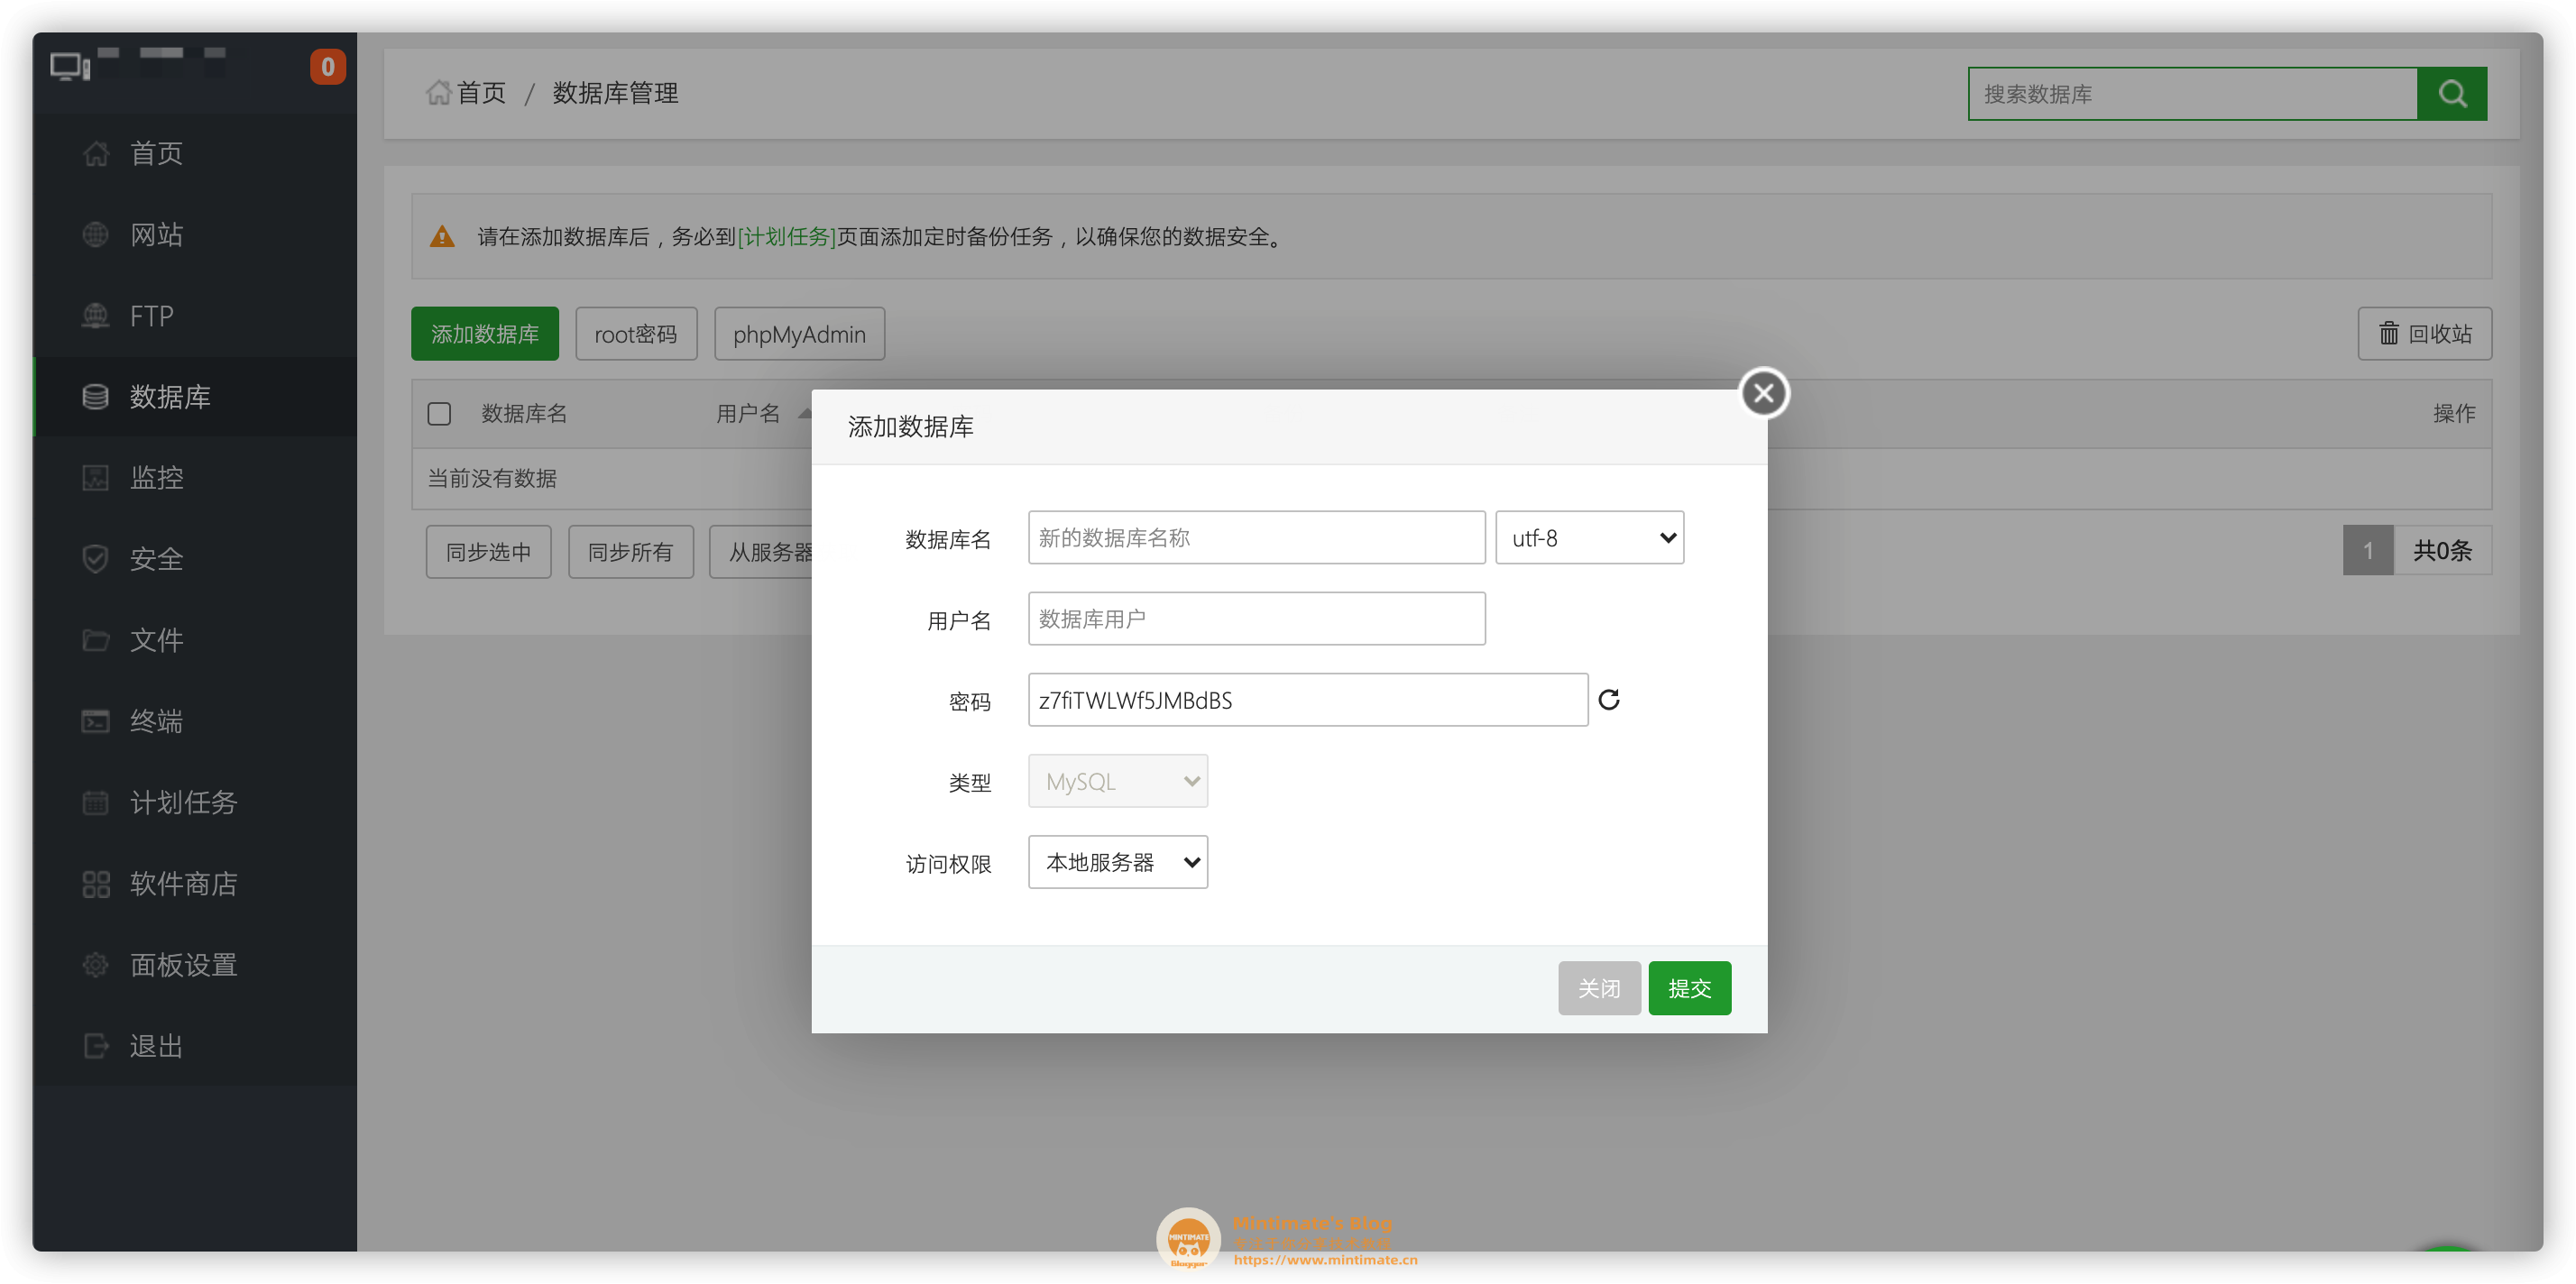
不过,既然都用宝塔了。再说说怎么弄个数据库。
数据库
刚刚我们有安装MySQL,这里我们添加一个MySQL数据库,为接下来的使用铺路:
宝塔常见问题
Q:后续初始化时候,在填入数据库信息设置管理员后,出现500错误?
其实我写教程是时候也发现了,但是刷新页面。发现已经初始化好了。不清楚为什么,可能是宝塔的原因。大家可以试试重新进我们搭建的网站。
Opt2:编译搭建
接下来,分三个小章节讲解。
Nginx
下载源码
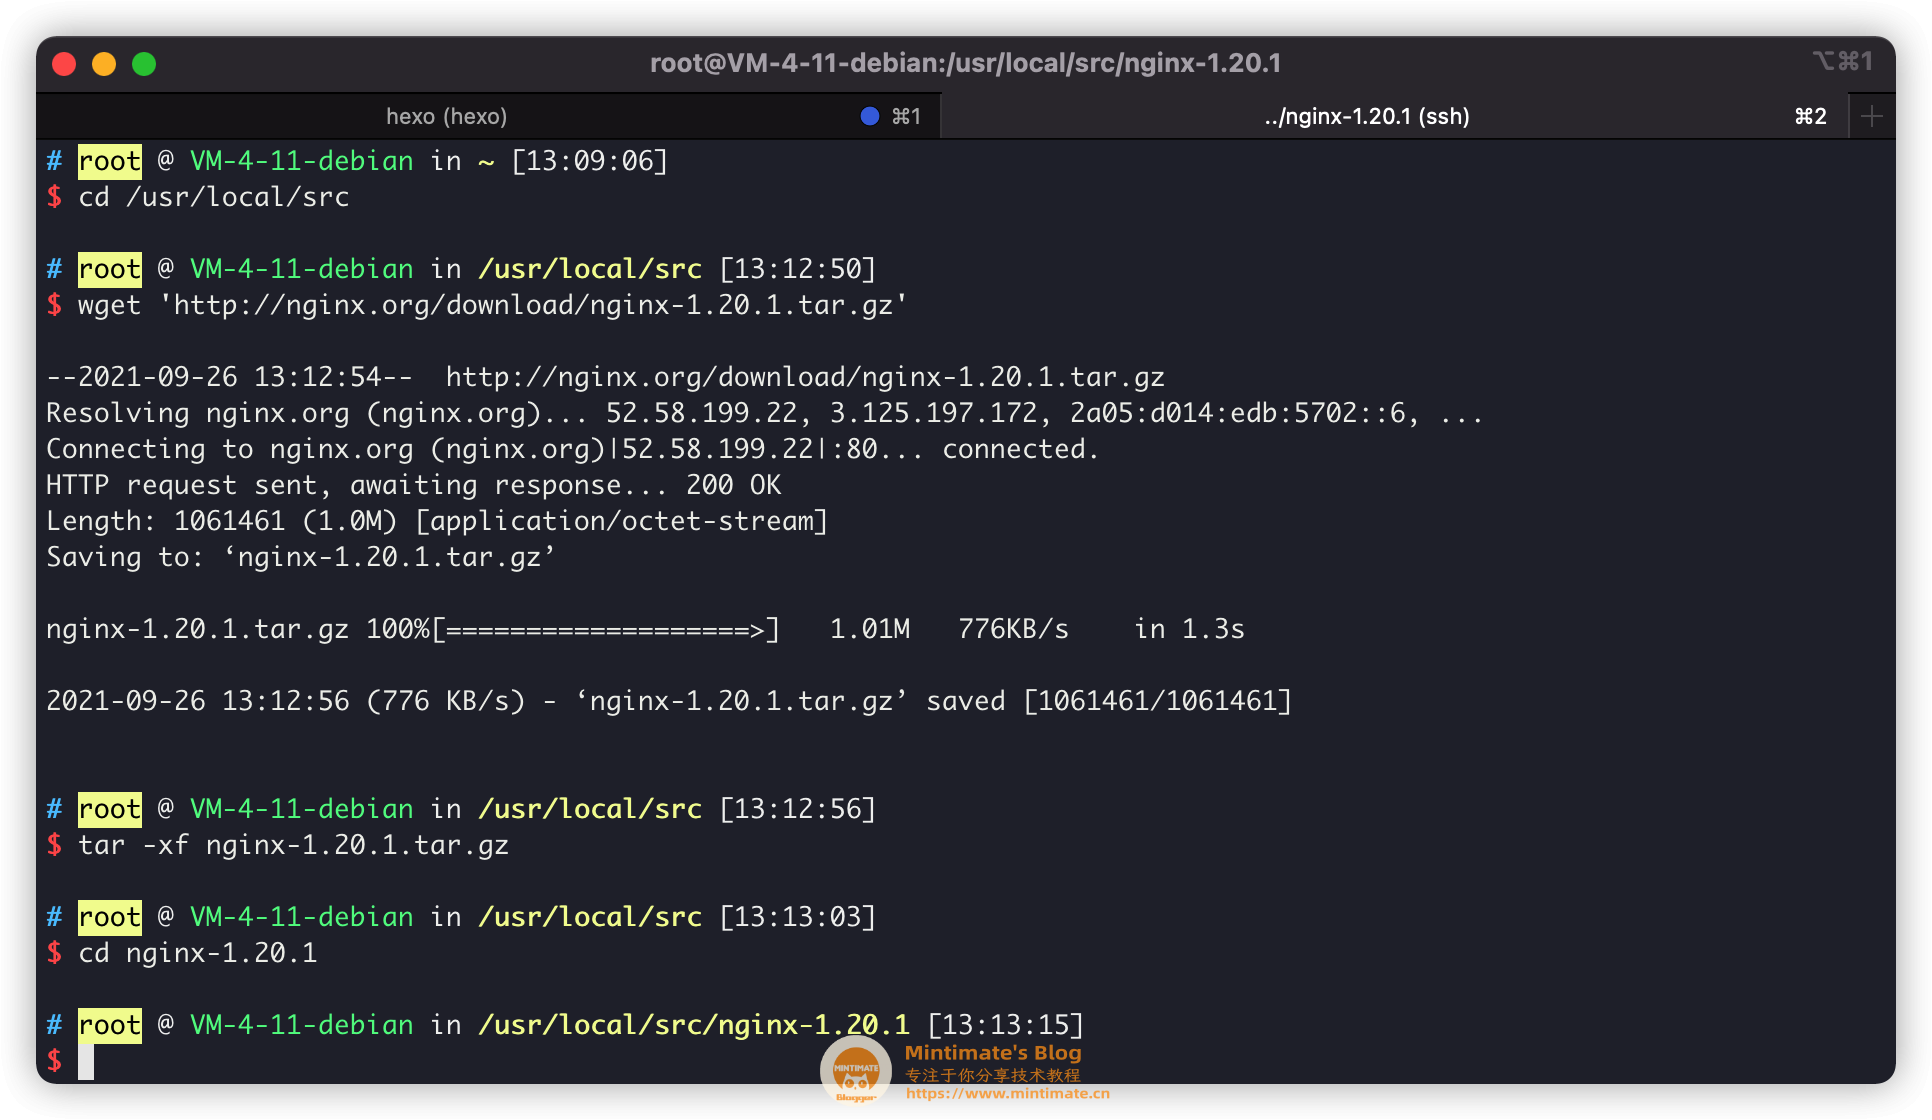
编译安装复杂一些,首先我们下载Nginx的源码,这里我们下载1.20.1的源码,下载到Nginx的/usr/local/src内,并解压进入:
1
2
3
4
5
|
cd /usr/local/src
wget 'http://nginx.org/download/nginx-1.20.1.tar.gz'
tar -xf nginx-1.20.1.tar.gz
cd nginx-1.20.1
|
编译依赖
按需求,我们需要SSL、gzip、正则库等依赖,所以这里我们安装一下依赖:
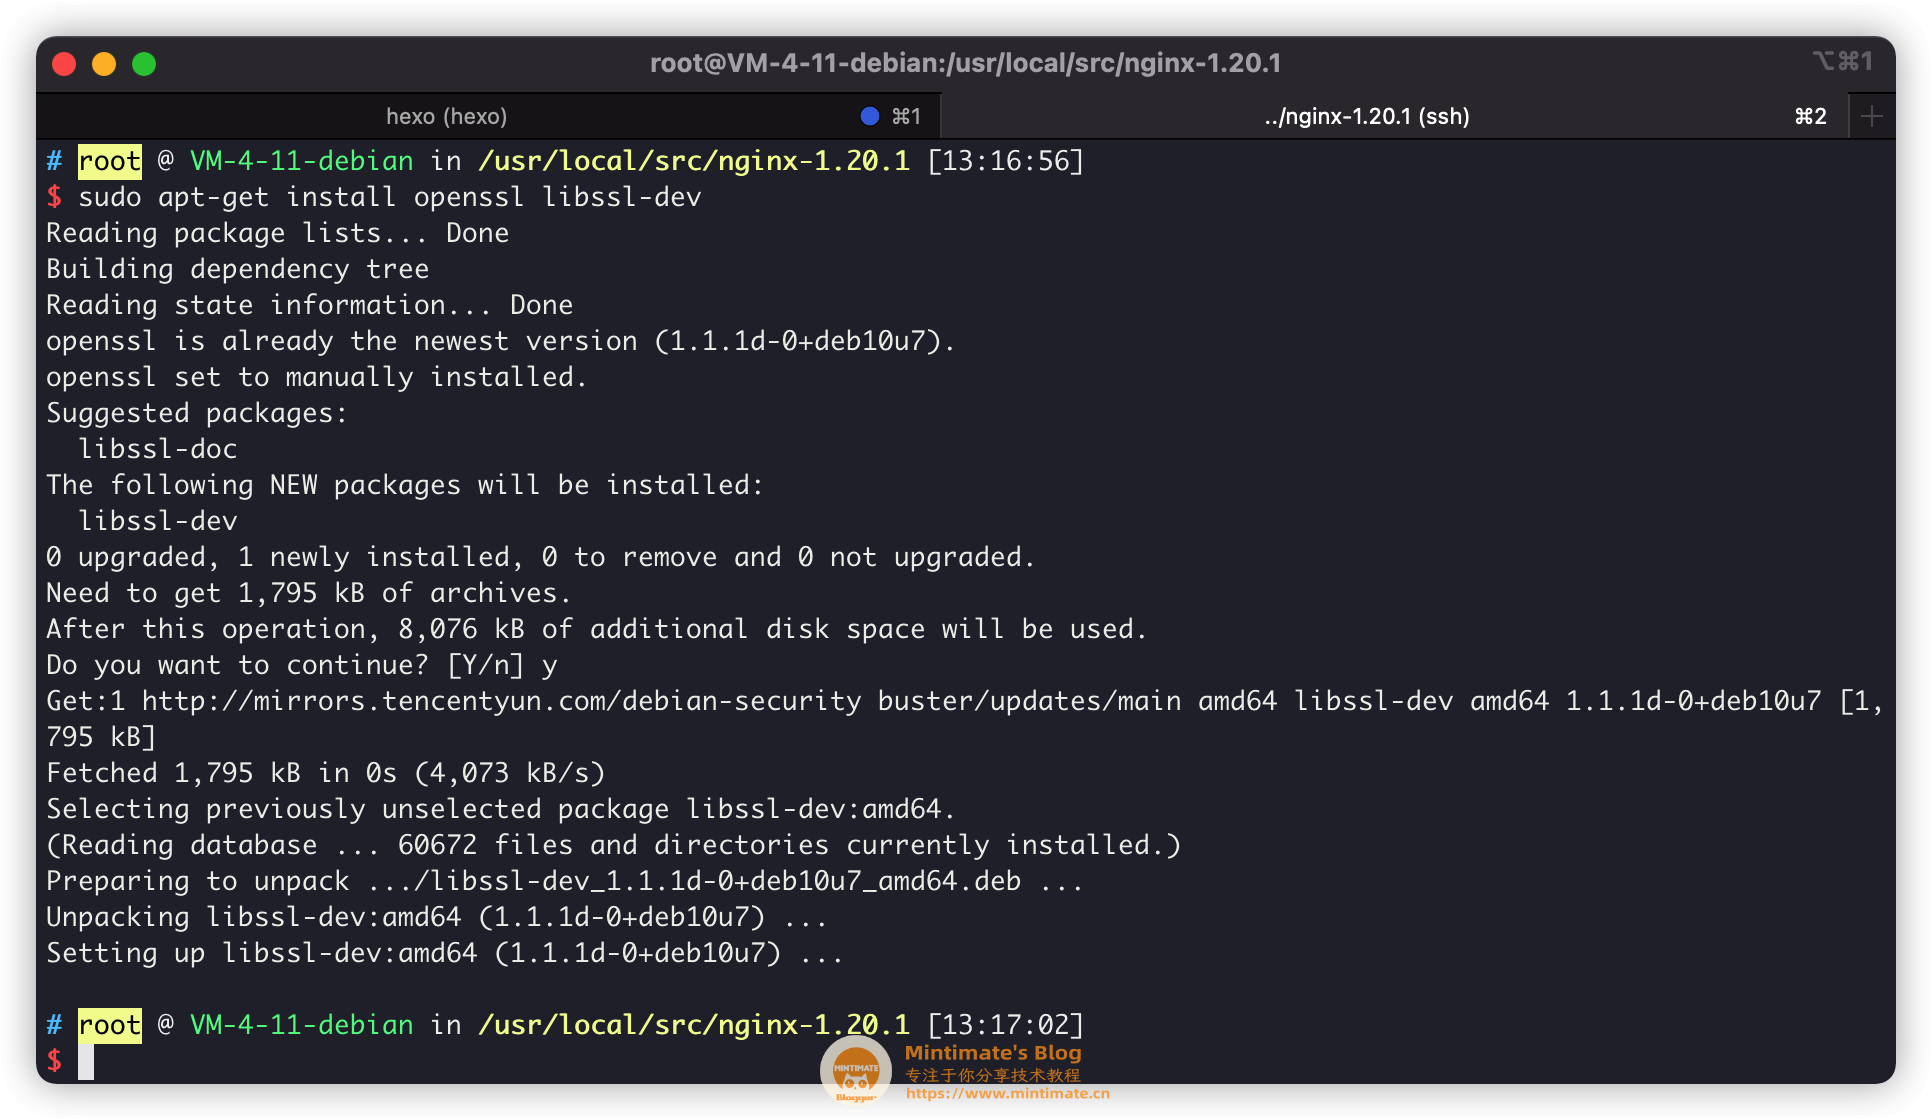
如果你的服务器是Debian/Ubuntu发行版本:
1
2
3
4
5
6
7
8
|
sudo apt-get install build-essential
sudo apt-get install libpcre3 libpcre3-dev
sudo apt-get install zlib1g-dev
sudo apt-get install openssl libssl-dev
|
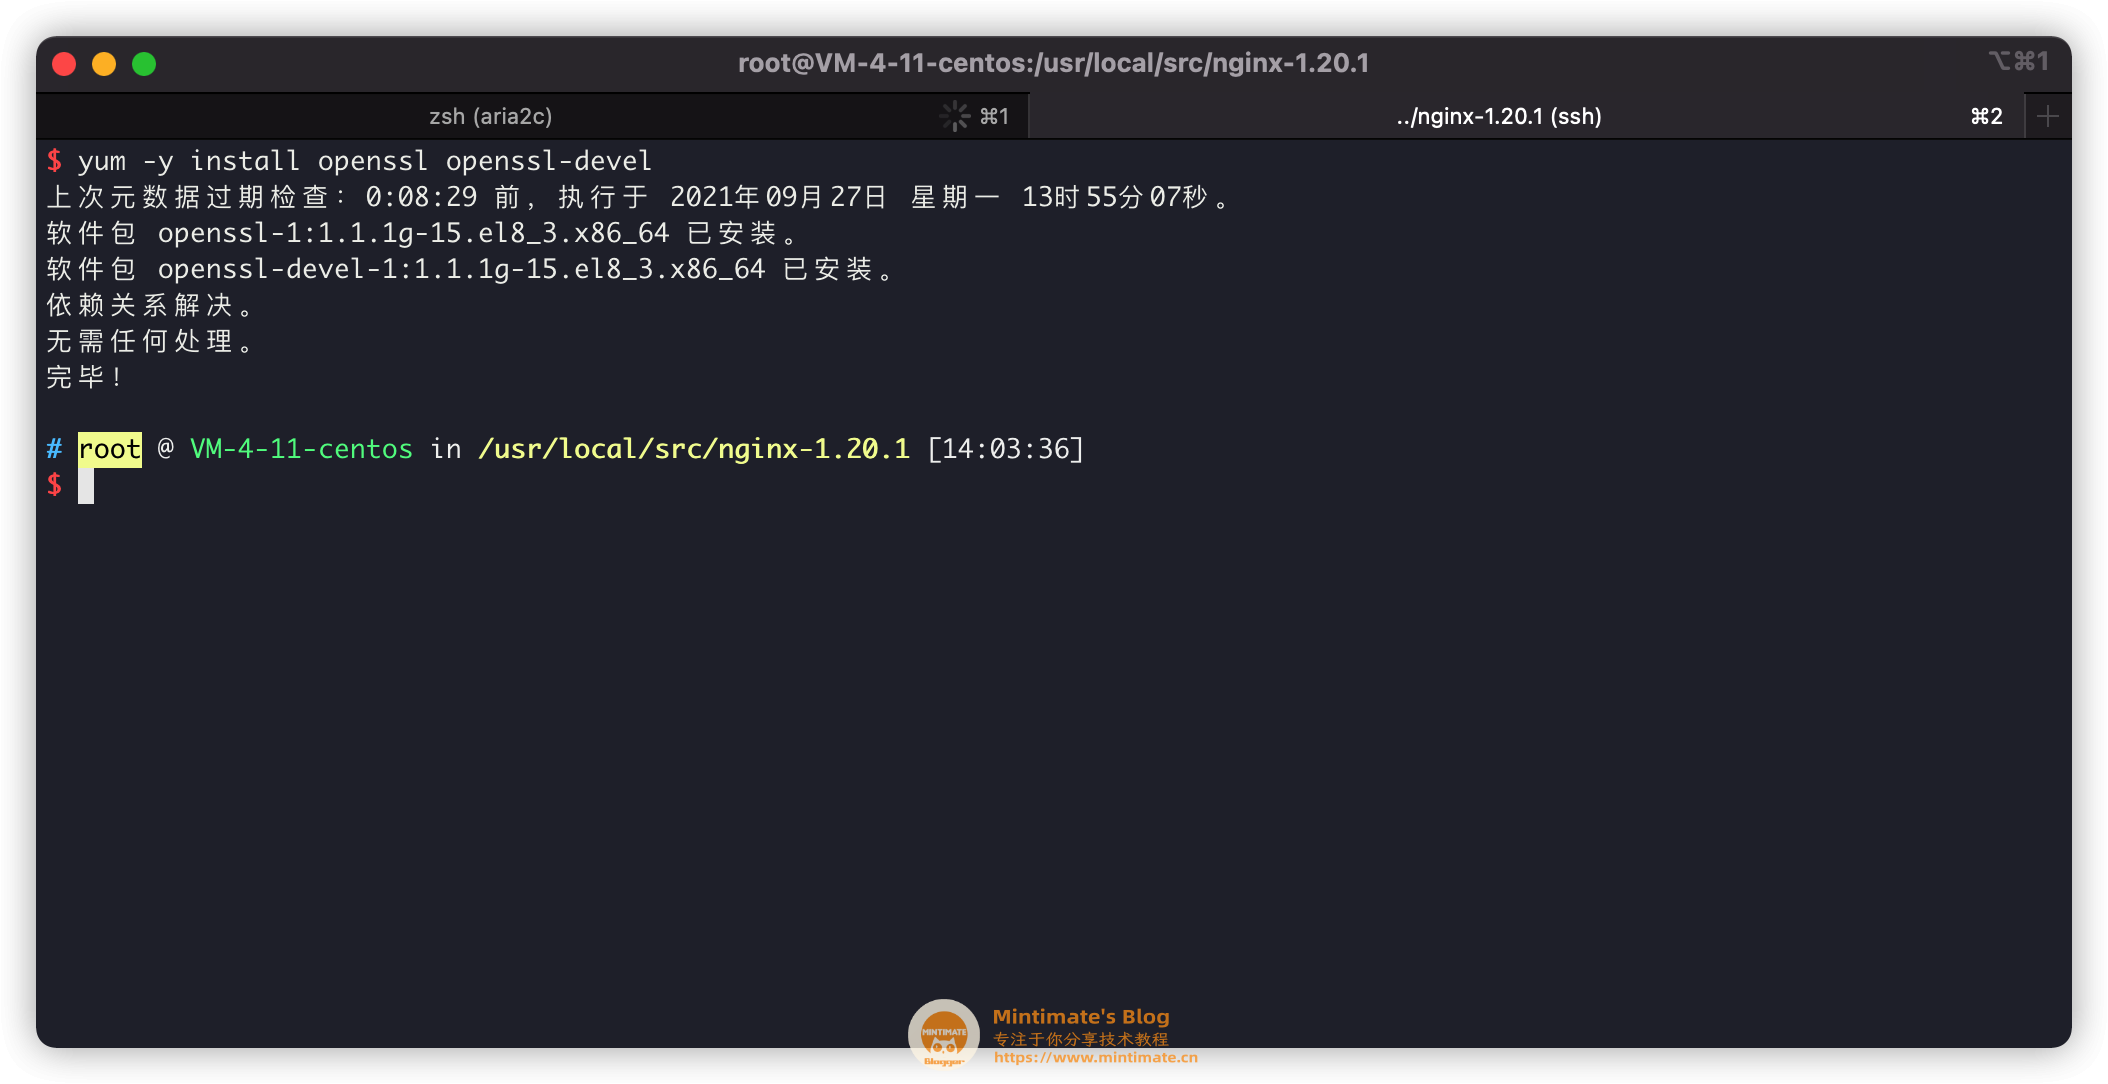
如果你的服务器是CentOS发行版本:
1
2
3
4
5
6
|
sudo yum install gcc
sudo yum install pcre pcre-devel
sudo yum -y install openssl openssl-devel
|
预编译
首先,我们想要把Nginx以www:www用户运行,所以我这里创建一个www用户,附属于www用户组:
1
2
3
4
5
6
|
sudo useradd www
sudo groupadd www
sudo usermod -a -G www www
|
之后,开始预编译:
1
2
3
4
5
6
7
8
9
10
11
12
13
14
15
16
17
18
19
20
21
22
23
24
25
26
27
28
29
30
31
32
33
34
35
36
37
38
| ./configure \
--prefix=/usr/local/nginx \
--user=www \
--group=www \
--sbin-path=/usr/local/nginx/sbin/nginx \
--conf-path=/usr/local/nginx/nginx.conf \
--error-log-path=/var/log/nginx/error.log \
--http-log-path=/var/log/nginx/access.log \
--pid-path=/var/run/nginx.pid \
--lock-path=/var/run/nginx.lock \
--http-client-body-temp-path=/var/cache/nginx/client_temp \
--http-proxy-temp-path=/var/cache/nginx/proxy_temp \
--http-fastcgi-temp-path=/var/cache/nginx/fastcgi_temp \
--http-uwsgi-temp-path=/var/cache/nginx/uwsgi_temp \
--http-scgi-temp-path=/var/cache/nginx/scgi_temp \
--with-file-aio \
--with-threads \
--with-http_addition_module \
--with-http_auth_request_module \
--with-http_dav_module \
--with-http_flv_module \
--with-http_gunzip_module \
--with-http_gzip_static_module \
--with-http_mp4_module \
--with-http_random_index_module \
--with-http_realip_module \
--with-http_secure_link_module \
--with-http_slice_module \
--with-http_ssl_module \
--with-http_stub_status_module \
--with-http_sub_module \
--with-http_v2_module \
--with-mail \
--with-mail_ssl_module \
--with-stream \
--with-stream_realip_module \
--with-stream_ssl_module \
--with-stream_ssl_preread_module
|
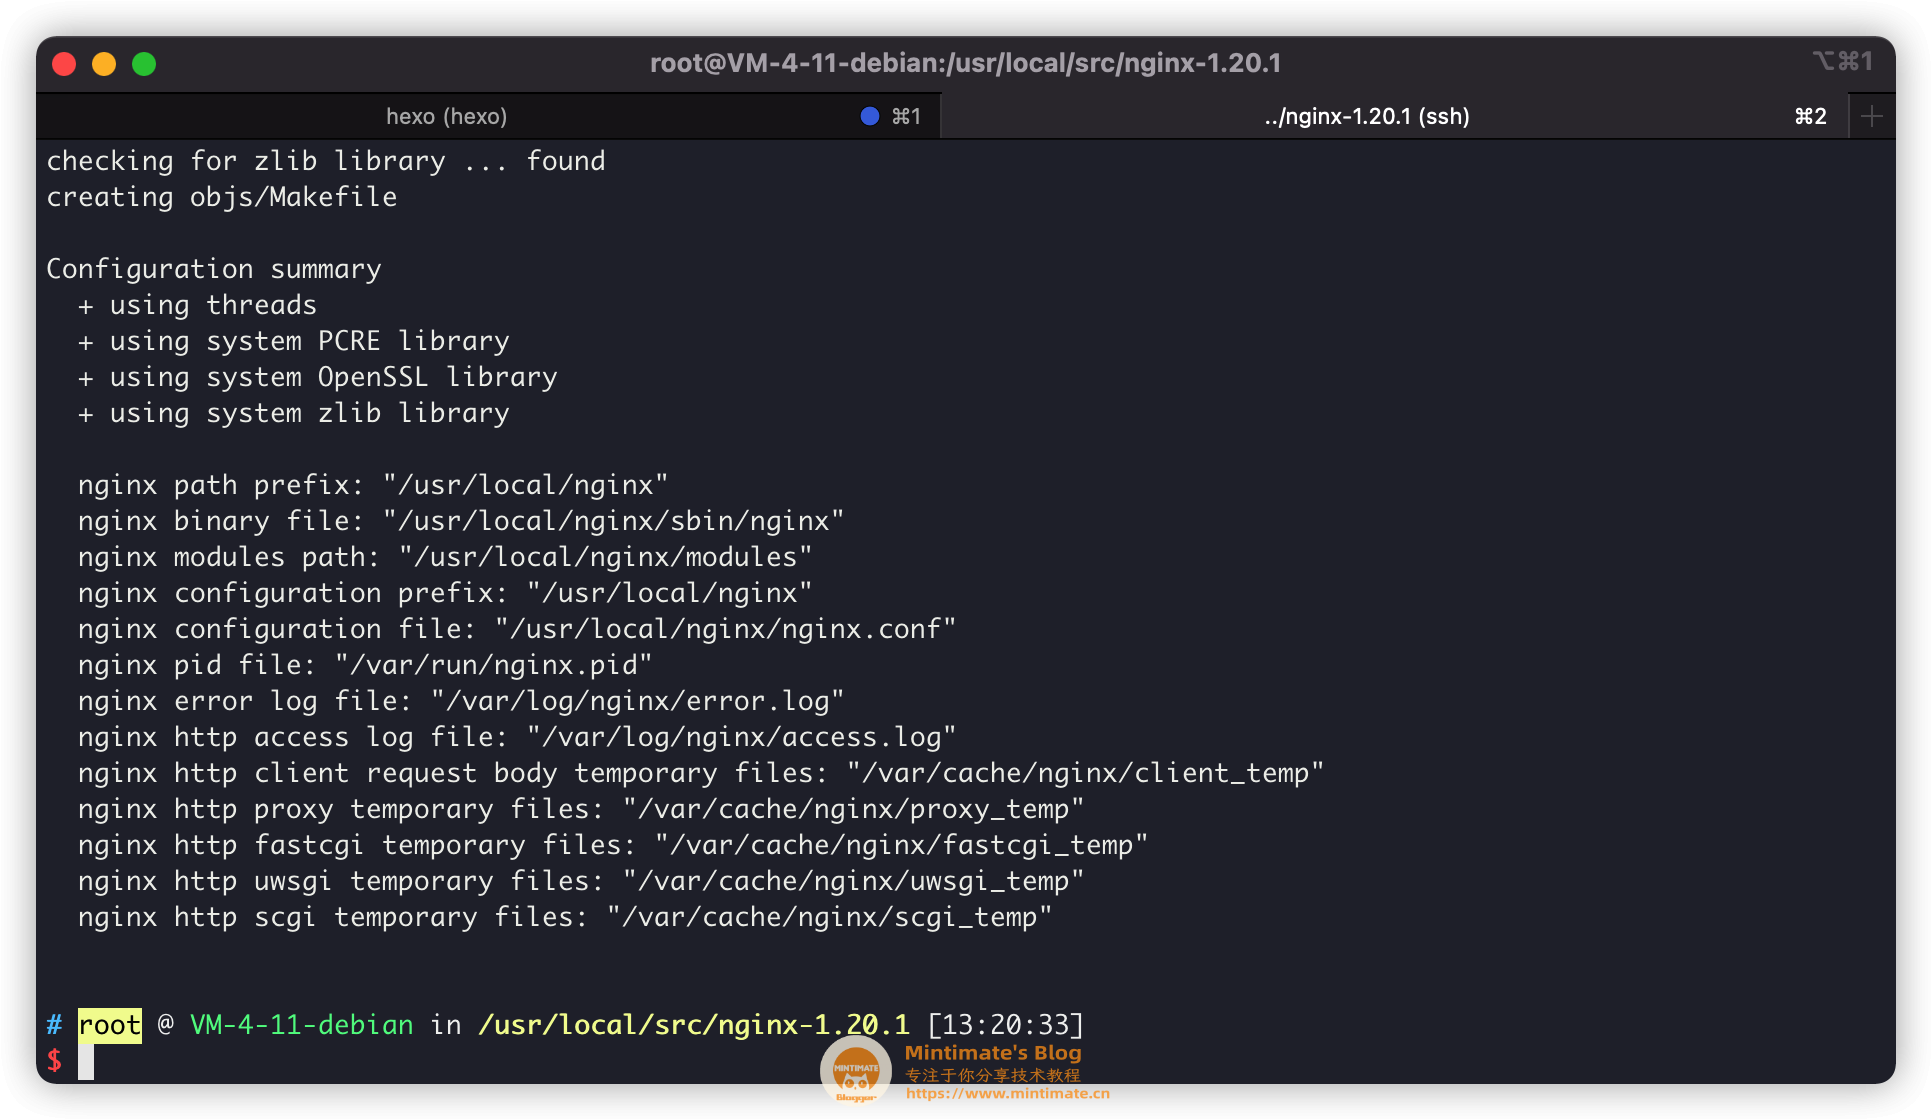
我这里预编译是通过的,如果你并没有通过,记得重新配置依赖嗷。
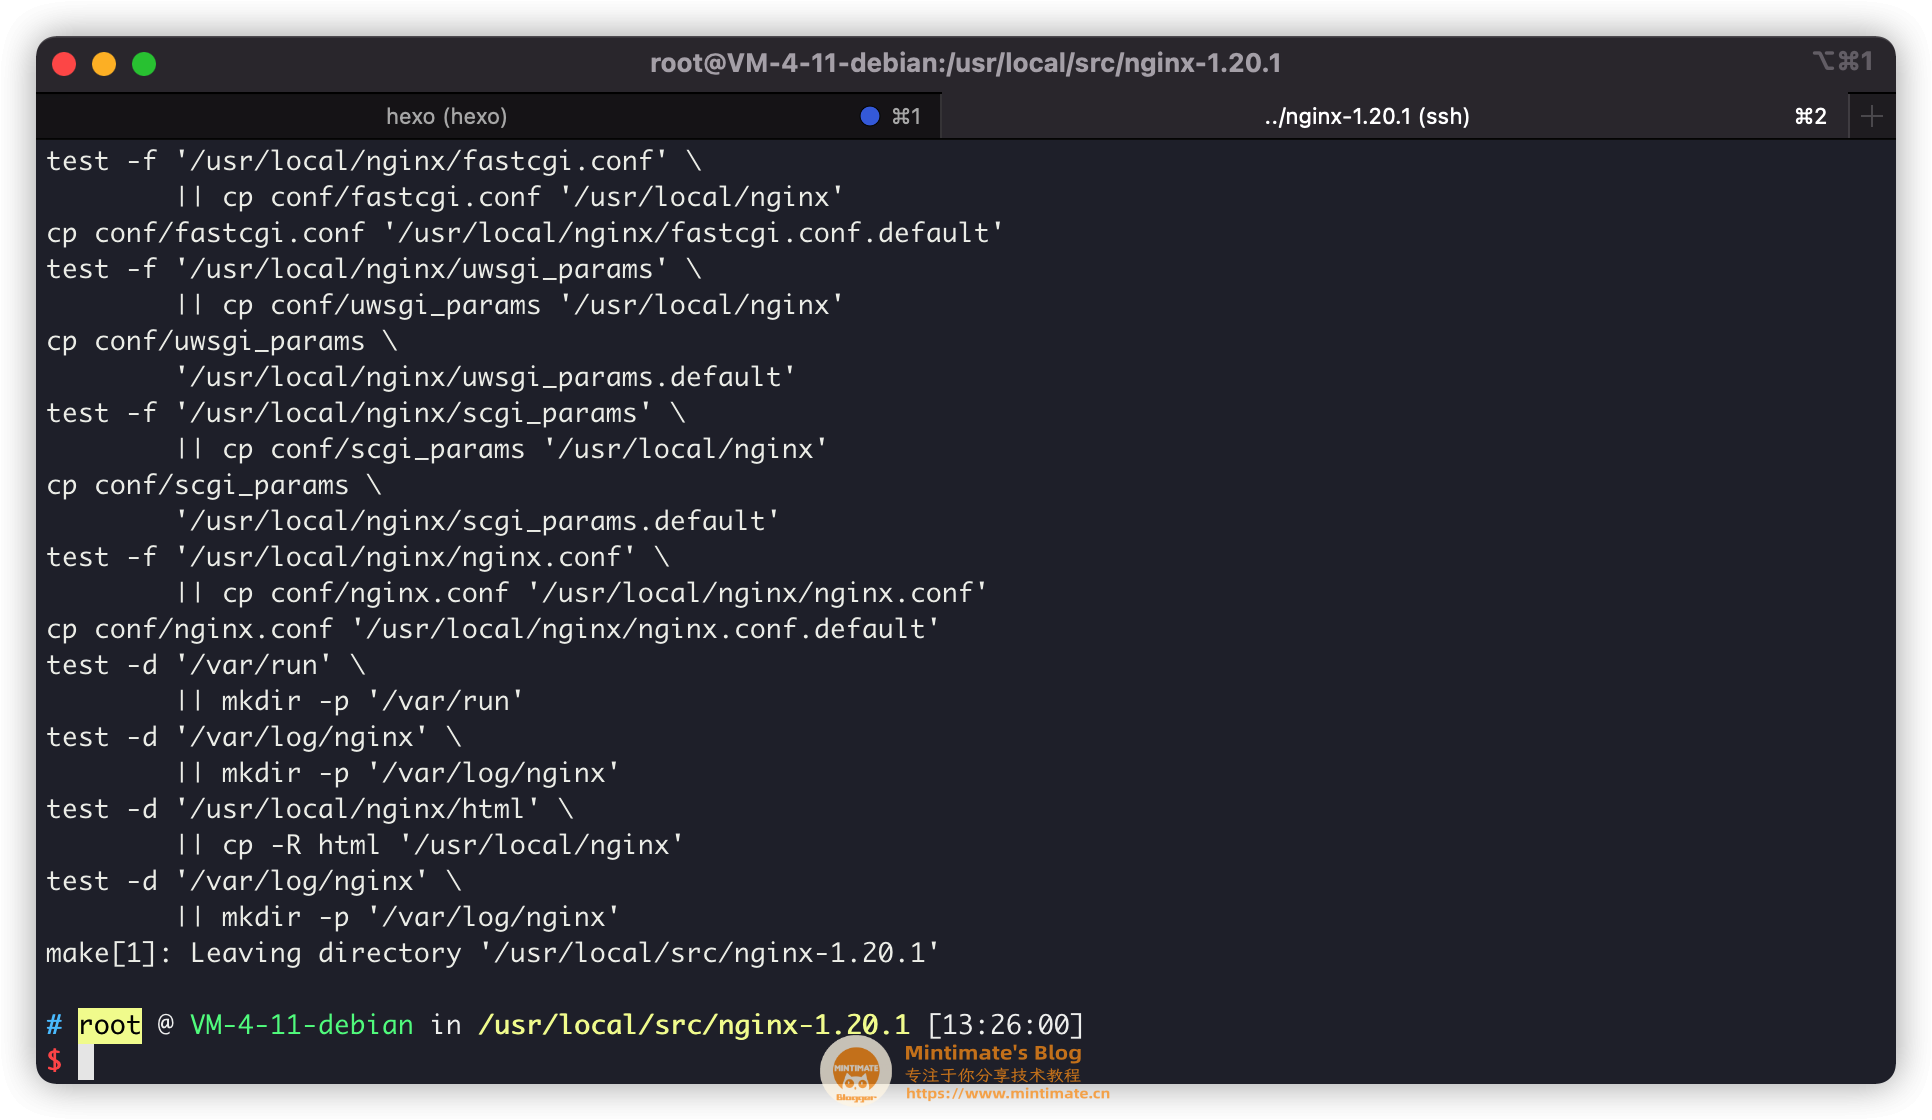
编译和安装
之后,我们开始编译和安装:
1
2
3
4
| # 我服务器是四核,所以-j4
make -j4
# 编译完成,进行安装
make install
|
注册服务
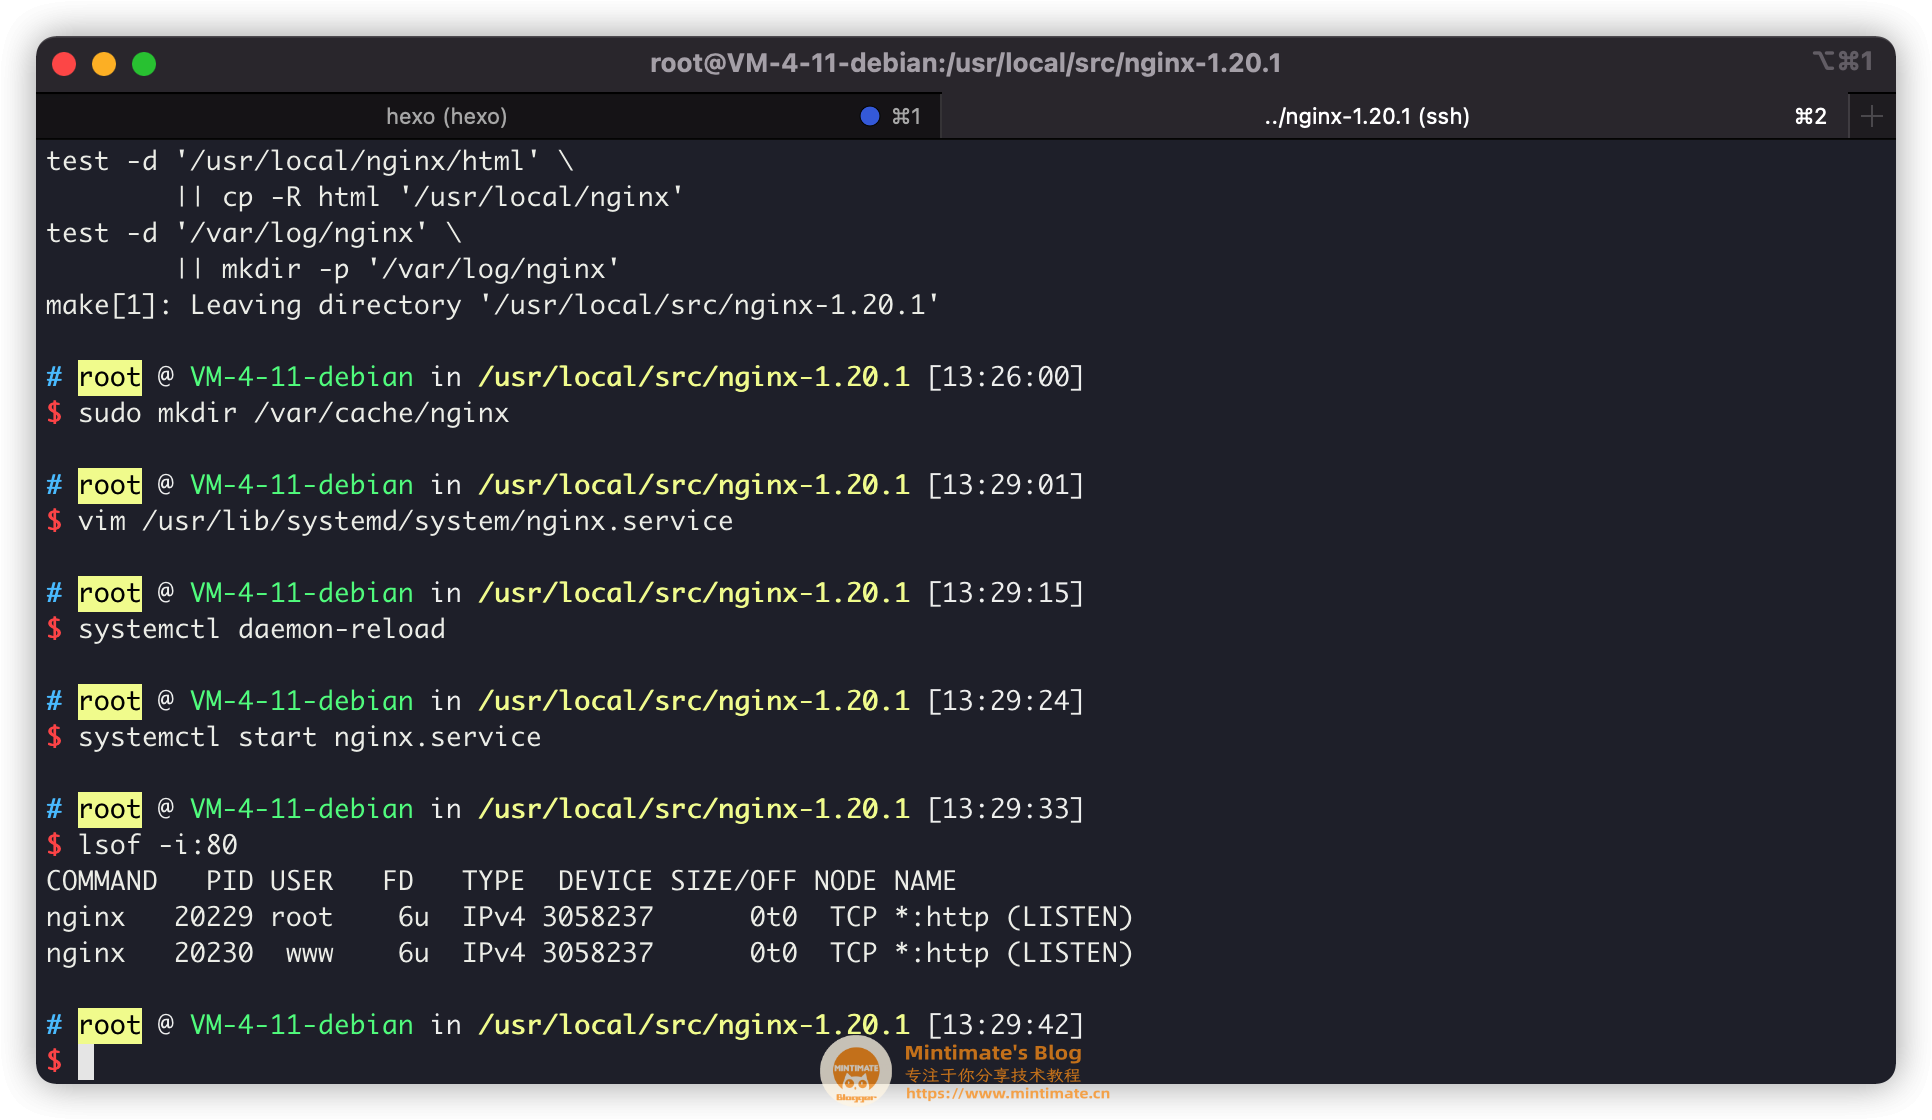
如果你是用我的编译参数,那么需要创建一个日志目录:
1
2
|
sudo mkdir /var/cache/nginx
|
为了之后更方便启动,我注册为服务:
1
| vim /usr/lib/systemd/system/nginx.service
|
添加内容:
1
2
3
4
5
6
7
8
9
10
11
12
13
| [Unit]
Description=nginx
After=network.target
[Service]
Type=forking
ExecStart=/usr/local/nginx/sbin/nginx
ExecReload=/usr/local/nginx/sbin/nginx -s reload
ExecStop=/usr/local/nginx/sbin/nginx -s quit
PrivateTmp=true
[Install]
WantedBy=multi-user.target
|
最后启动即可:
PHP
PHP会比较麻烦,主要是依赖问题,根据Blessing Skin安装指南,我们需要PHP支持:
- OpenSSL
- PDO
- Mbstring
- Tokenizer
- GD
- XML
- Ctype
- JSON
- fileinfo
- zip
主要是GD模块,需要很多额外参数,尤其是freetype参数,所以这里编译需要注意。
下载PHP源码
首先,还是和刚刚一样,我们需要下载PHP7.4的源码到/usr/local/src下:
1
2
3
4
5
|
cd /usr/local/src
wget 'https://www.php.net/distributions/php-7.4.22.tar.gz'
tar -xf php-7.4.22.tar.gz
cd php-7.4.22
|
编译依赖
我们编译依赖很简单,需要支援Nginx和MariaDB/MySQL,同时支持gd等模块,所以:
如果你是Debian/Ubuntu:
1
2
3
4
5
6
7
8
9
10
11
12
|
sudo apt-get install pkg-config
sudo apt-get install openssl libssl-dev
sudo apt-get install libsqlite3-dev
sudo apt-get install zlib1g-dev
sudo apt-get install libcurl4-openssl-dev
sudo apt-get install libpng-dev libjpeg-dev libonig-dev
|
之后,编译安装:libxml2、freetype。
并把freetype编译安装地址下的lib/pkgconfig添加到pkg内,如:
1
2
|
export PKG_CONFIG_PATH=/usr/local/freetype/lib/pkgconfig/
|
如果你是CentOS:
首先是编译安装oniguruma,并配置到pkg内,如:
1
2
|
export PKG_CONFIG_PATH=/usr/local/freetype/lib/pkgconfig/
|
之后用软件包管理器安装:
1
2
3
4
5
6
7
8
9
10
|
sudo yum install libxml2 libxml2-devel
sudo yum install pcre pcre-devel
sudo yum install sqlite3-devel
sudo yum install libcurl-devel libpng-devel libjpeg-devel
sudo yum install freetype-devel
|
预编译
最后,我们看看预编译PHP:
1
2
3
4
5
6
7
8
9
10
11
12
13
14
15
16
17
18
19
20
| ./configure \
--prefix=/usr/local/php7 \
--with-curl \
--with-mysqli \
--with-openssl \
--with-pdo-mysql \
--with-jpeg \
--enable-gd \
--enable-fpm \
--with-fpm-user=www \
--with-fpm-group=www \
--enable-bcmath \
--enable-xml \
--with-zip \
--enable-mbstring \
--enable-sockets \
--with-zlib \
--enable-fileinfo \
--enable-exif \
--with-freetype
|

我这里预编译是通过的,如果你并没有通过,记得重新配置依赖嗷。尤其是freetype和libxml2。
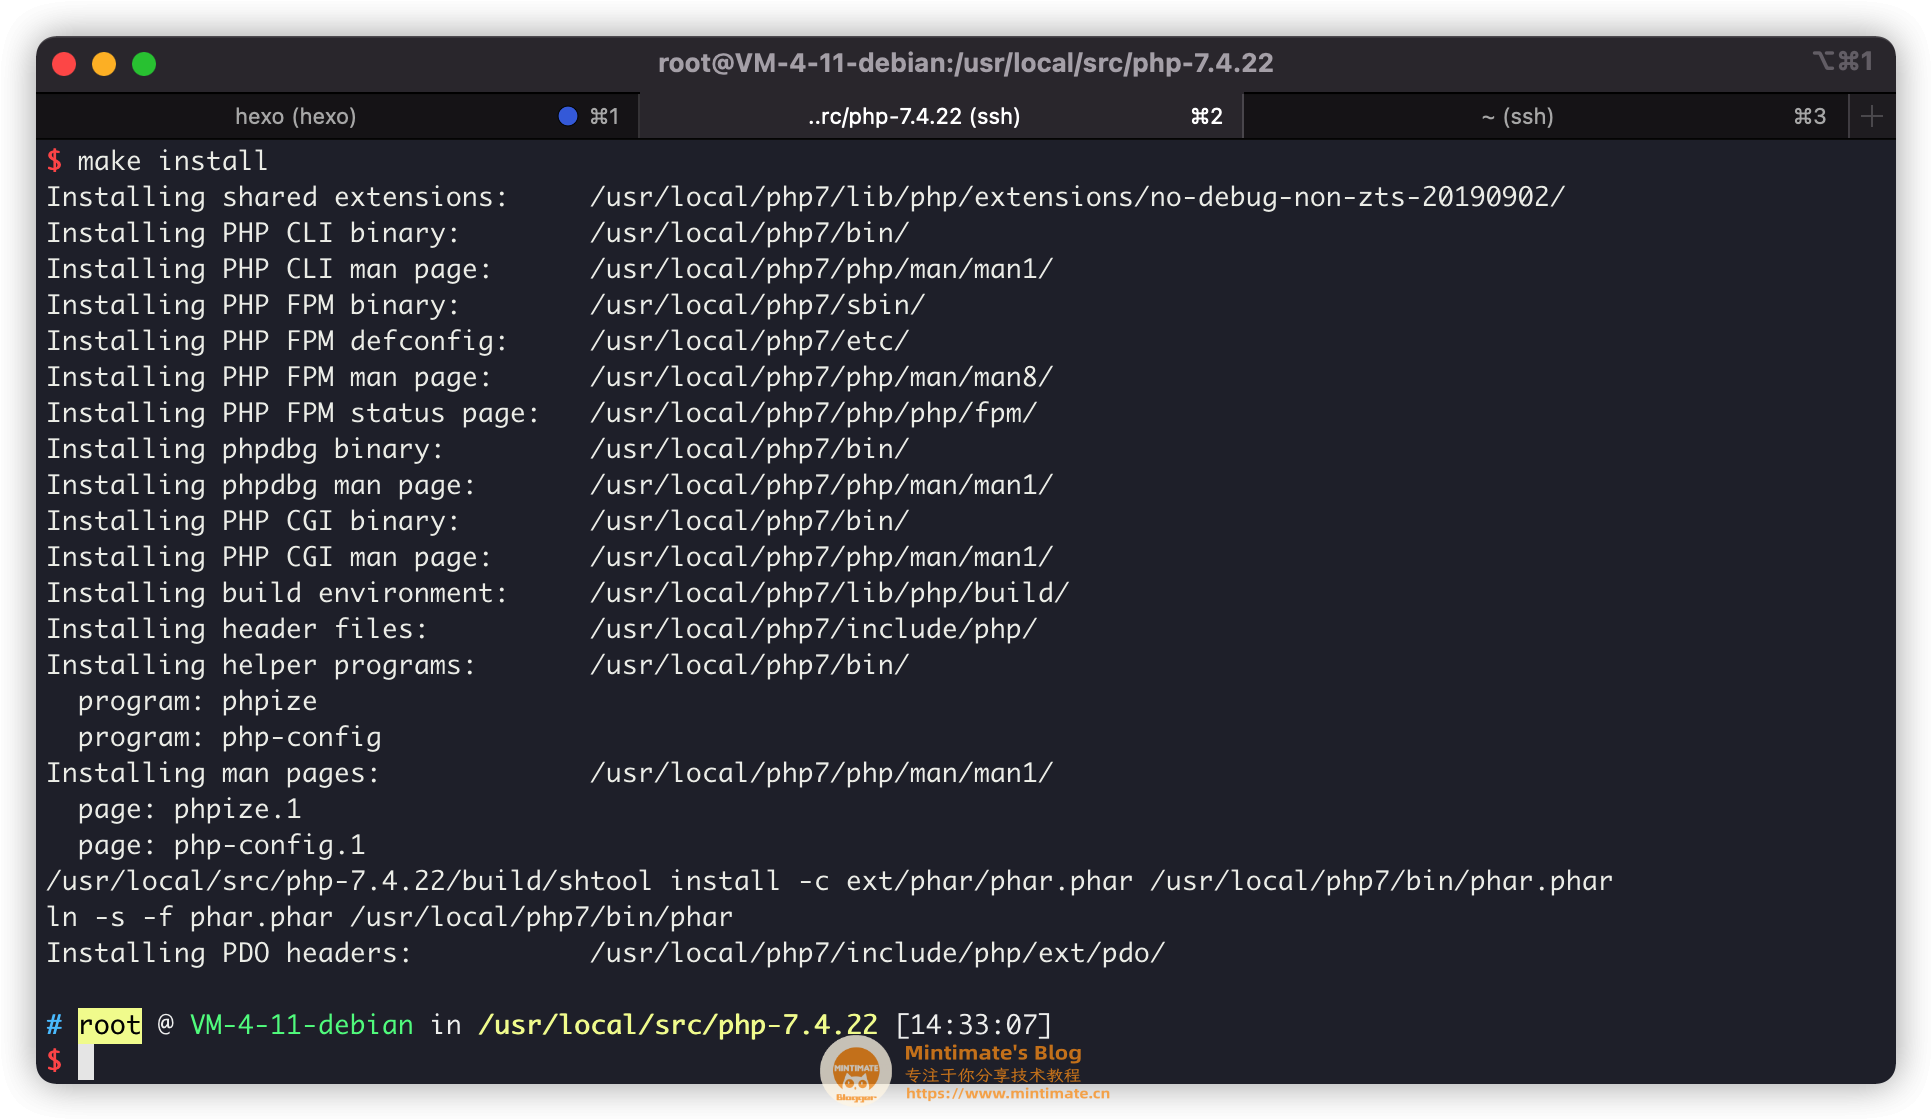
编译和安装
之后,我们开始编译和安装:
1
2
3
4
| # 我服务器是四核,所以-j4
make -j4
# 编译完成,进行安装
make install
|
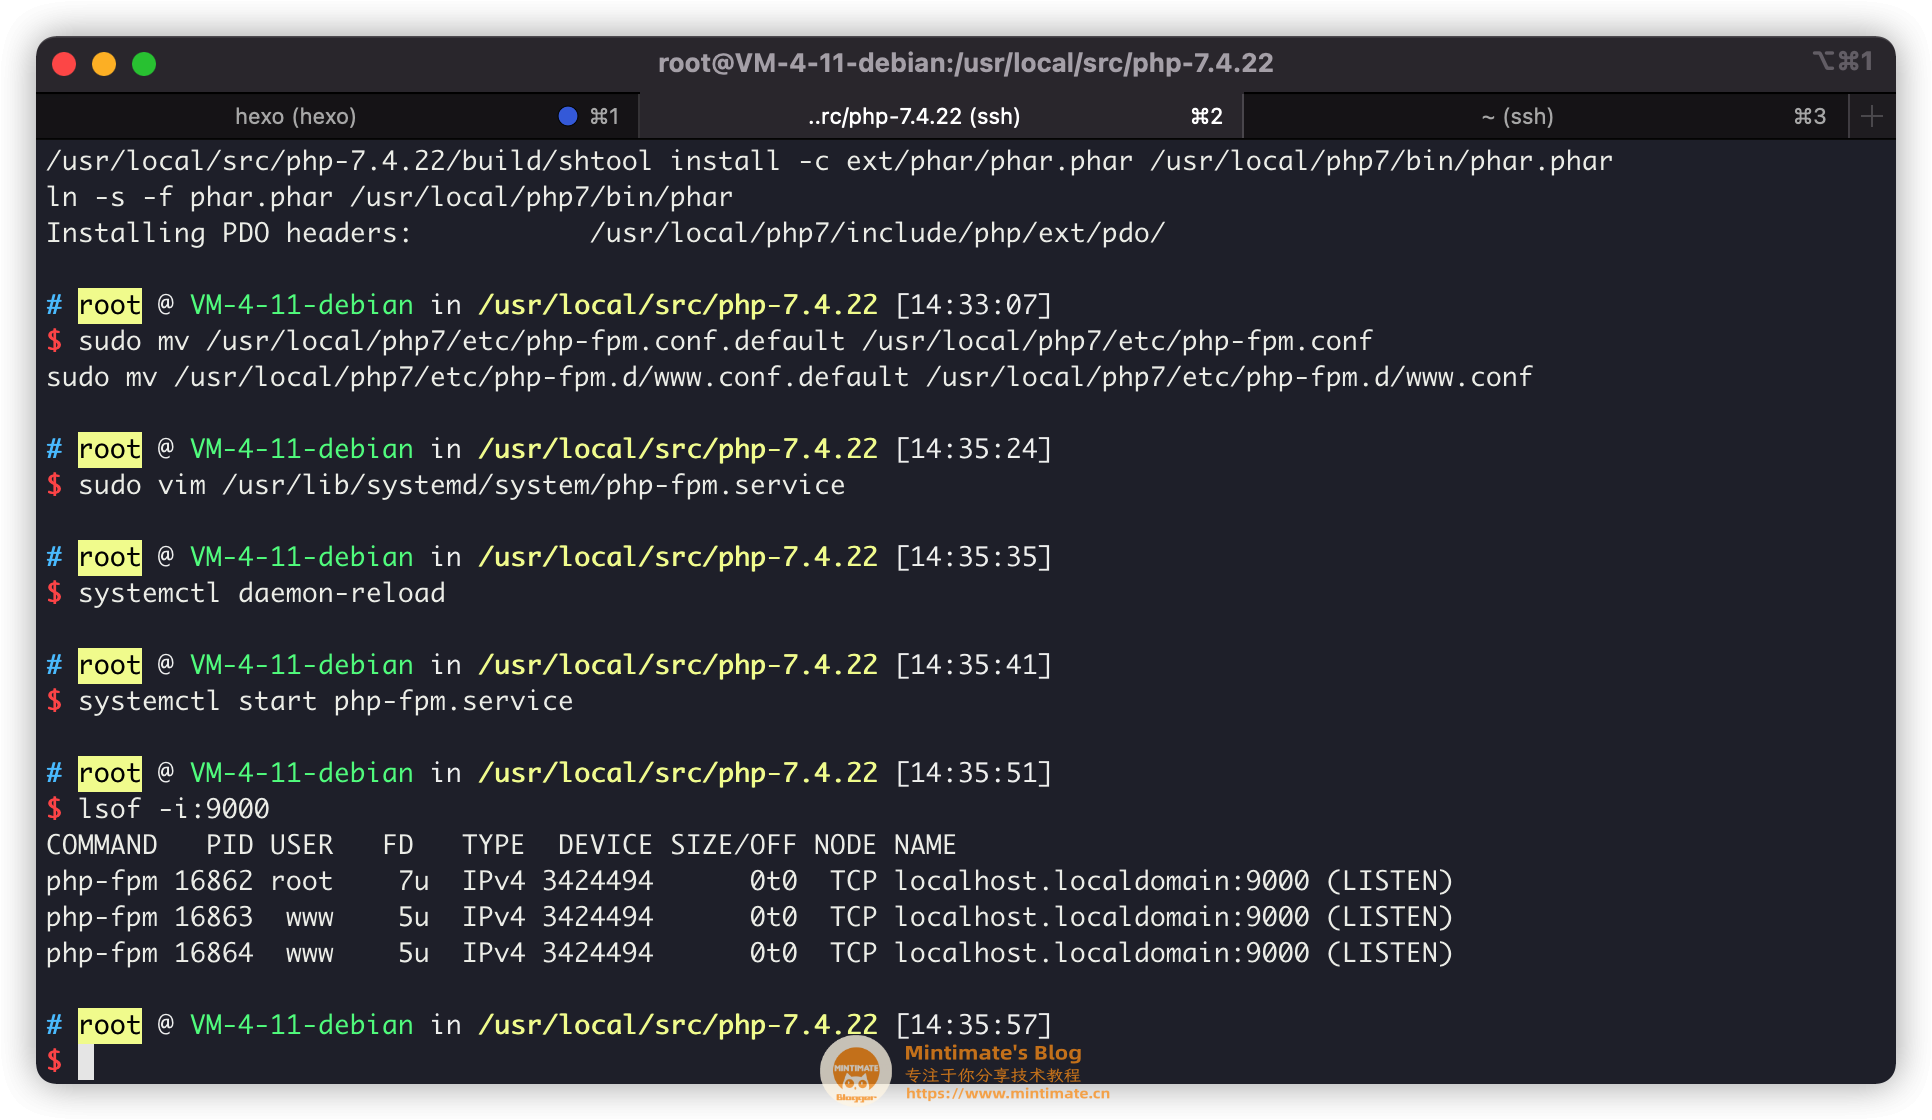
注册服务
如果你是用我的编译参数,那么需要PHP-FPM配置文件:
1
2
3
|
sudo mv /usr/local/php7/etc/php-fpm.conf.default /usr/local/php7/etc/php-fpm.conf
sudo mv /usr/local/php7/etc/php-fpm.d/www.conf.default /usr/local/php7/etc/php-fpm.d/www.conf
|
为了之后更方便启动,我注册为服务:
1
| sudo vim /usr/lib/systemd/system/php-fpm.service
|
添加内容:
1
2
3
4
5
6
7
8
9
10
11
| [Unit]
Description=php-fpm
After=network.target
[Service]
Type=forking
ExecStart=/usr/local/php7/sbin/php-fpm
PrivateTmp=true
[Install]
WantedBy=multi-user.target
|
最后启动即可:
MariaDB/MySQL
这里,我另外一篇文章写的很详细了,不再赘述:
搭建BlessingSkin
1. 下载BlessingSkin
首先,我们创建一个目录,作为网站目录:
1
2
| mkdir /www/BlessingSkin -pv
cd /www/BlessingSkin
|
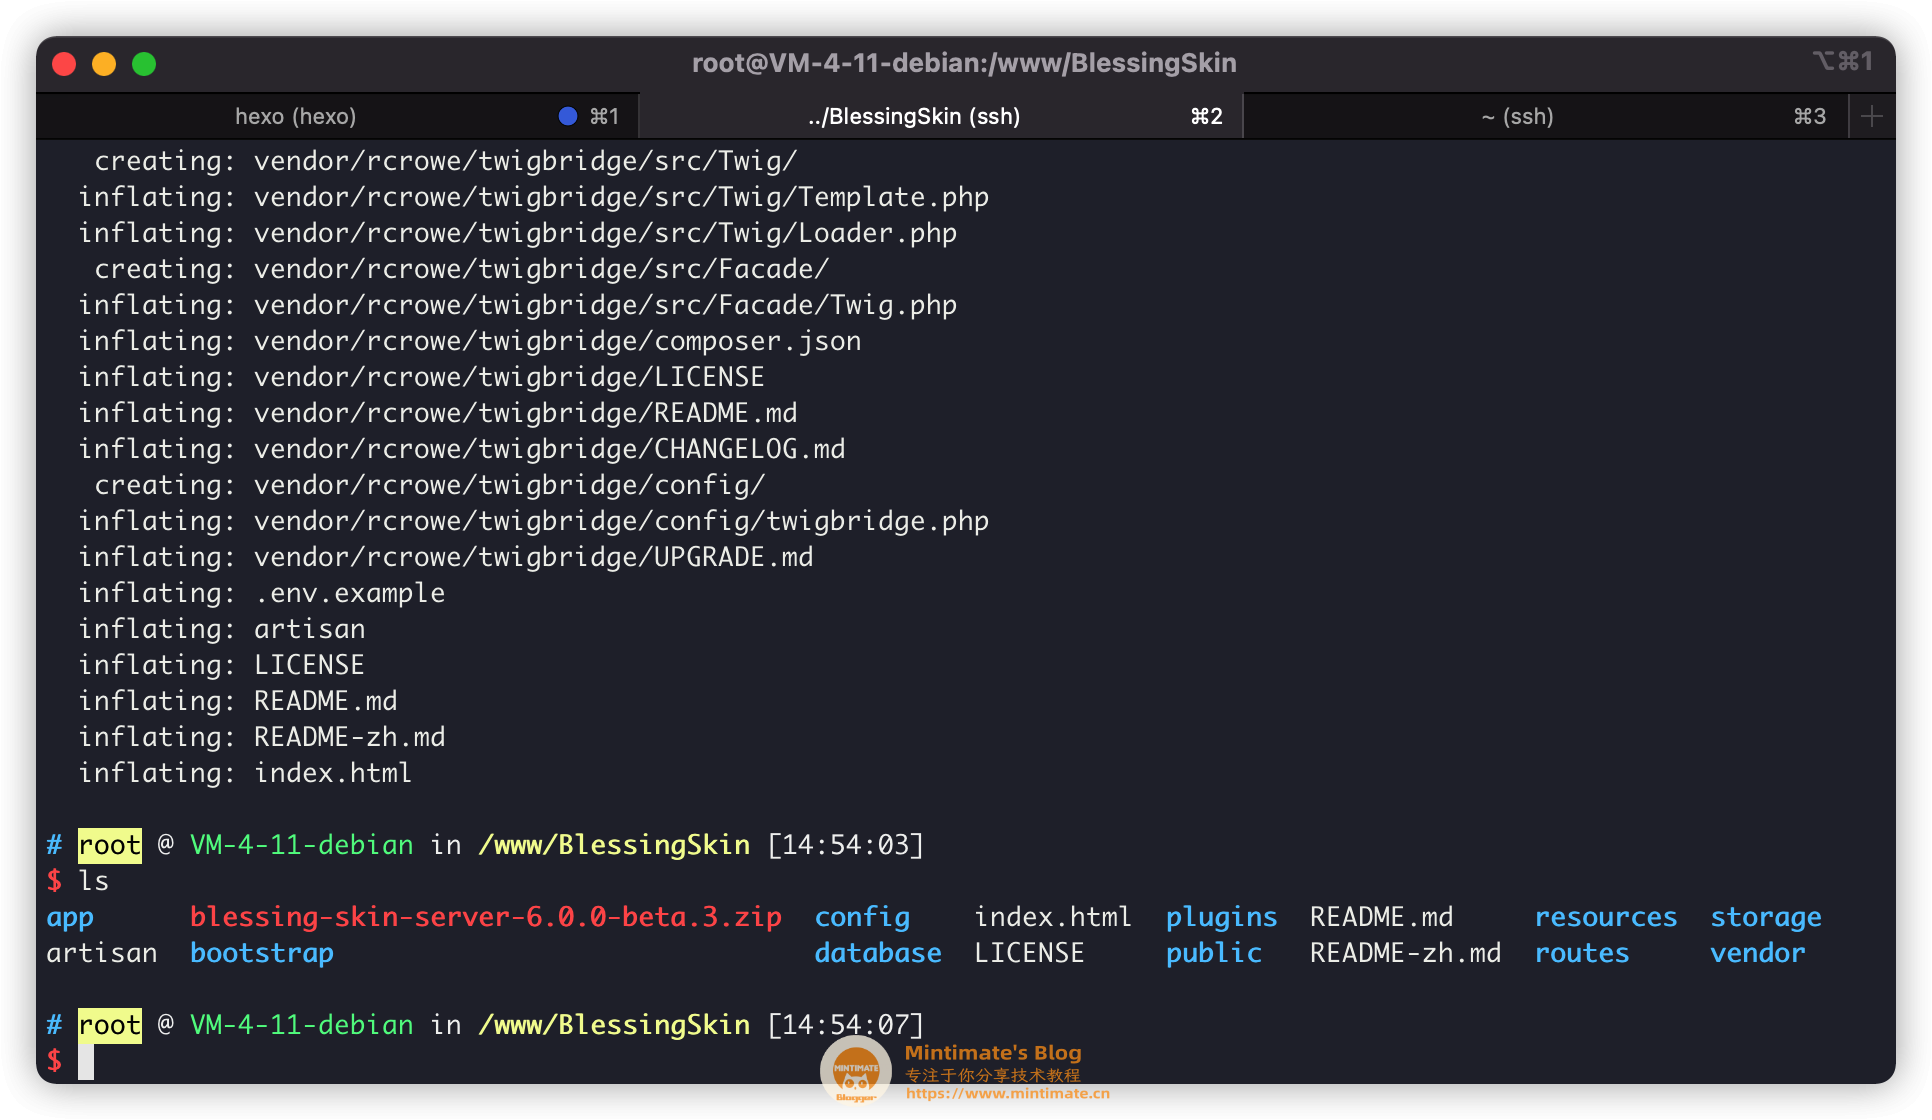
之后,下载BlessingSkin的发行版本,这里选择安装6.0.0-beta.3:
1
| wget 'https://github.com/bs-community/blessing-skin-server/releases/download/6.0.0-beta.3/blessing-skin-server-6.0.0-beta.3.zip'
|
之后解压即可:
1
| unzip blessing-skin-server-6.0.0-beta.3.zip
|
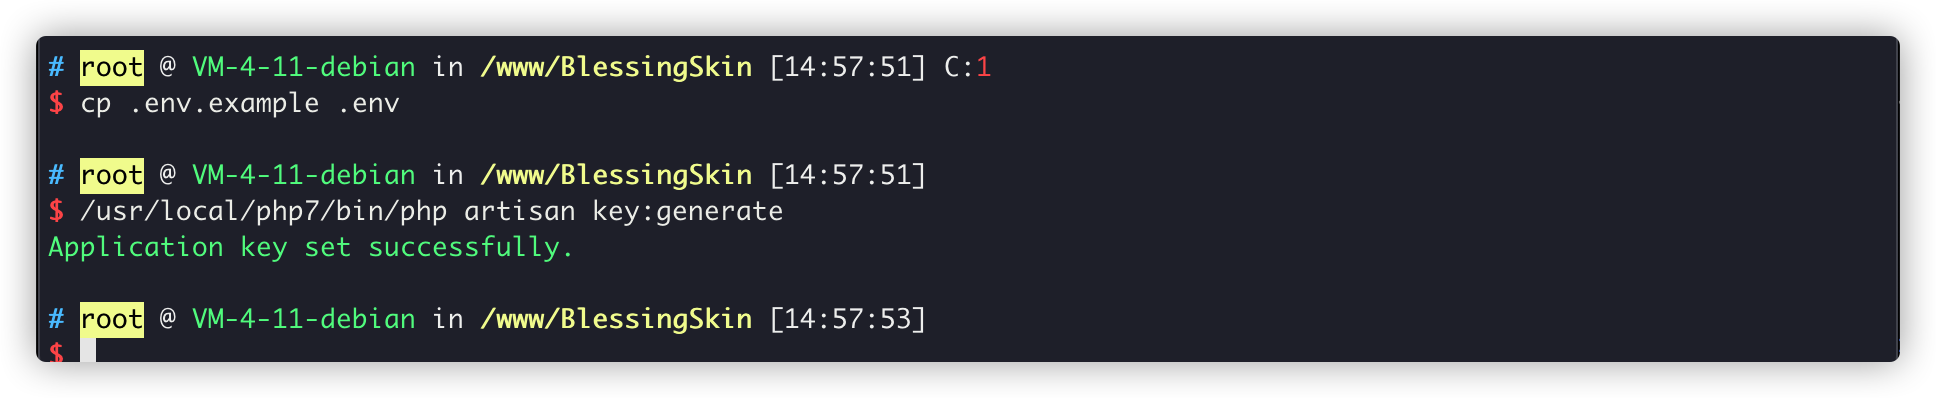
当然,安装官网要求,我们需要重命名和初始化:
1
2
| cp .env.example .env
/usr/local/php7/bin/php artisan key:generate
|
2. 配置Nginx
当然,我们还要配置Nginx:
1
| vim /usr/local/nginx/nginx.conf
|
查看:
1
2
3
4
5
6
7
8
9
10
11
12
13
14
15
16
17
18
19
20
21
22
23
24
25
26
27
28
29
30
31
32
33
34
35
36
37
38
39
40
41
42
43
44
| user www;
worker_processes 1;
events {
worker_connections 1024;
}
http {
include mime.types;
default_type application/octet-stream;
sendfile on;
keepalive_timeout 65;
gzip on;
server {
listen 80;
server_name localhost;
root /www/BlessingSkin/public;
location / {
index index.php index.html index.htm;
try_files $uri $uri/ /index.php?$query_string;
}
error_page 500 502 503 504 /50x.html;
location = /50x.html {
root html;
}
location ~ [^/]\.php(/|$){
fastcgi_pass 127.0.0.1:9000;
include fastcgi.conf;
fastcgi_index index.php;
fastcgi_param SCRIPT_FILENAME $document_root/$fastcgi_script_name;
}
}
}
|
3. 提权&重载配置
刚刚我们都是用root用户直接修改文件,现在我们把网站目录权限移交给www:
最后,我们重载配置:
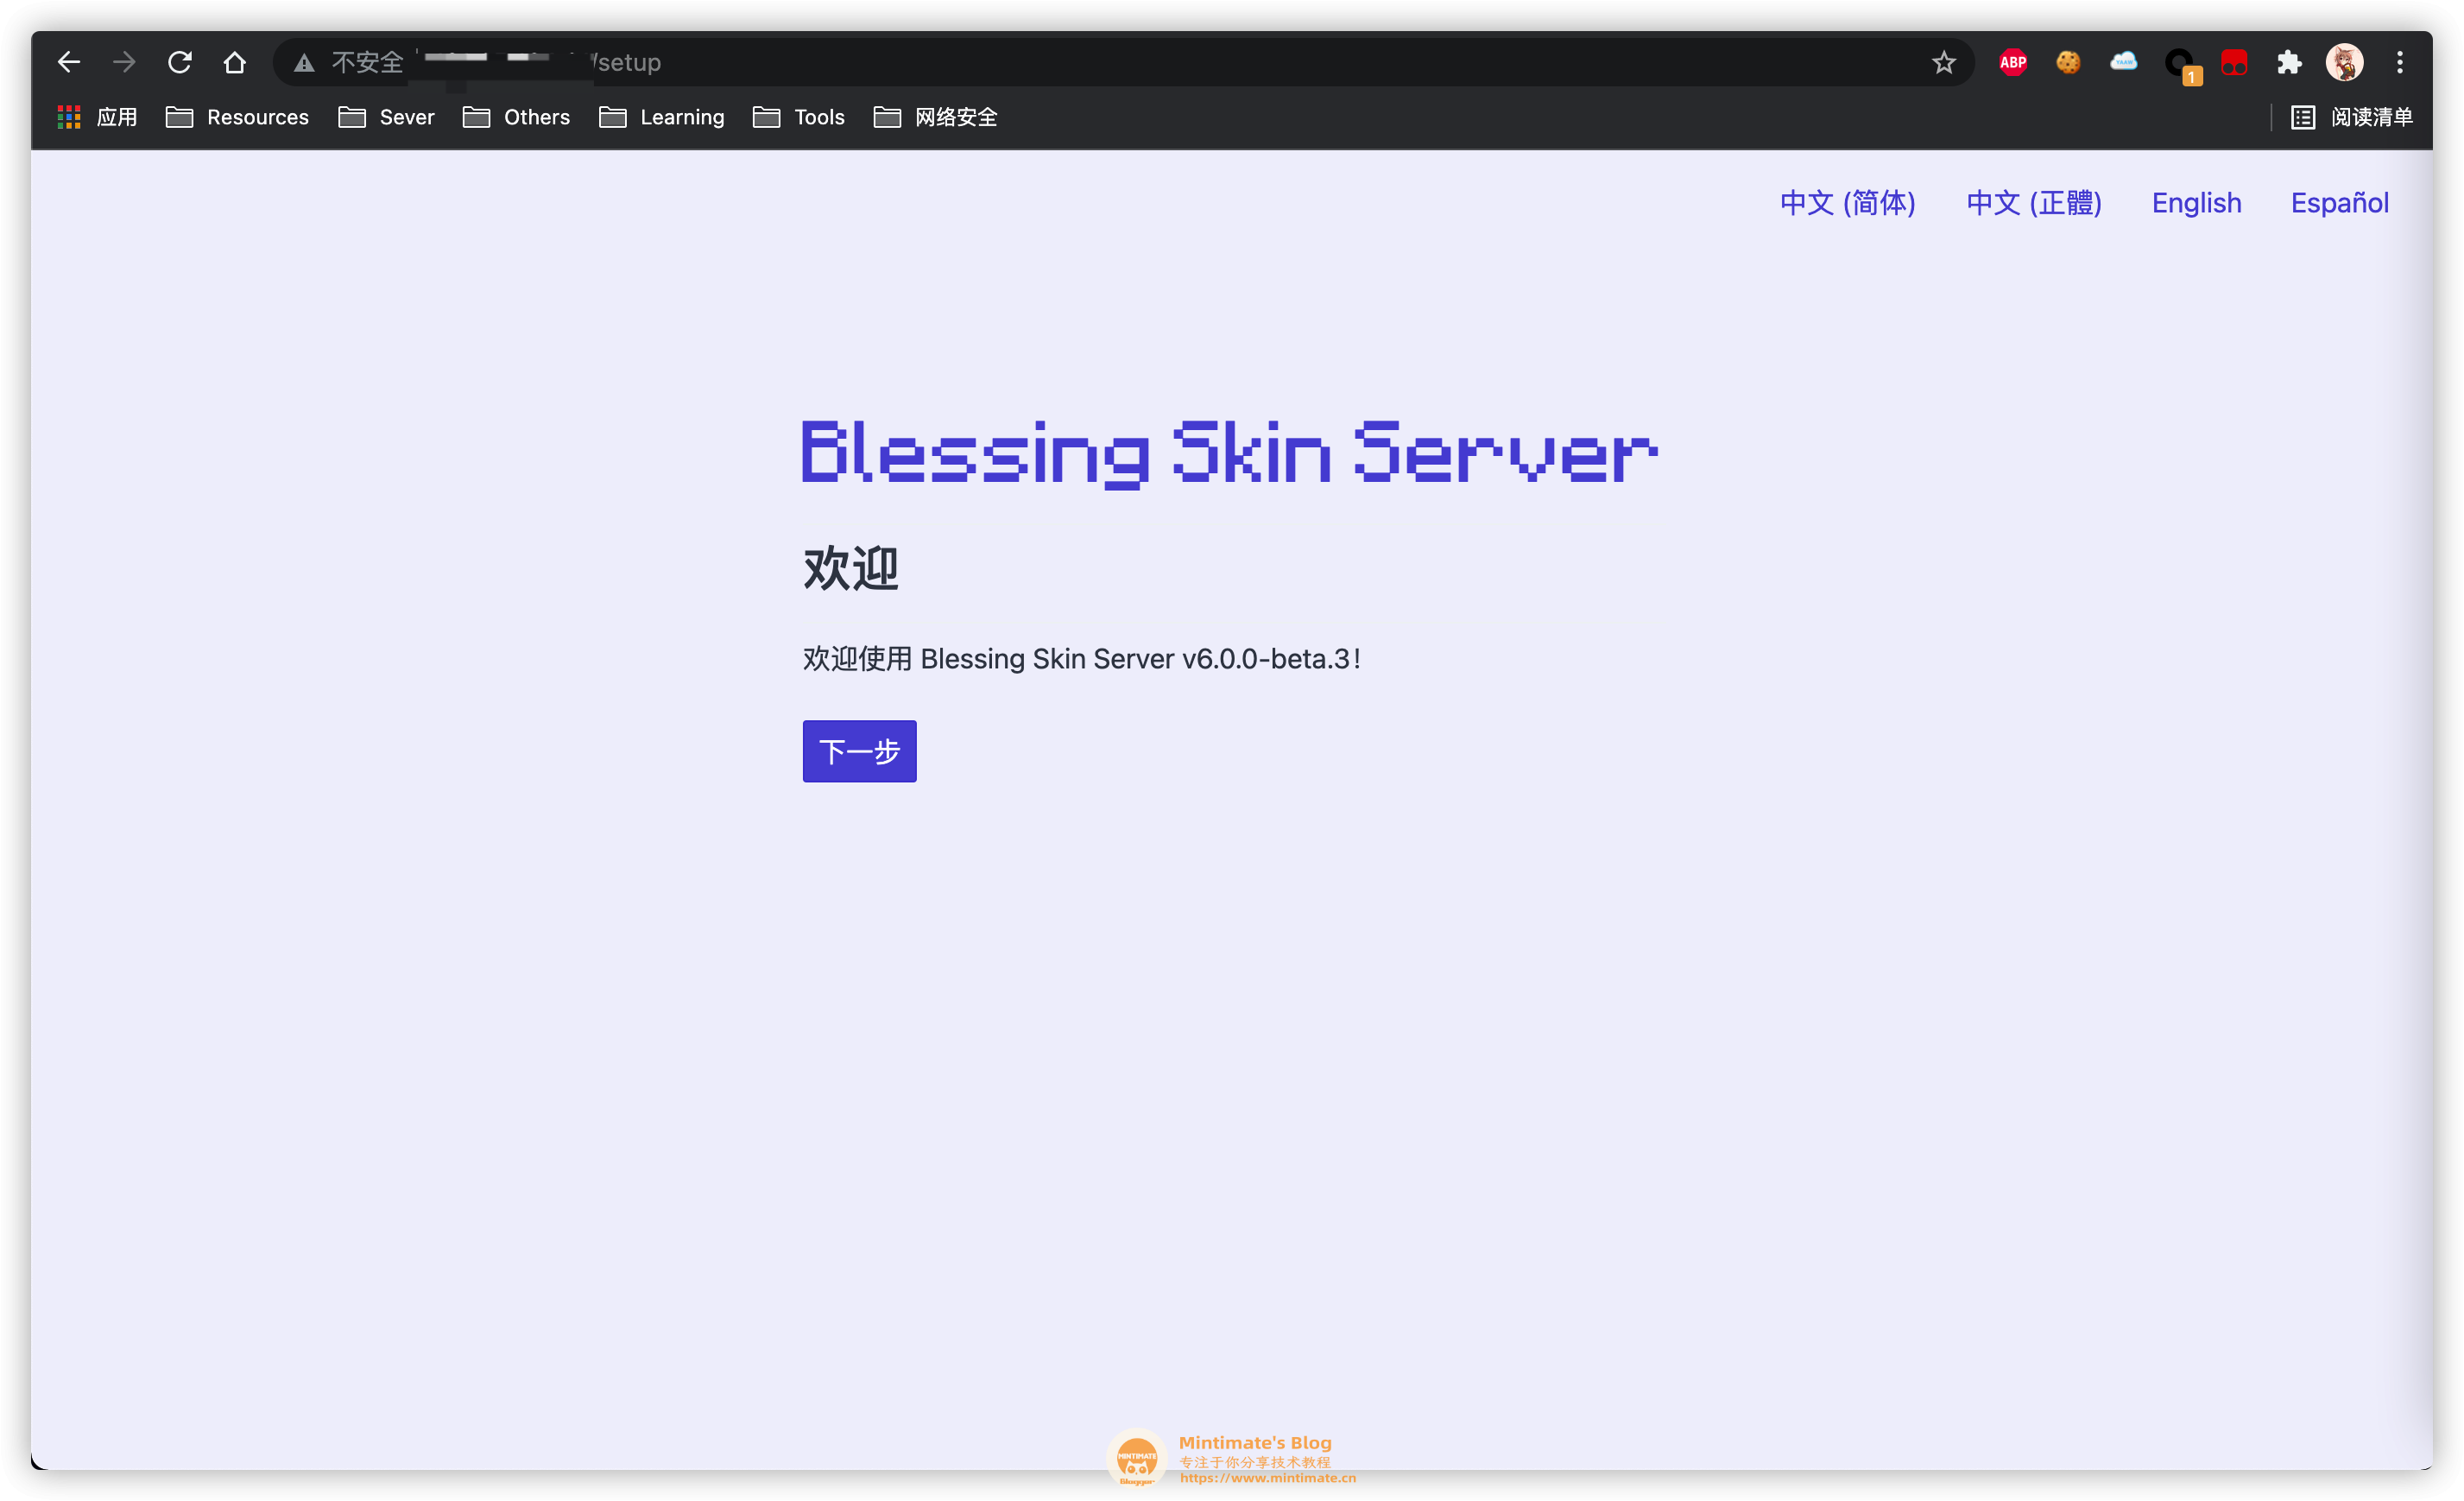
浏览器访问网站,即可看到效果:
初始化BlessingSkin
现在,我们已经搭建好BlessingSkin,接下来就是初始化了,点击下一步,进入初始化参数界面:
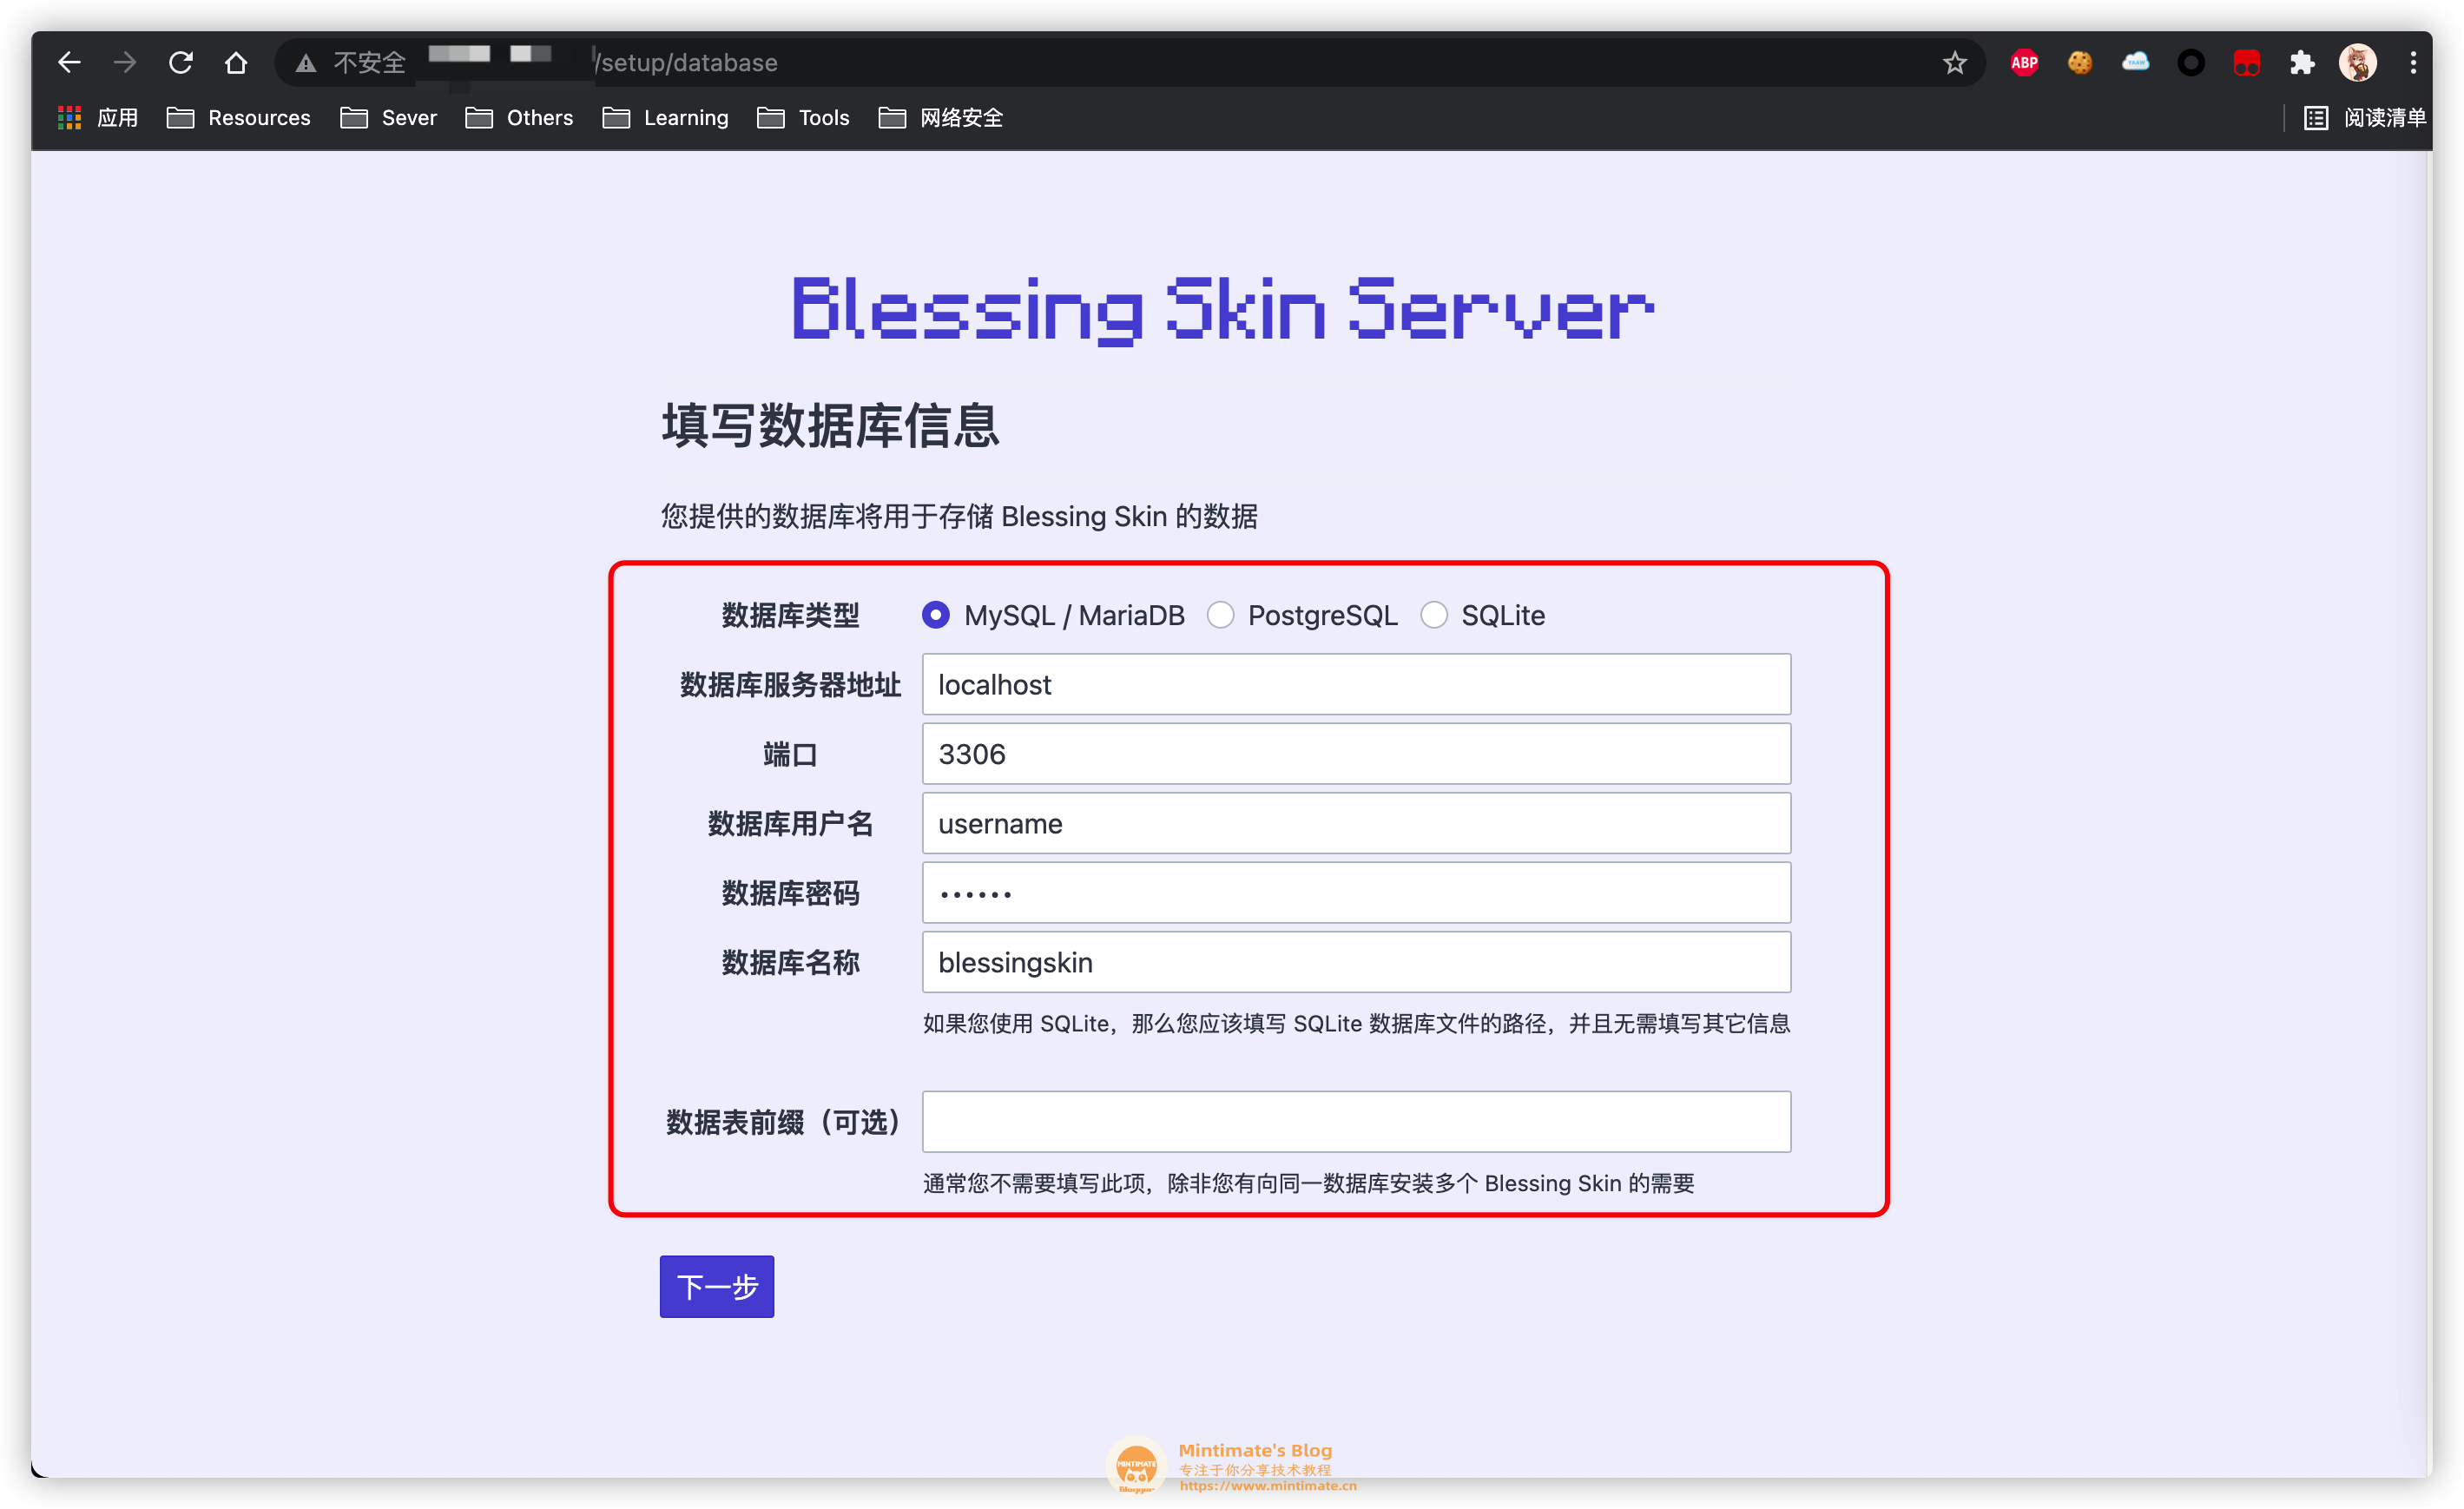
接下来,我就不说了。MySQL基本操作了~需要注意的是,输入完数据库,让你设置管理员,这里因为要对数据库操作,会停滞一下,不要一直点下一步嗷:

之后,就可以愉快使用皮肤站了。我们看看如何设置外置登录。
外置登录
使用外置登录,服务器的online-mode记得设置为true哦~
接下来,我们使用Yggdrasil API来外置登录。
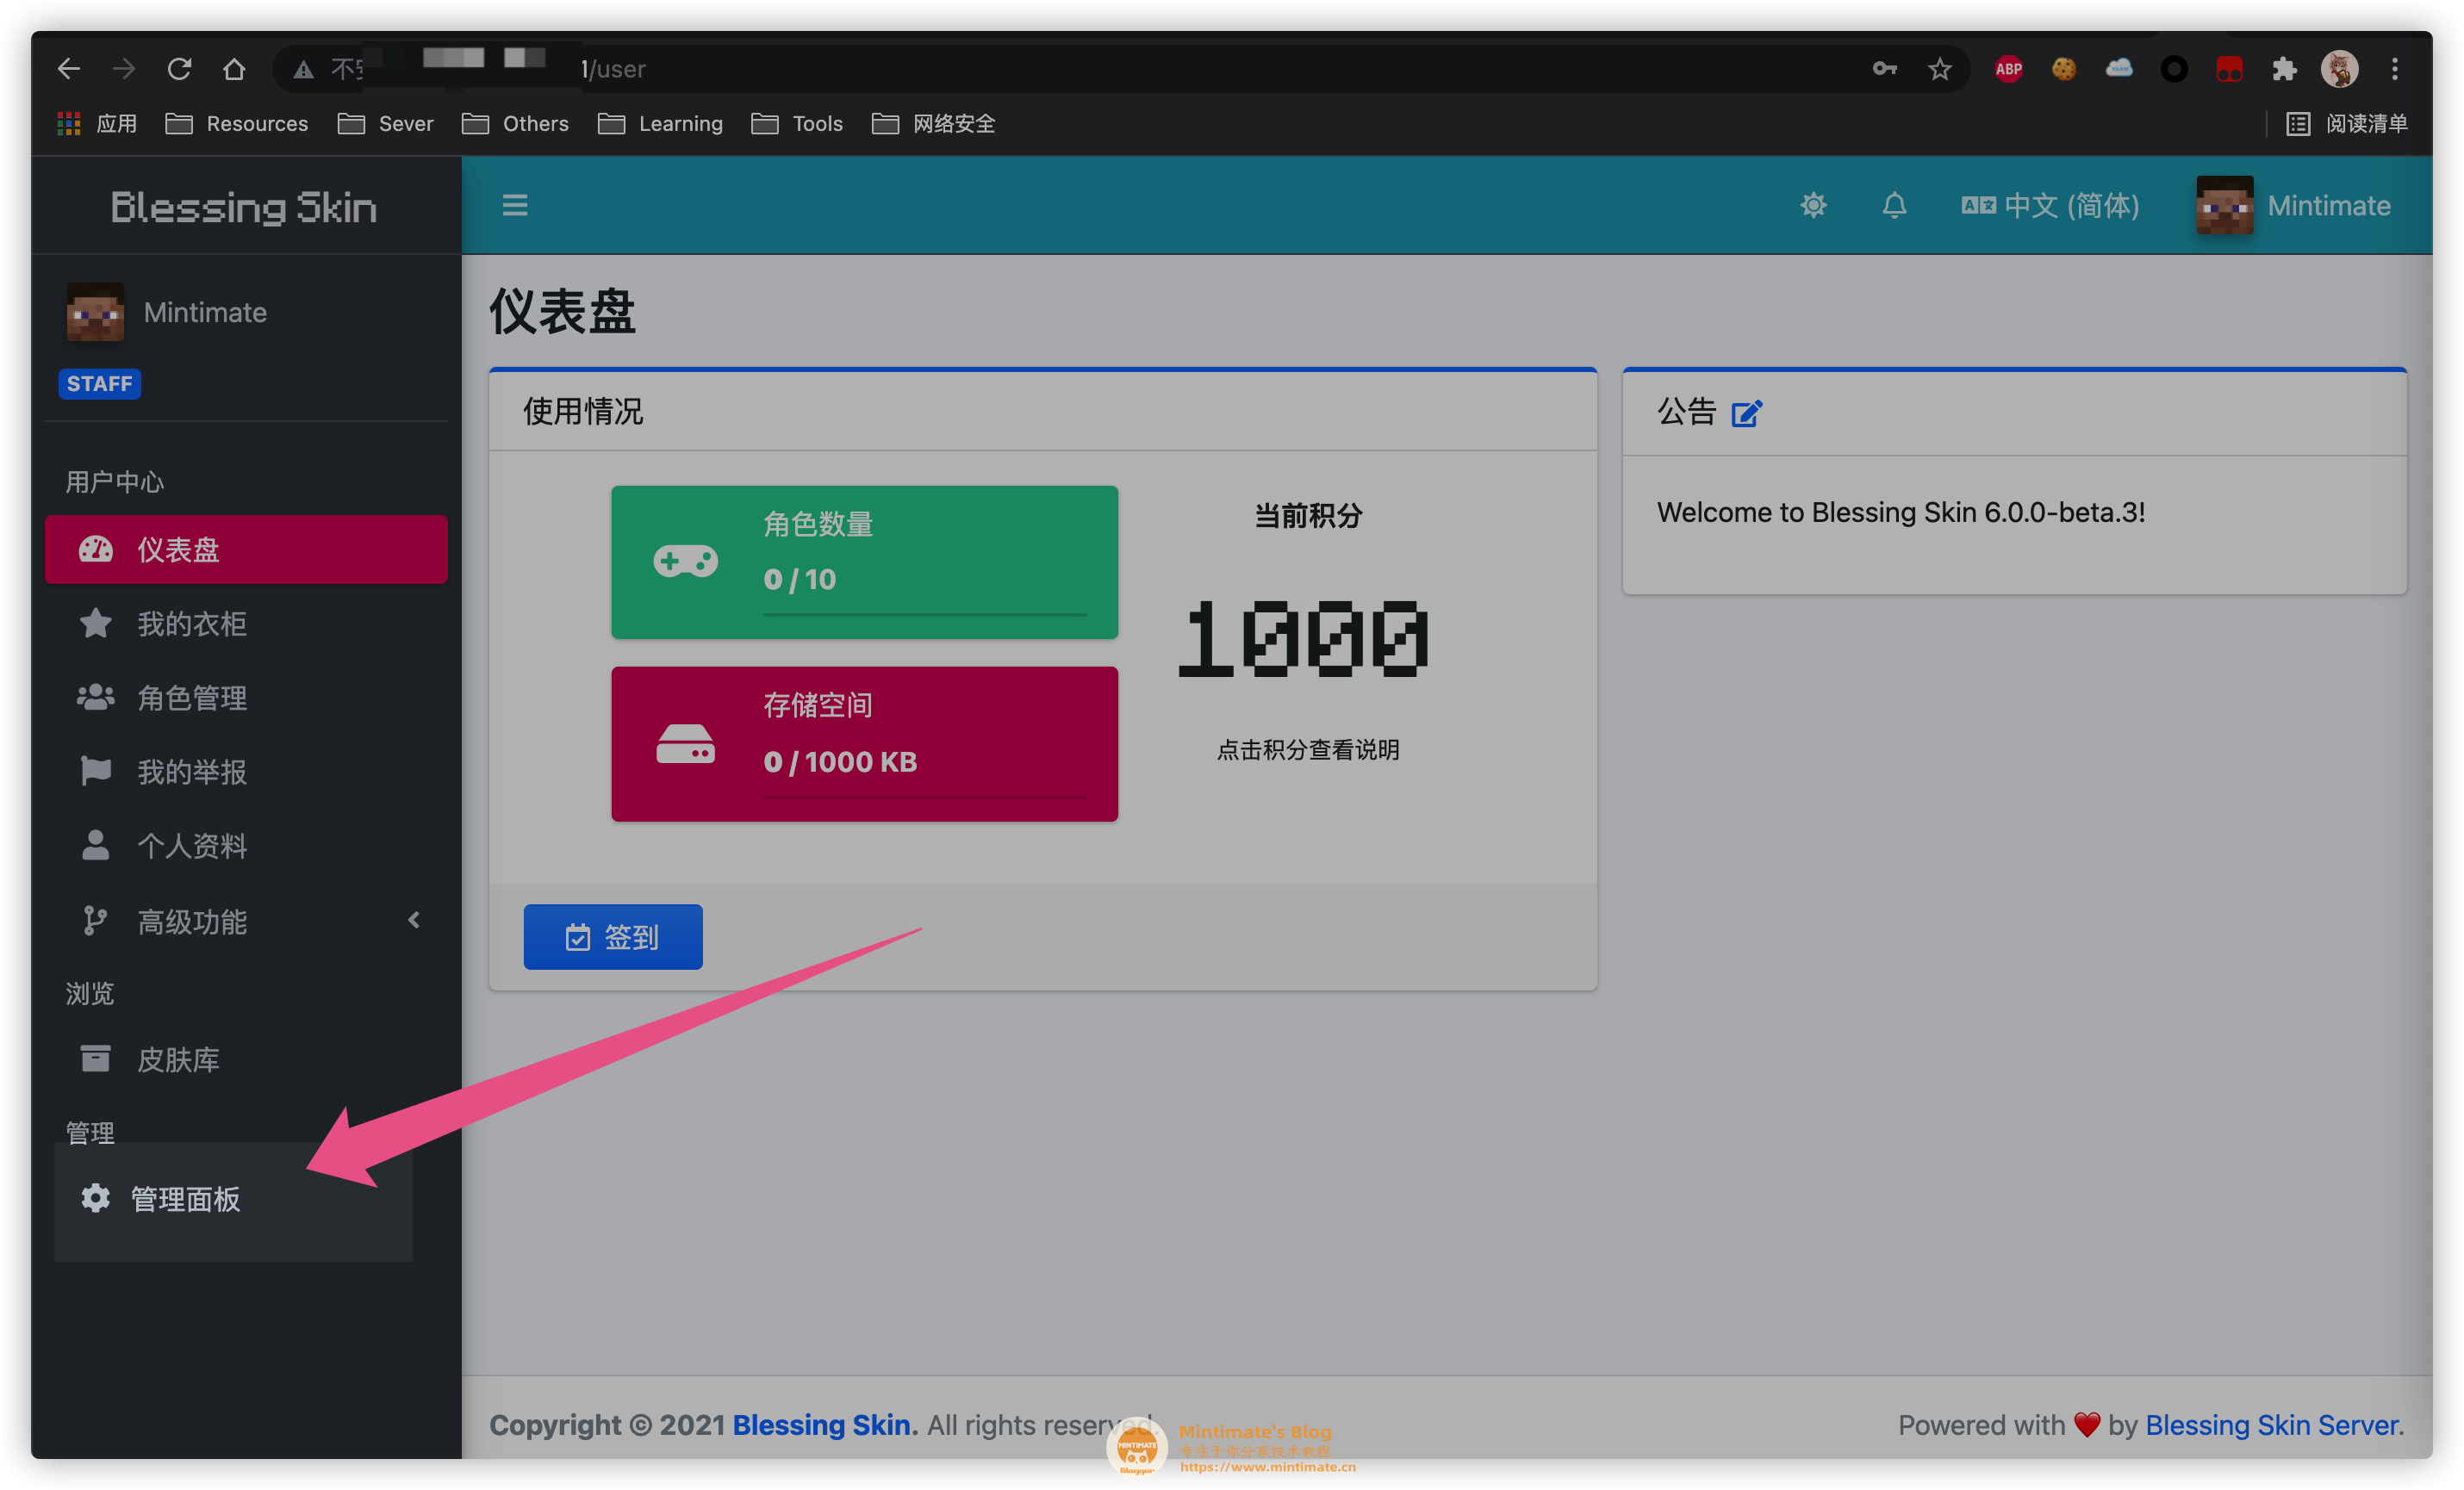
皮肤站上操作
首先,我们需要配置我们的皮肤站(其实,说是皮肤站,倒像是个百宝箱),之后选择管理面板:
进入 管理面板后,选择插件市场(这里有好几页,大家翻一下……):
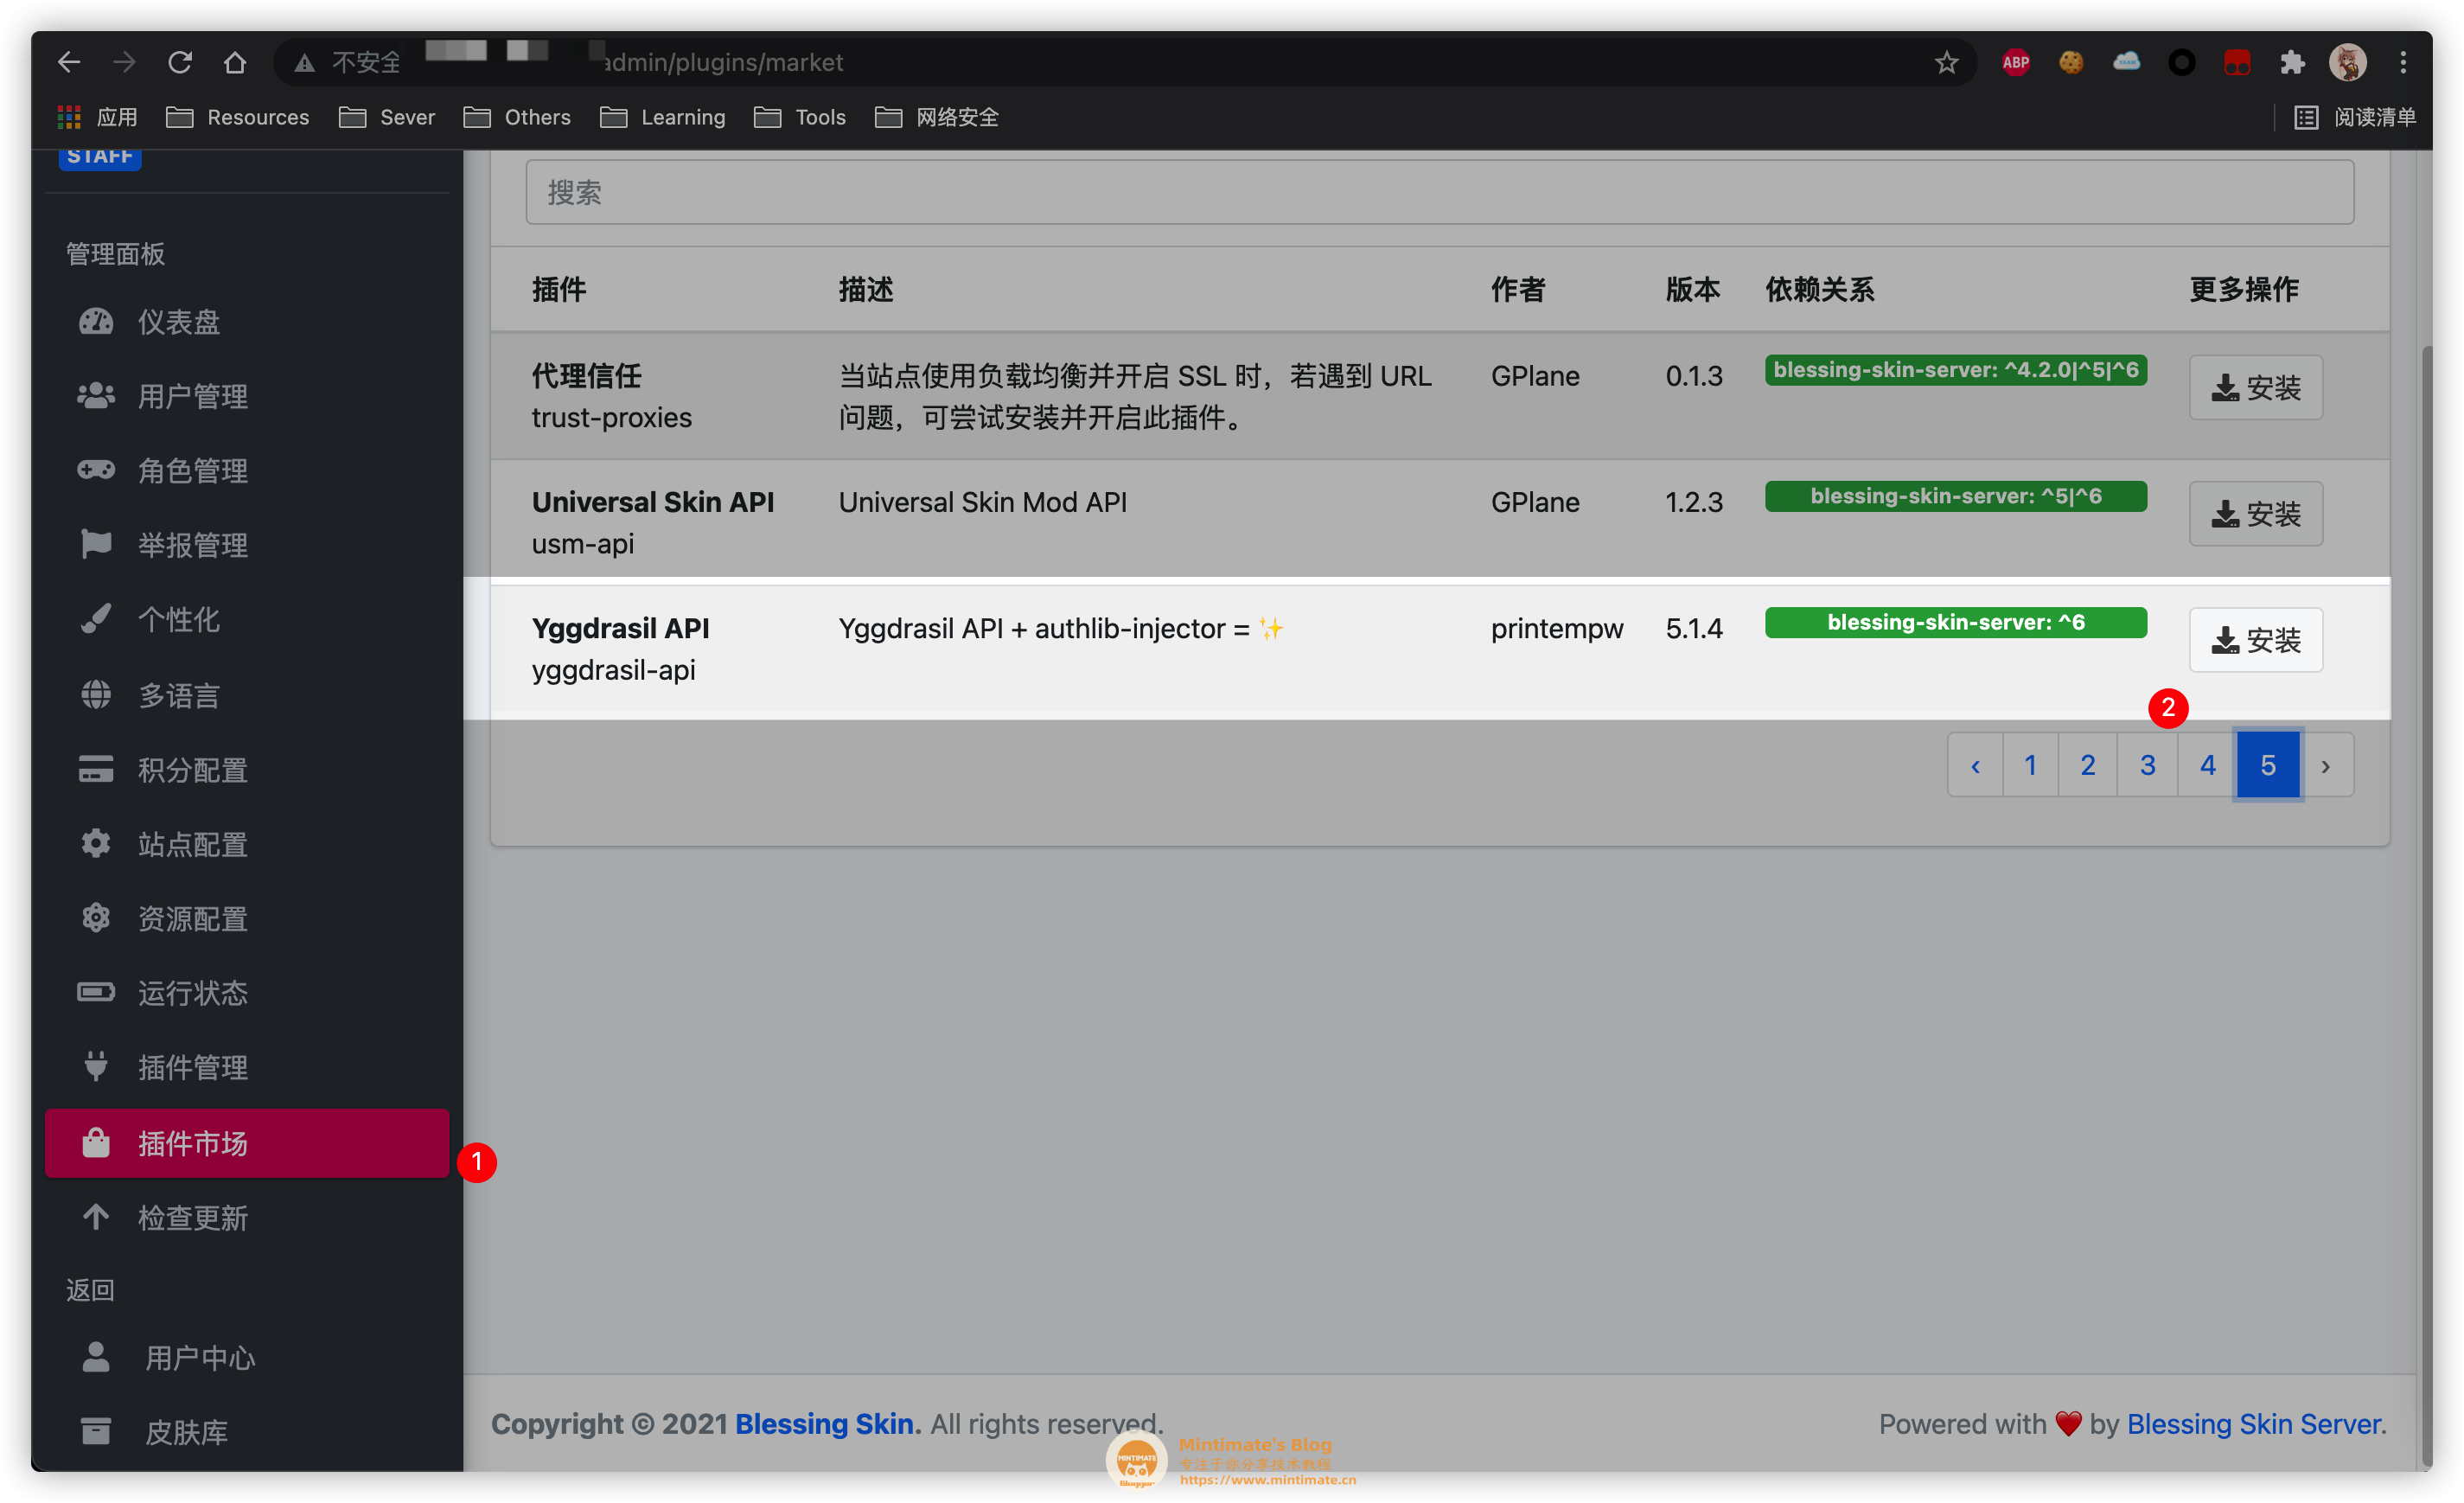
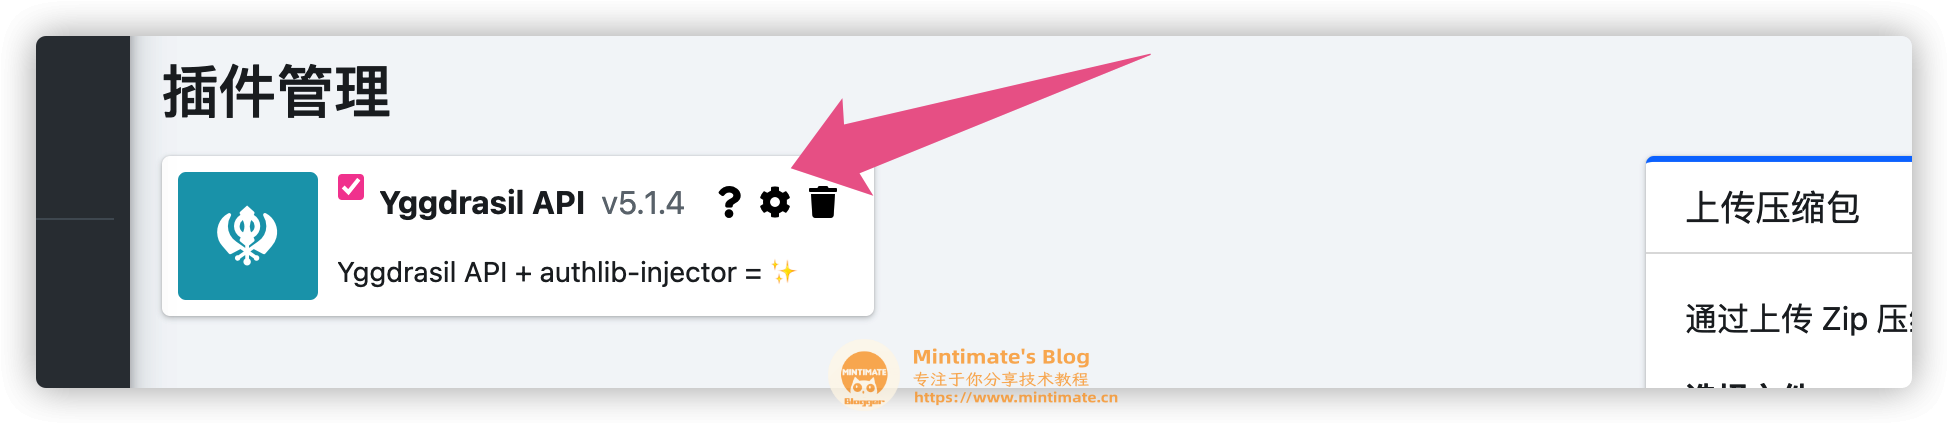
安装好插件后,我们进入插件管理,勾选插件:
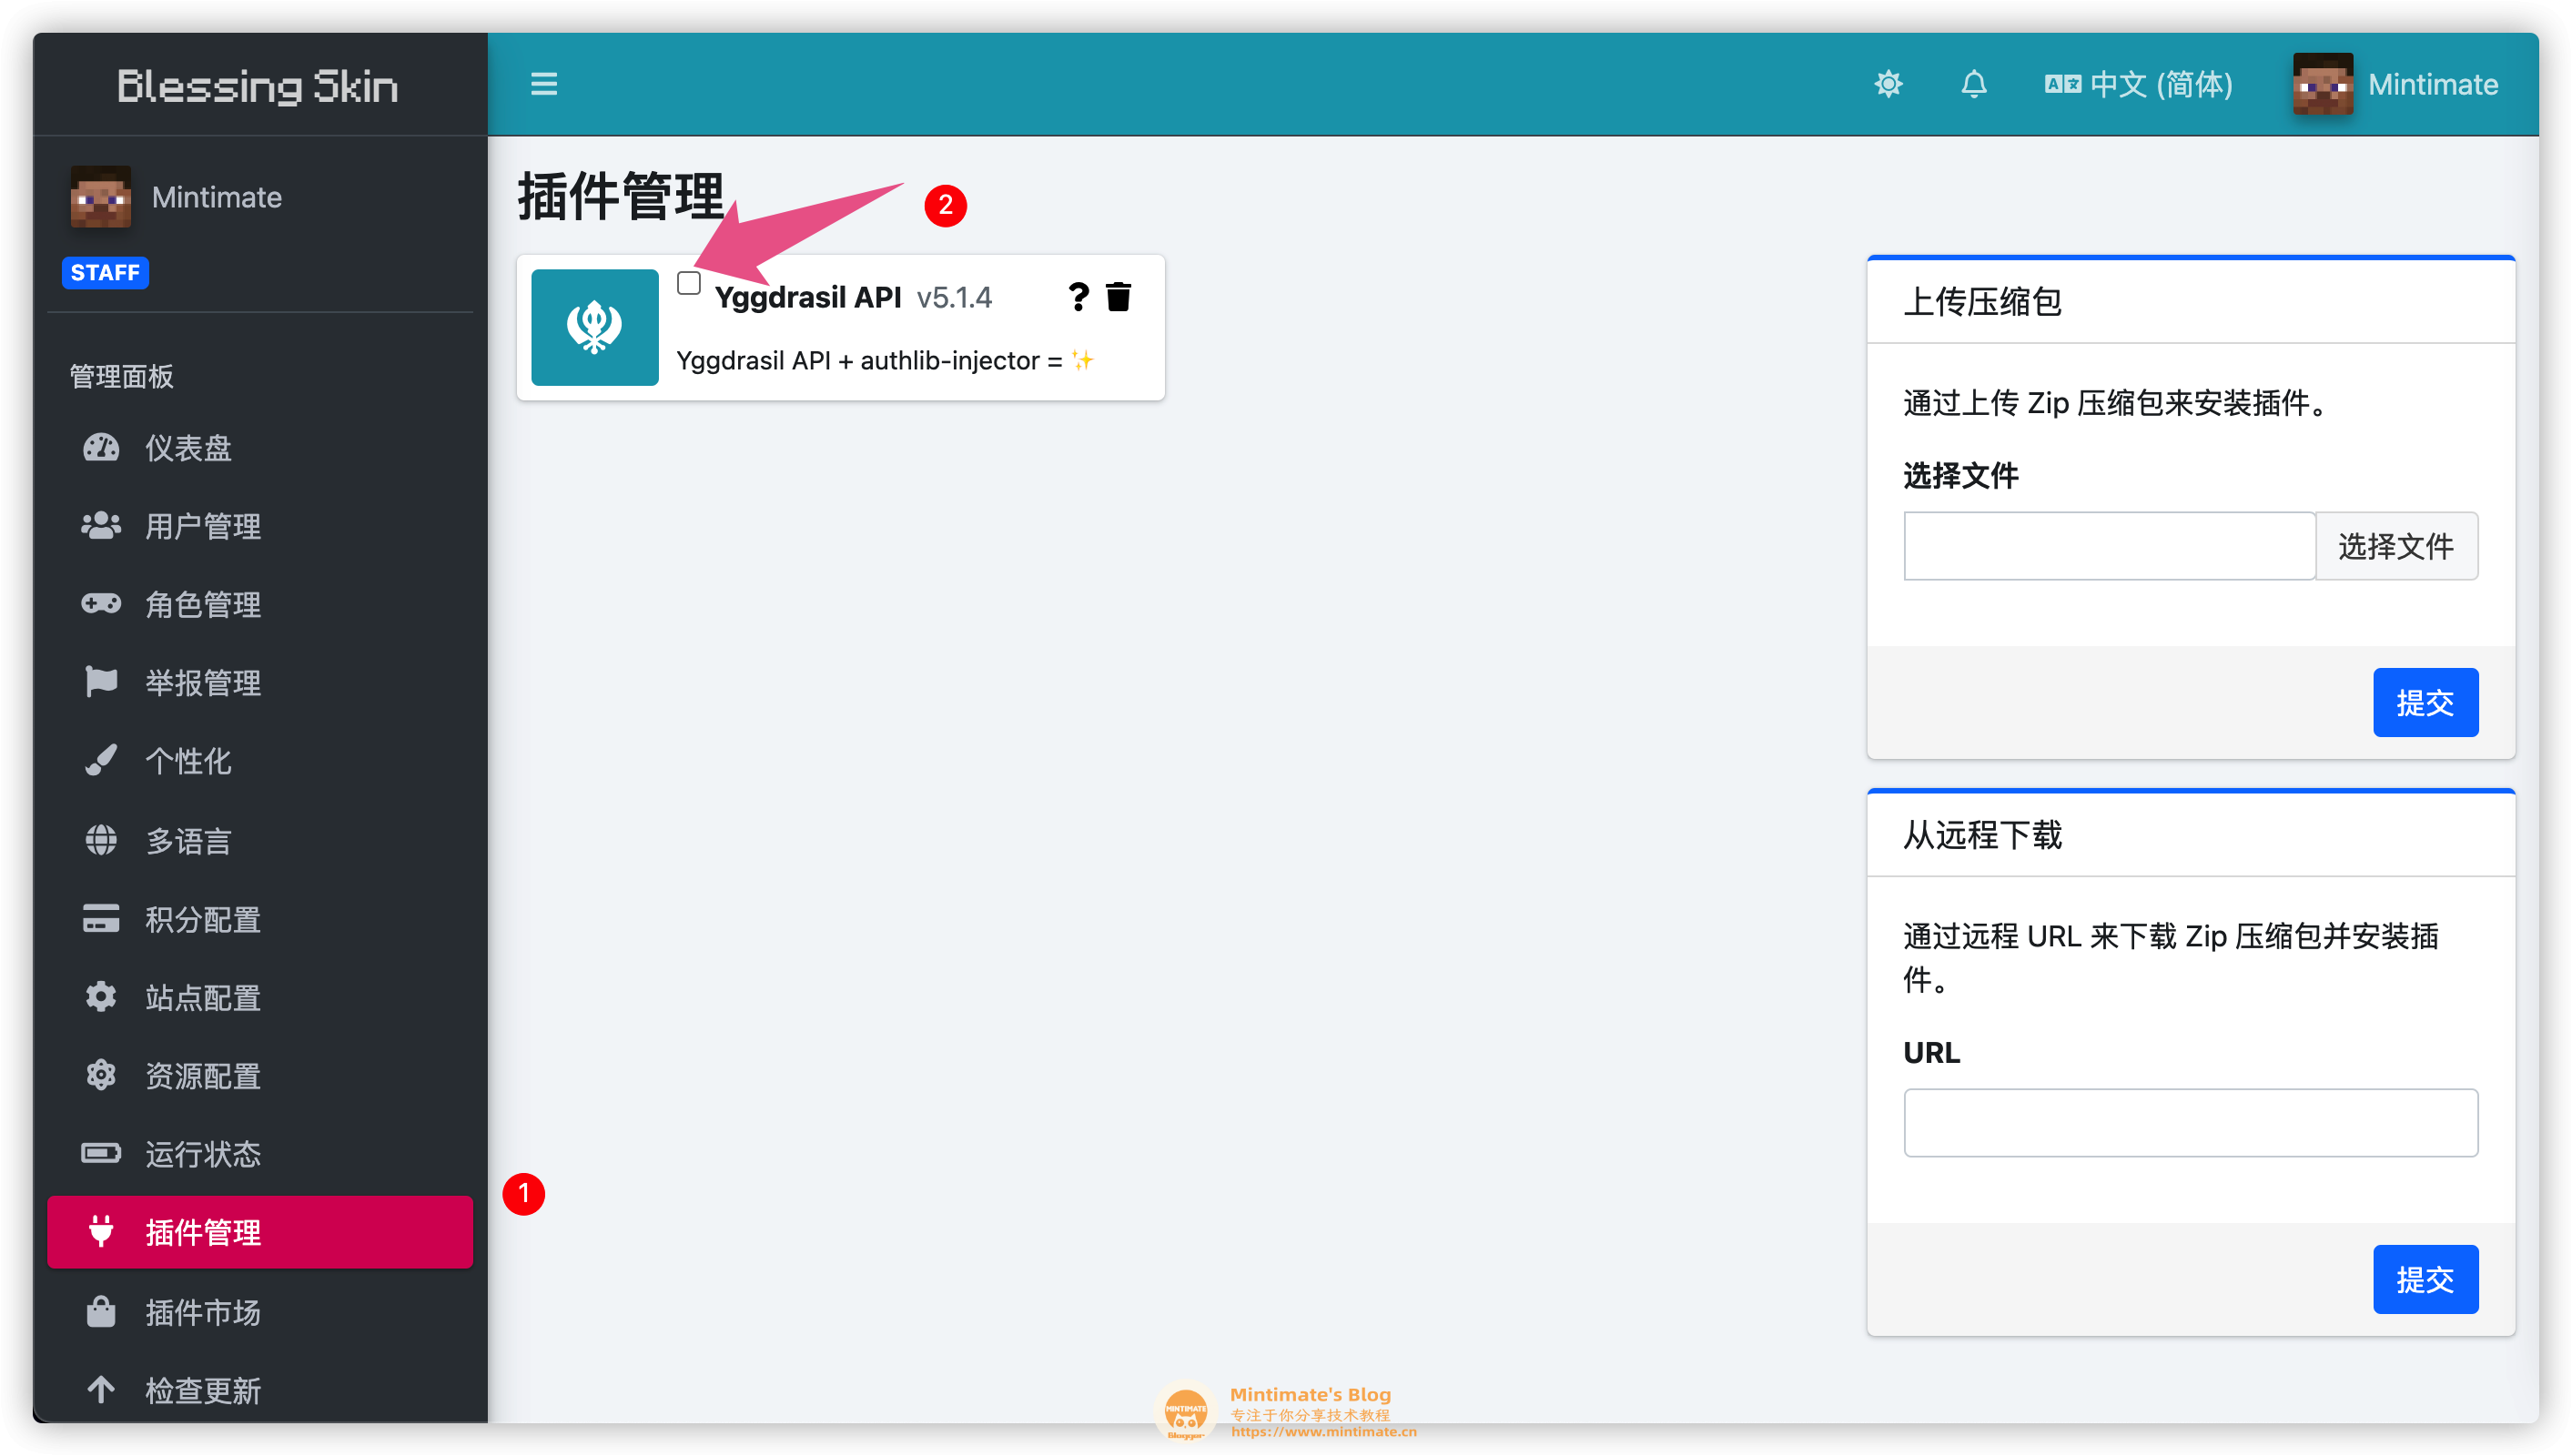
之后,会出现小齿轮⚙️,我们 点击就可以进入这个插件的管理面板:
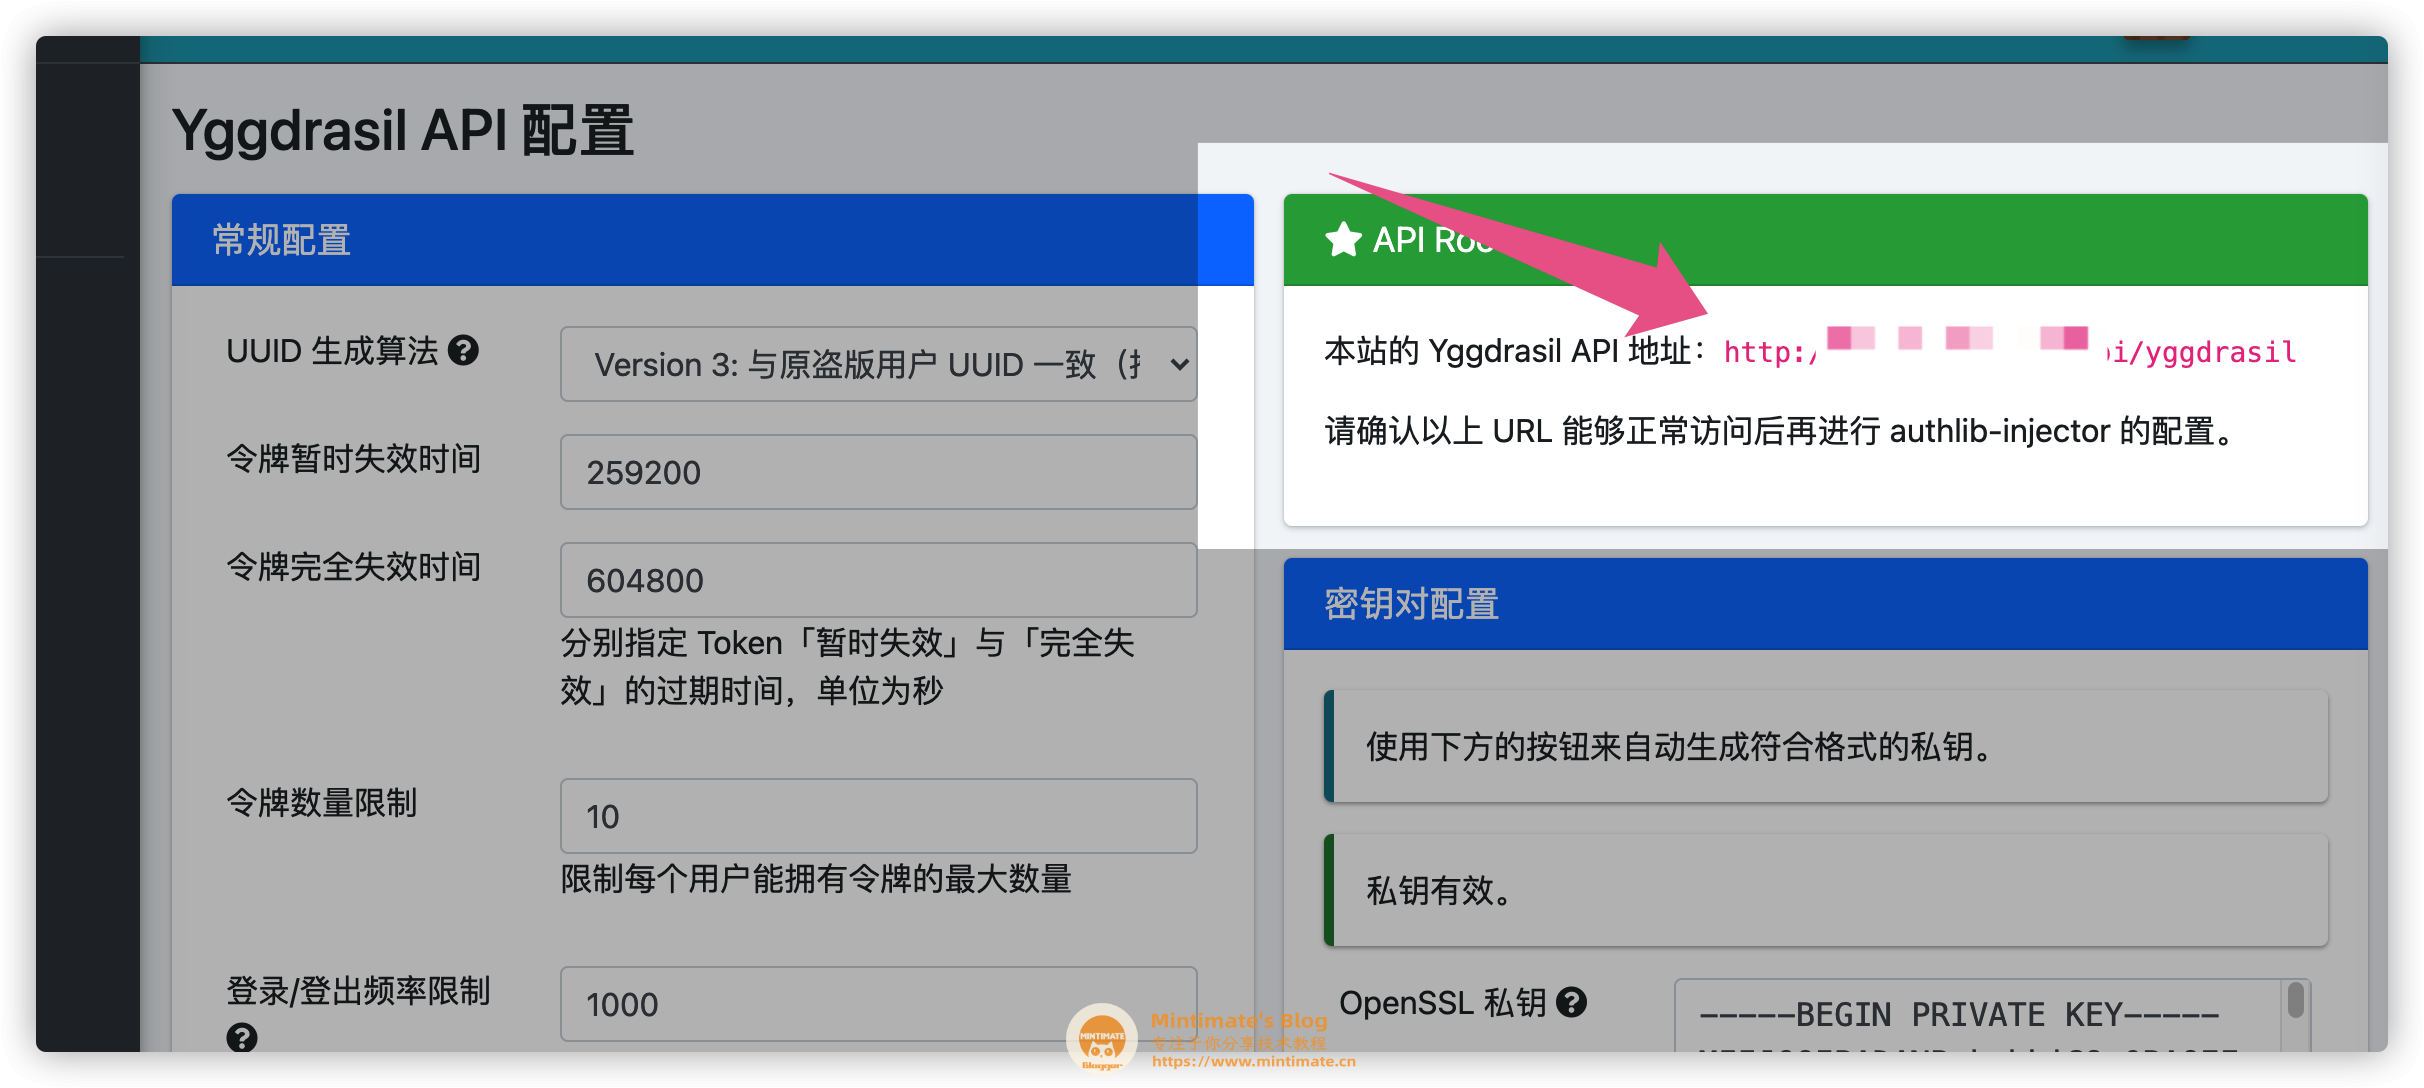
记住API Root中的Yggdrasil API地址,这个就是我们外置登录的验证地址:
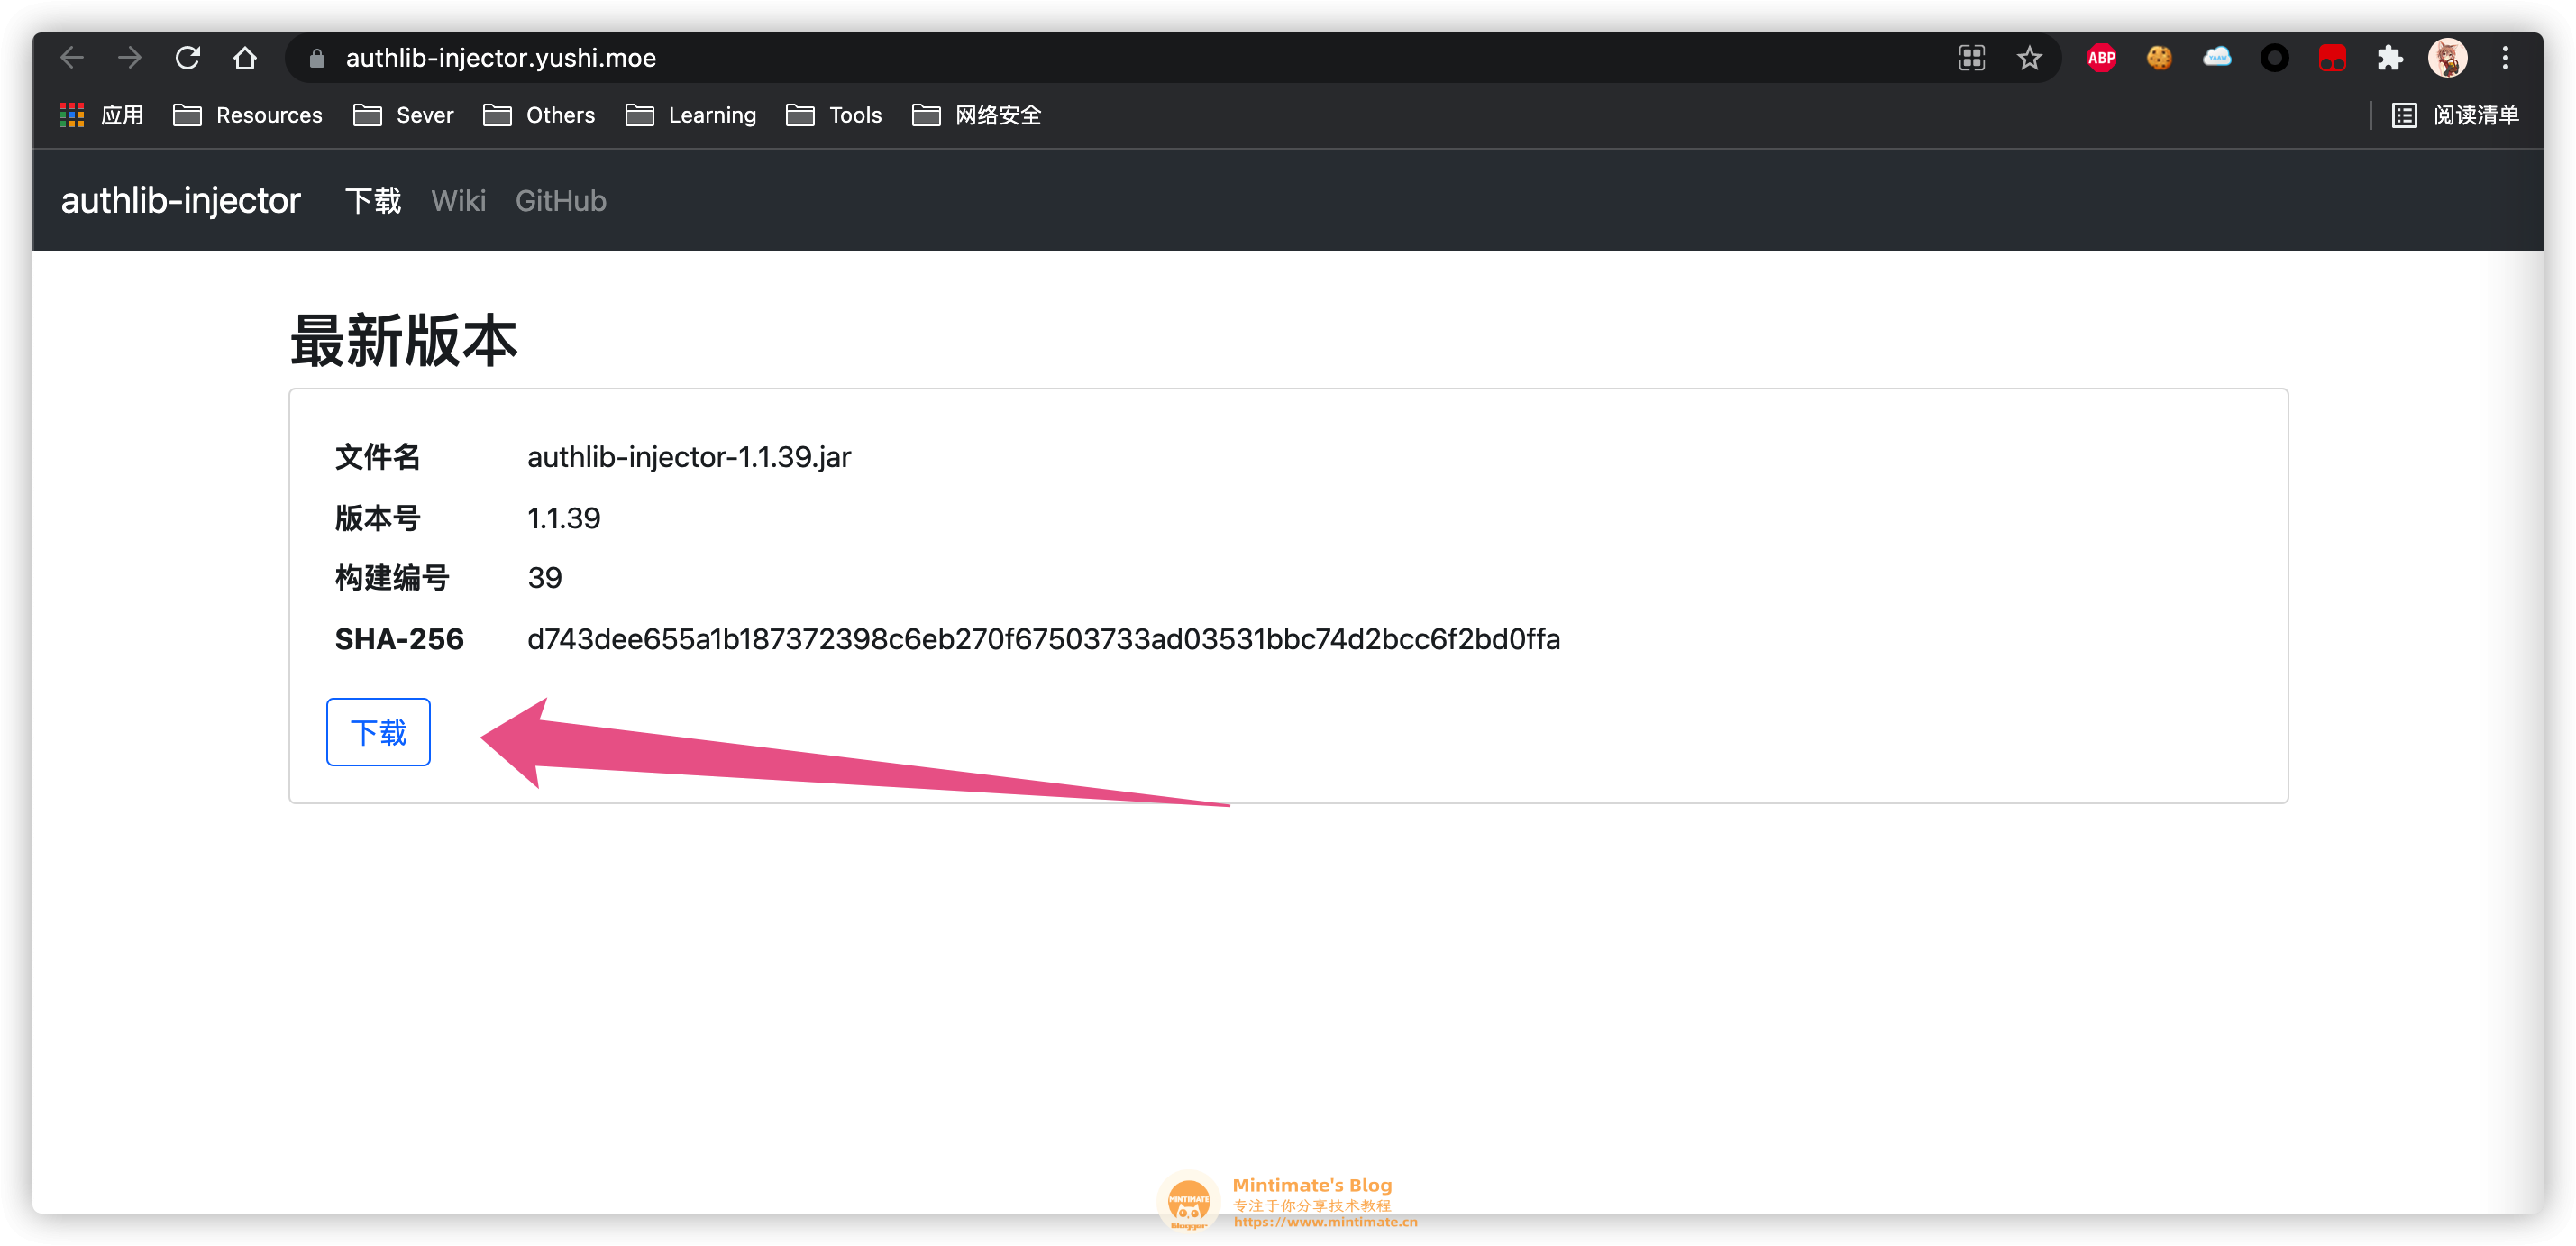
服务器上操作
其次,我们需要设置我们的 Java Minecraft服务器的启动命令,先下载最新版本的authlib-injector.jar,下载地址:
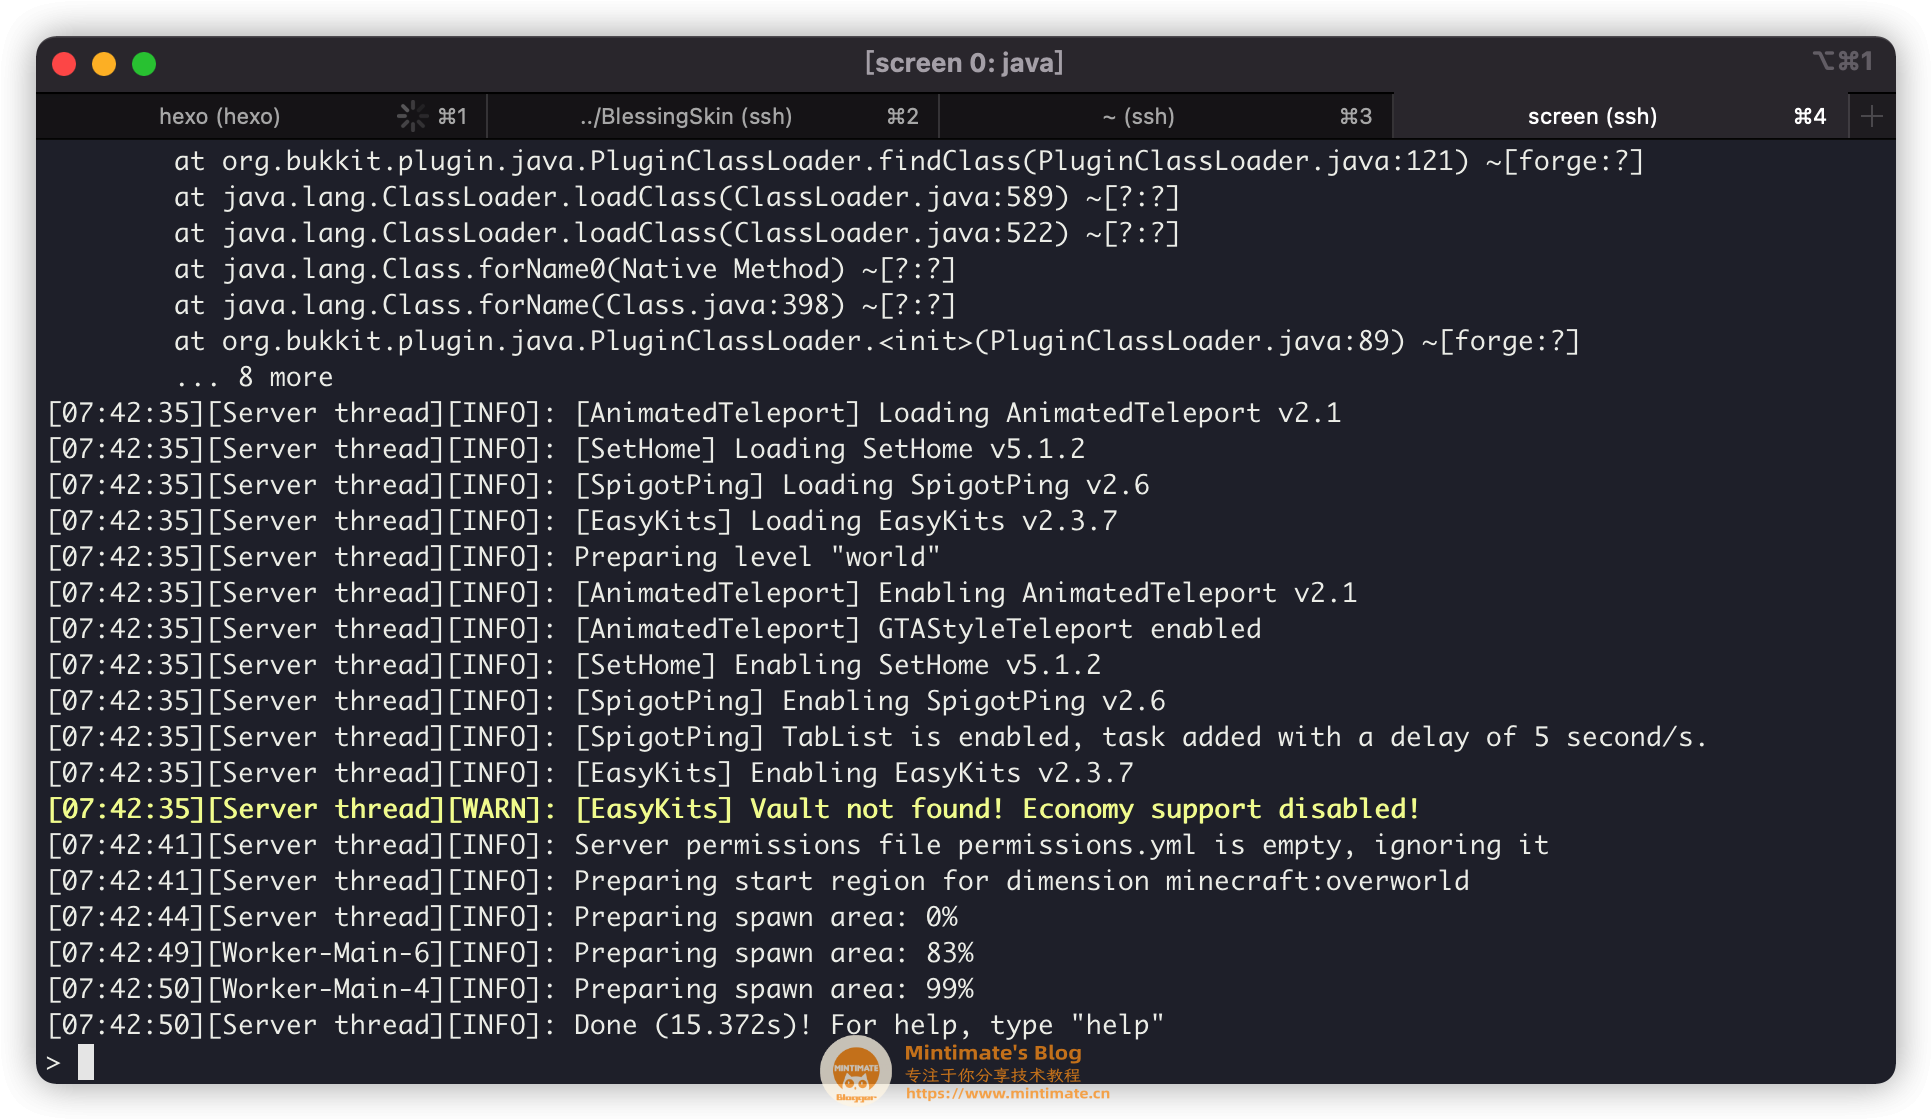
之后,我们回到我们Minecraft的启动界面,如果你之前的Minecraft服务器启动命令是:
1
| java -jar -Xms1024M -Xmx5120M LoliServer-1.16.5-89-server.jar
|
那么,加上authlib-injector验证就是:
1
| java -jar -Xms1024M -Xmx5120M -javaagent:authlib-injector-1.1.39.jar=http://URL LoliServer-1.16.5-89-server.jar
|
其中:
服务器也是可以正常启动的:
接下来,我们到客户端上,就可以使用外置登录了。
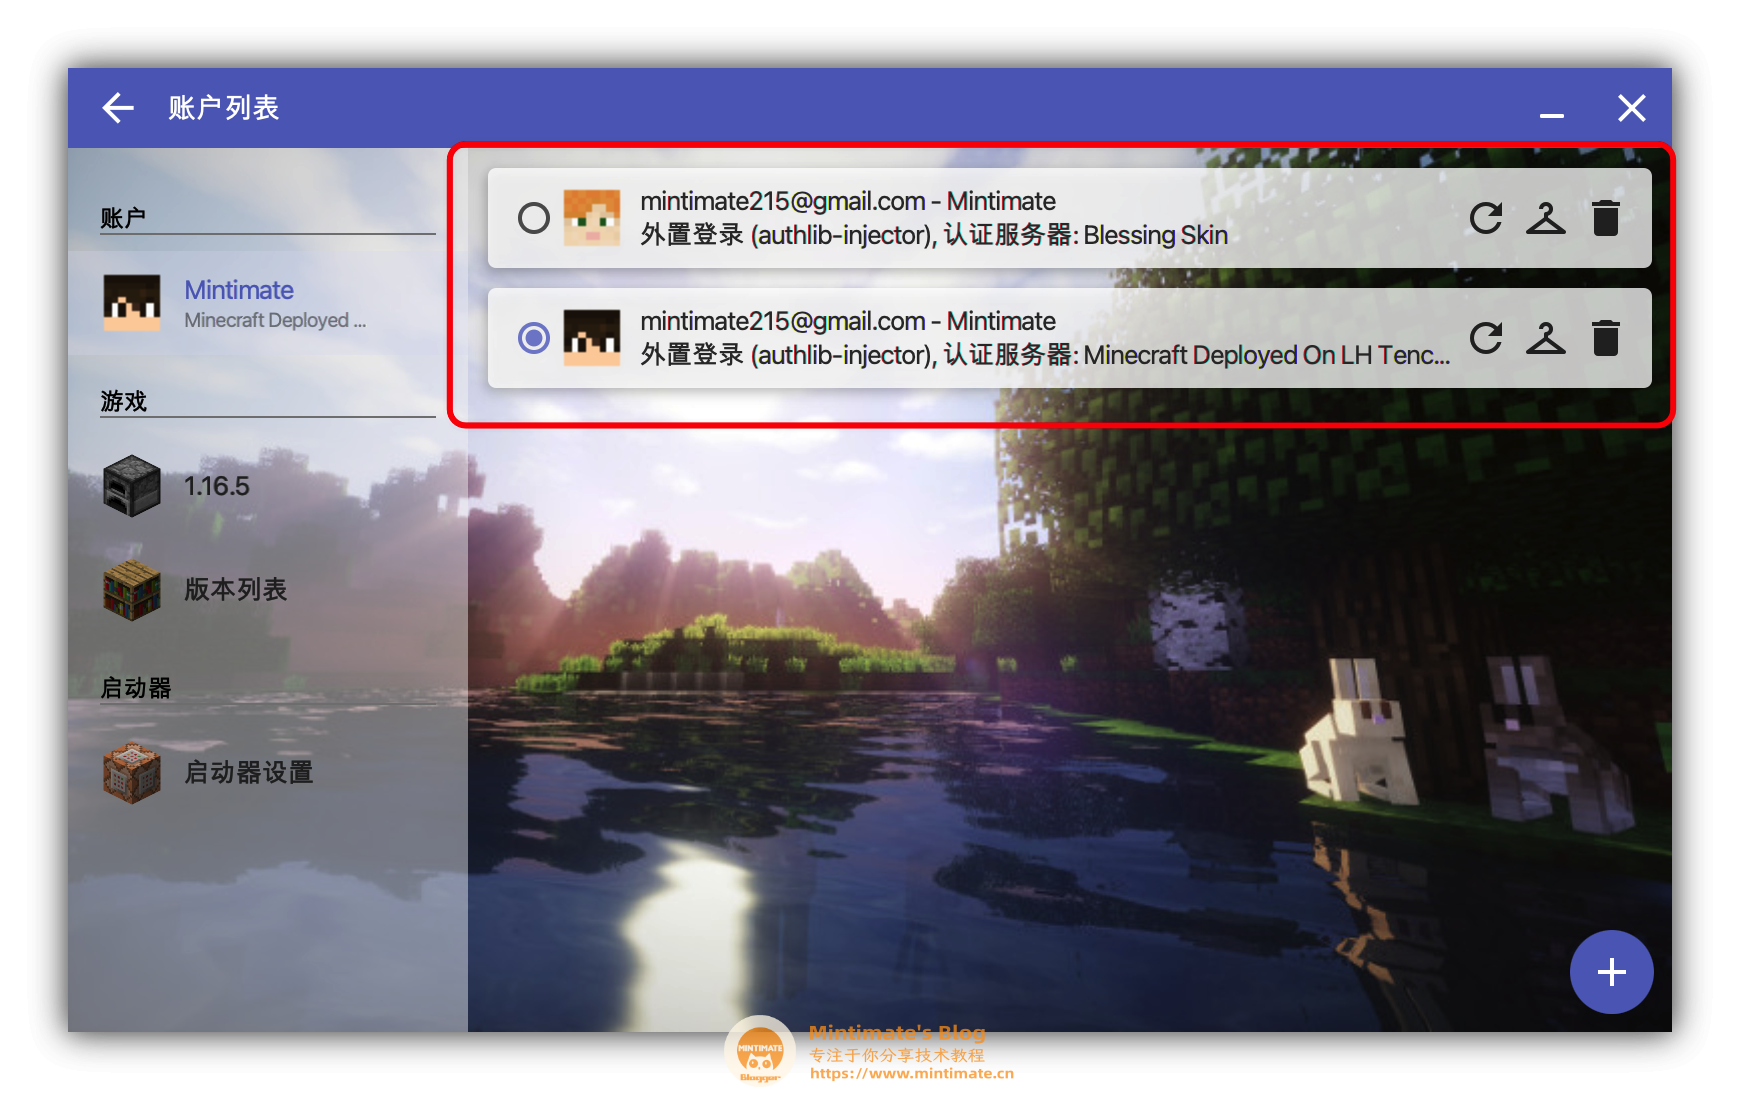
客户端上操作
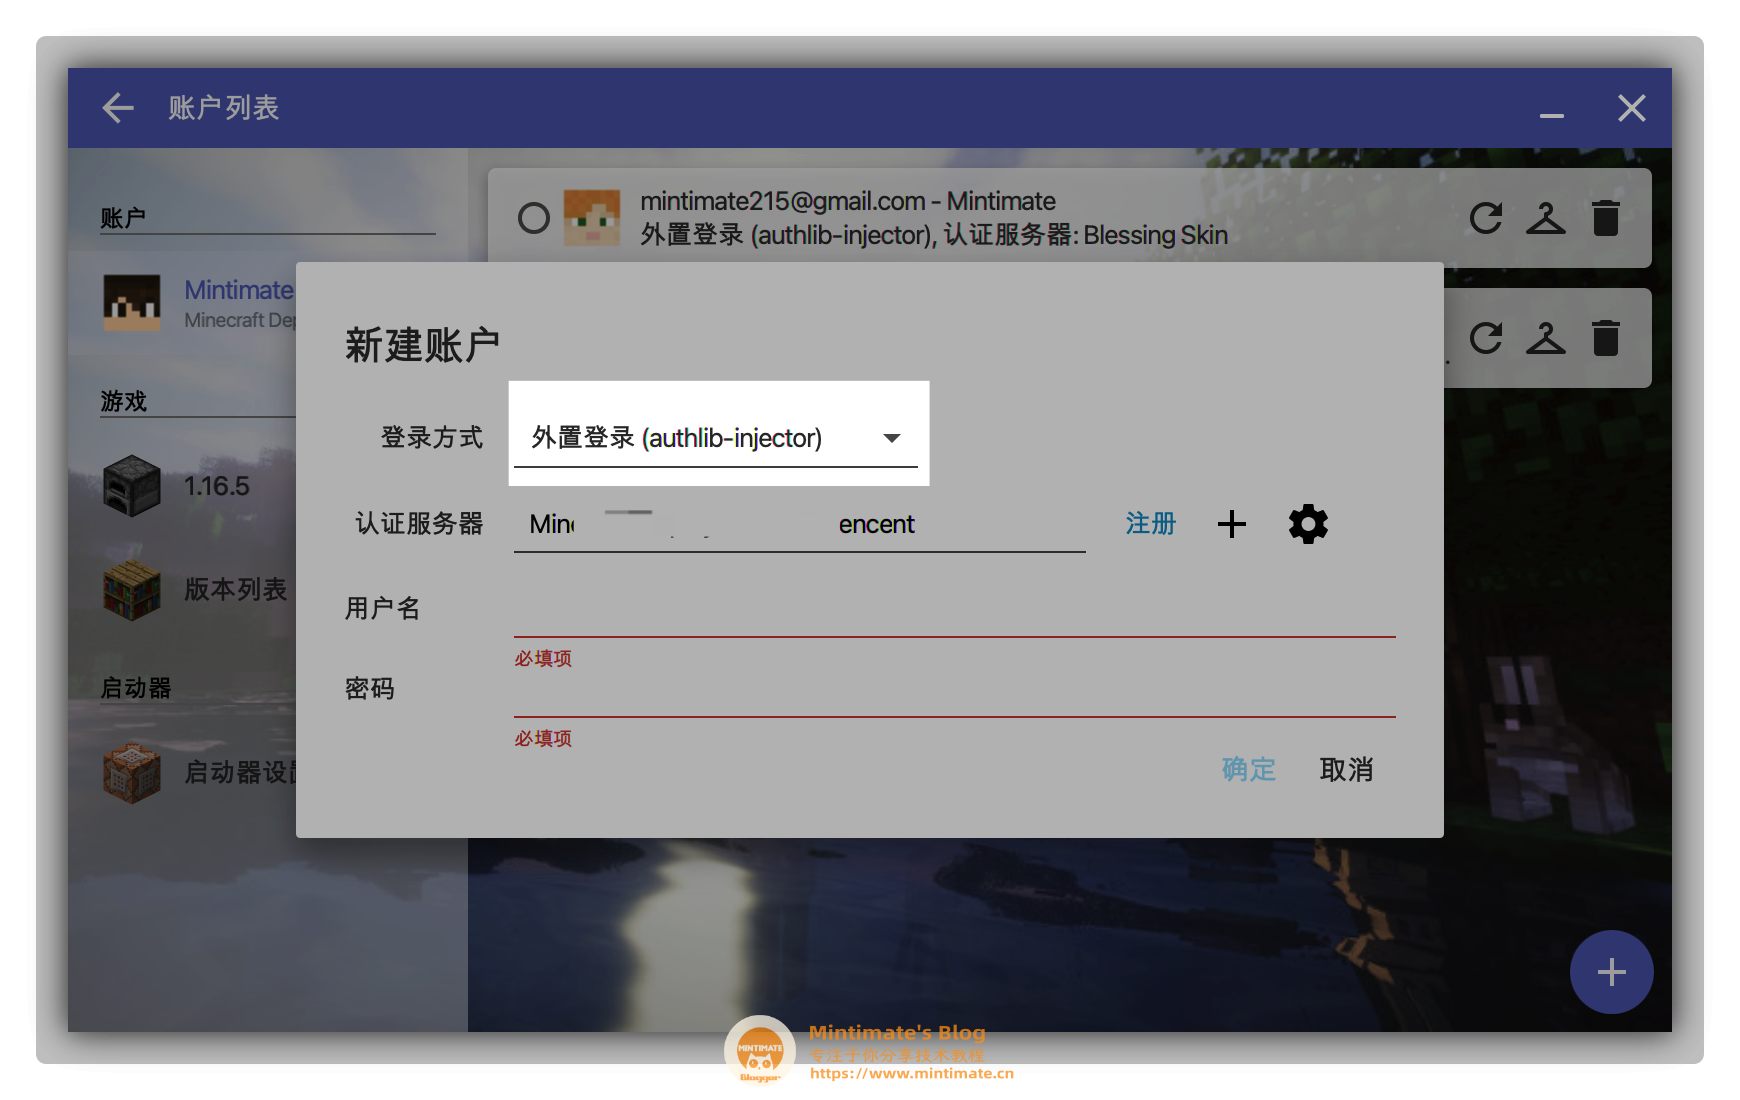
最后,我们到客户单上设置,以HCML为例,我们打开HMCL后,在登录里选择外置登录:
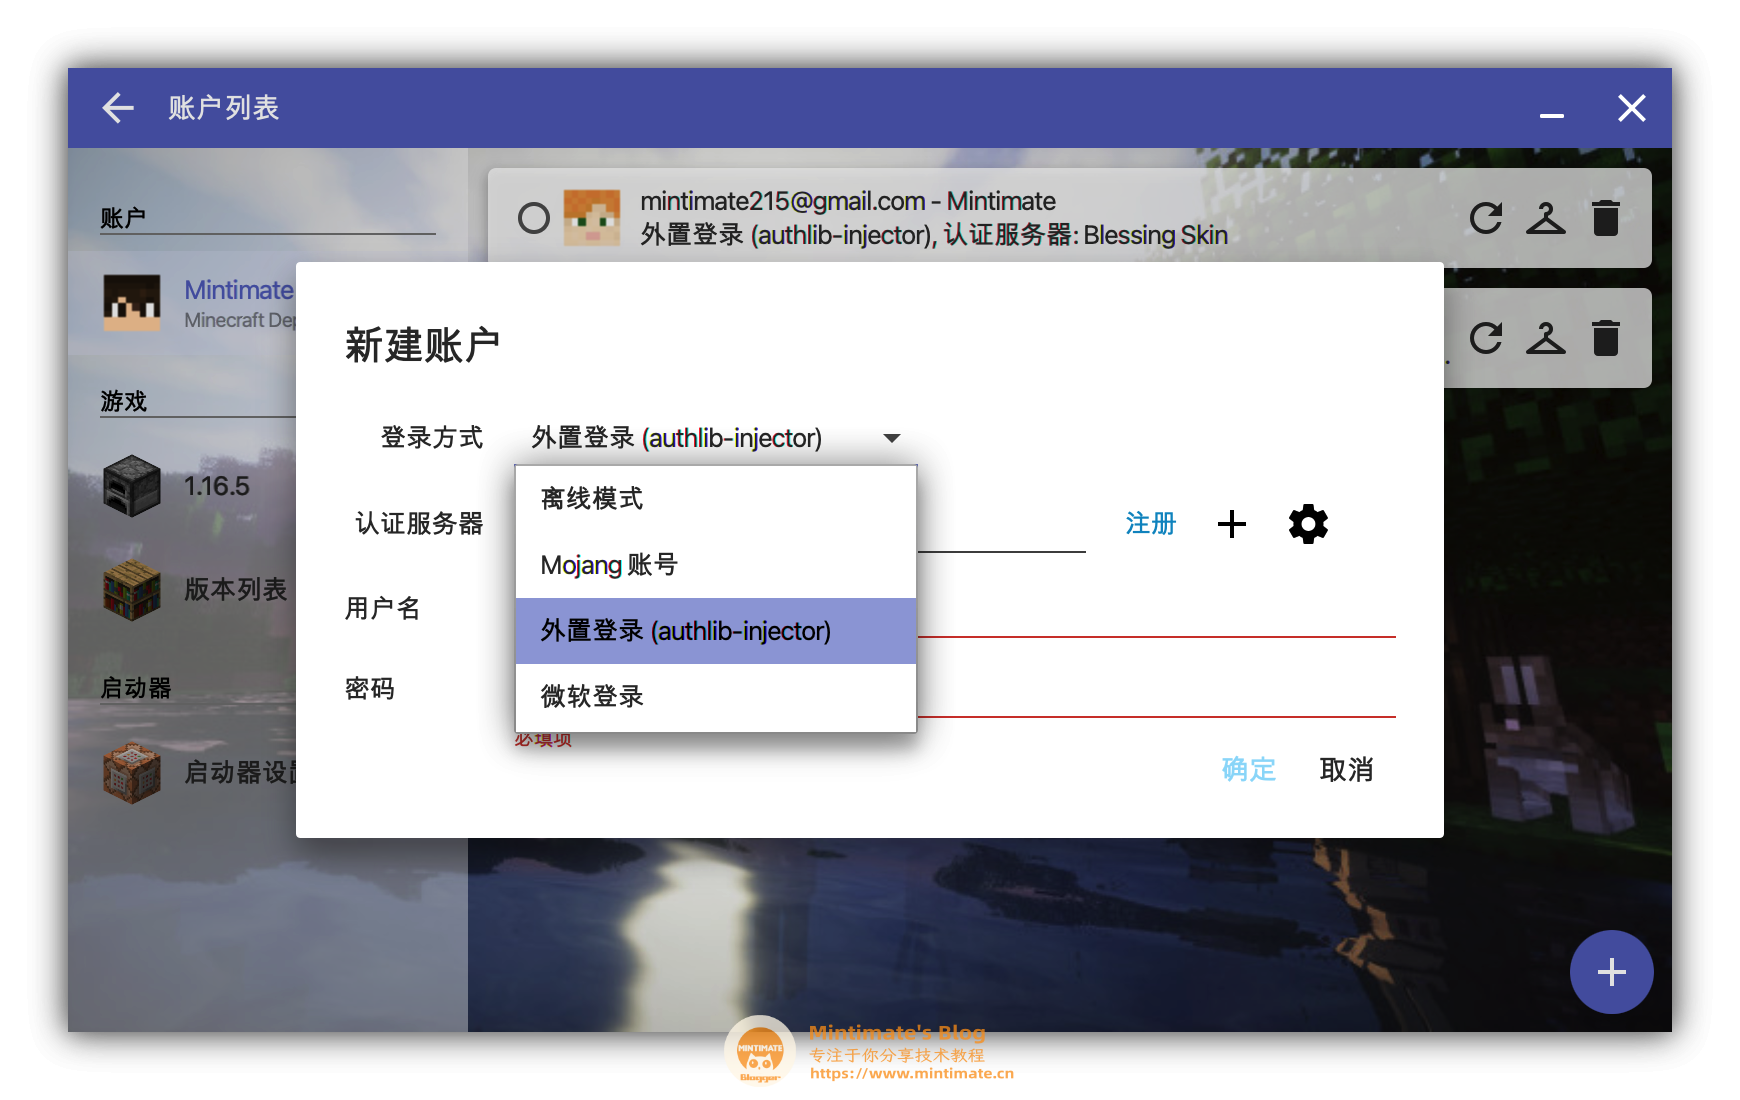
添加的内容:
- 验证服务器:我们的
Yggdrasil API地址
- 用户名:我们自己皮肤站上注册的用户
- 密码:我们自己皮肤站上……
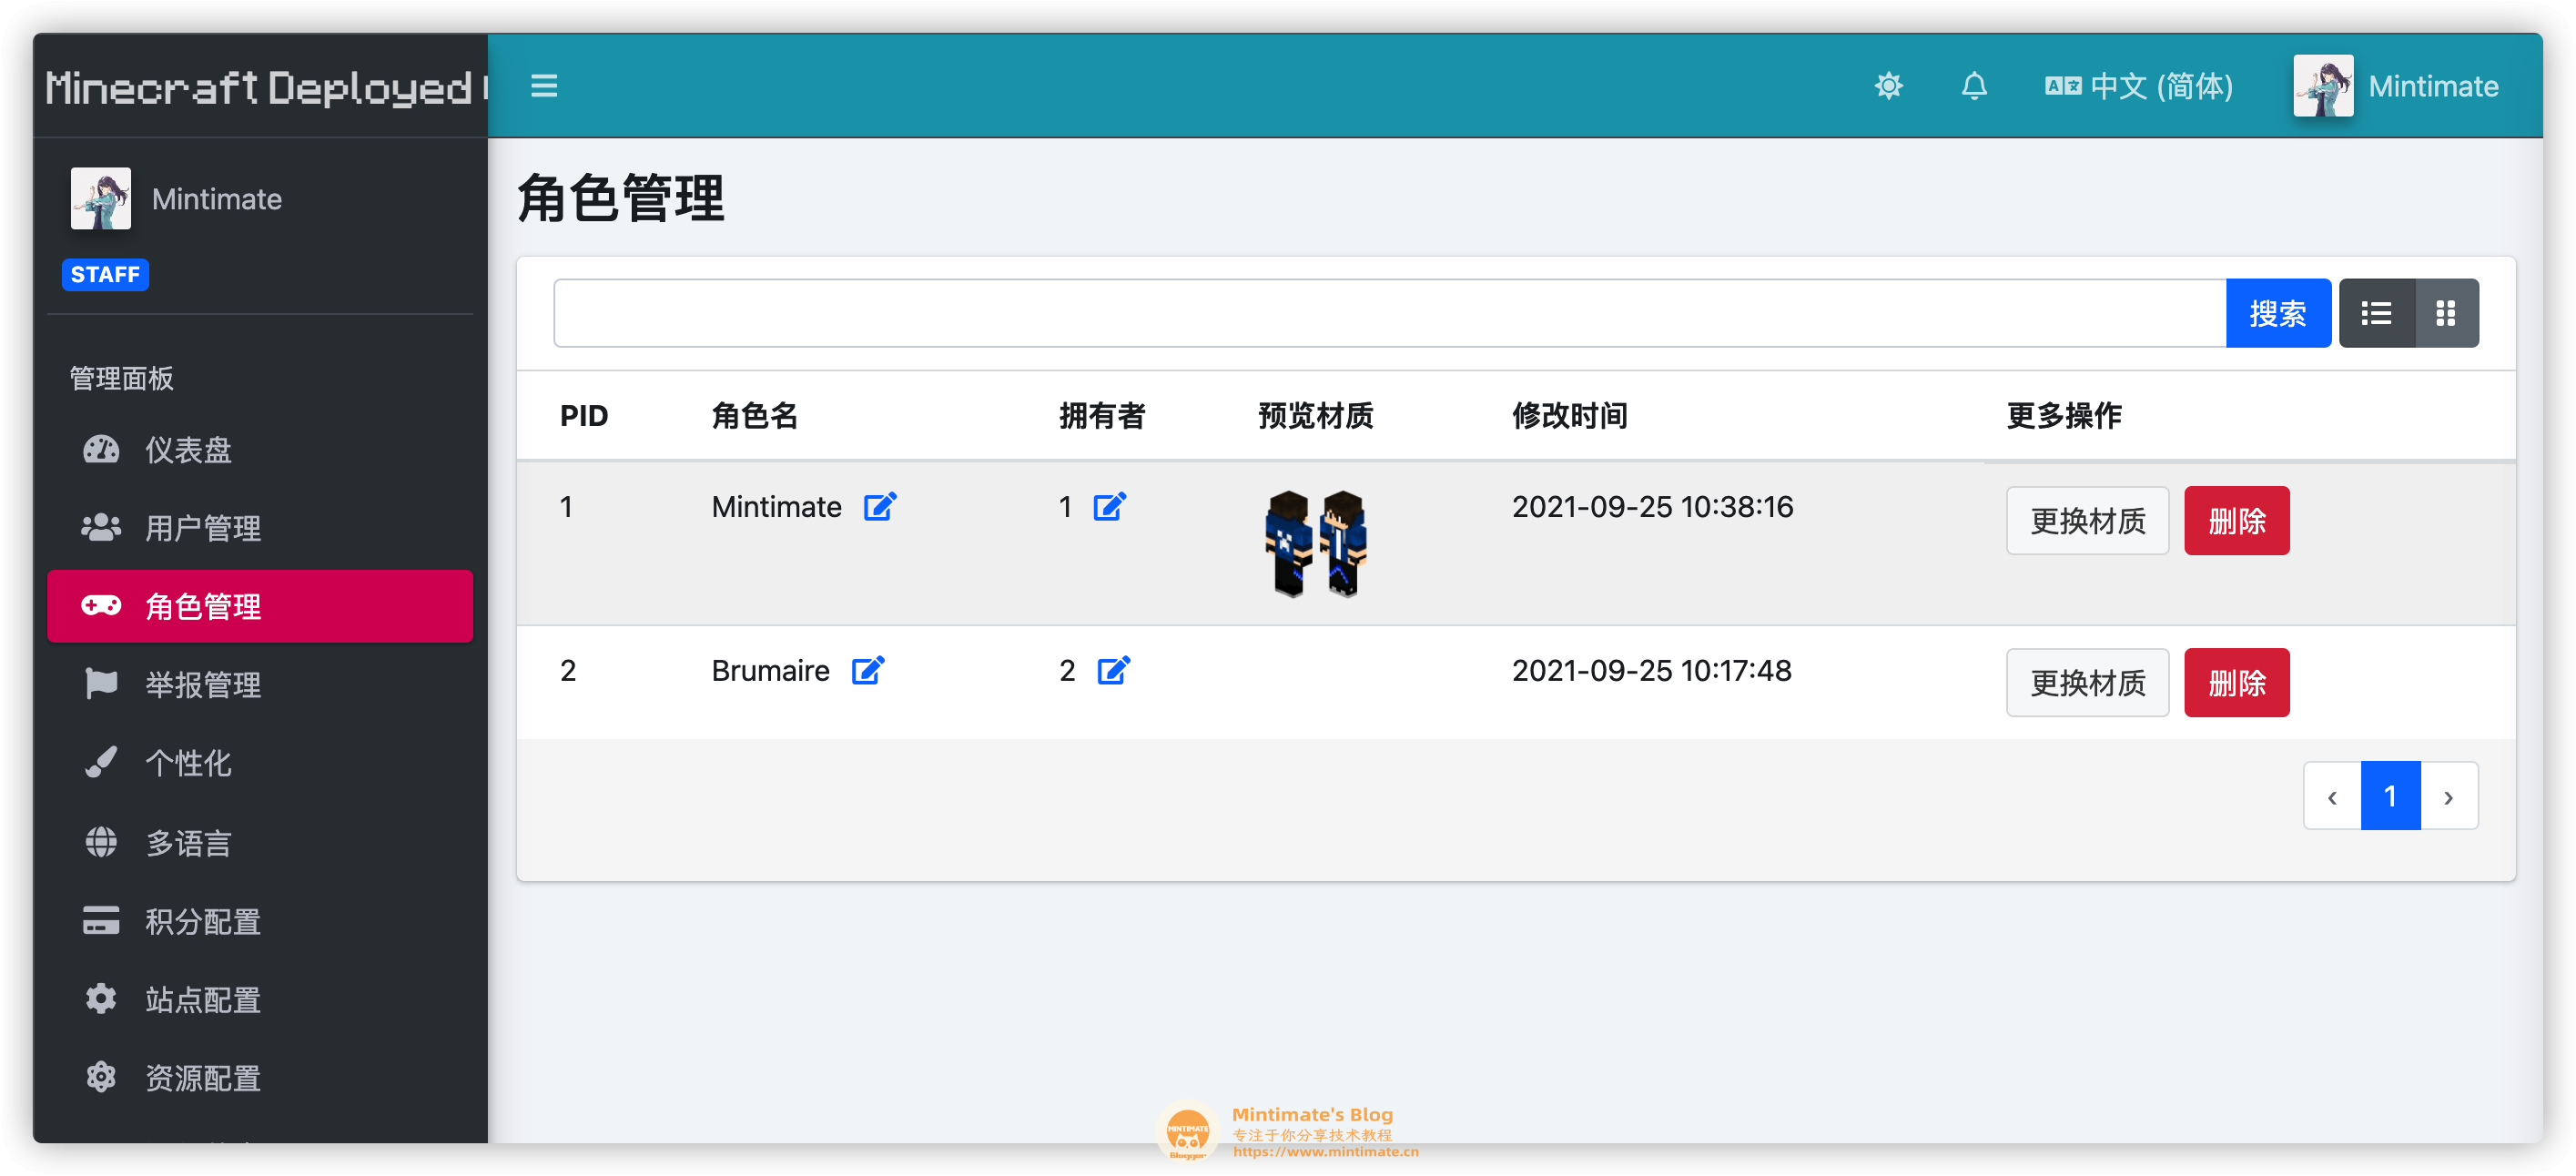
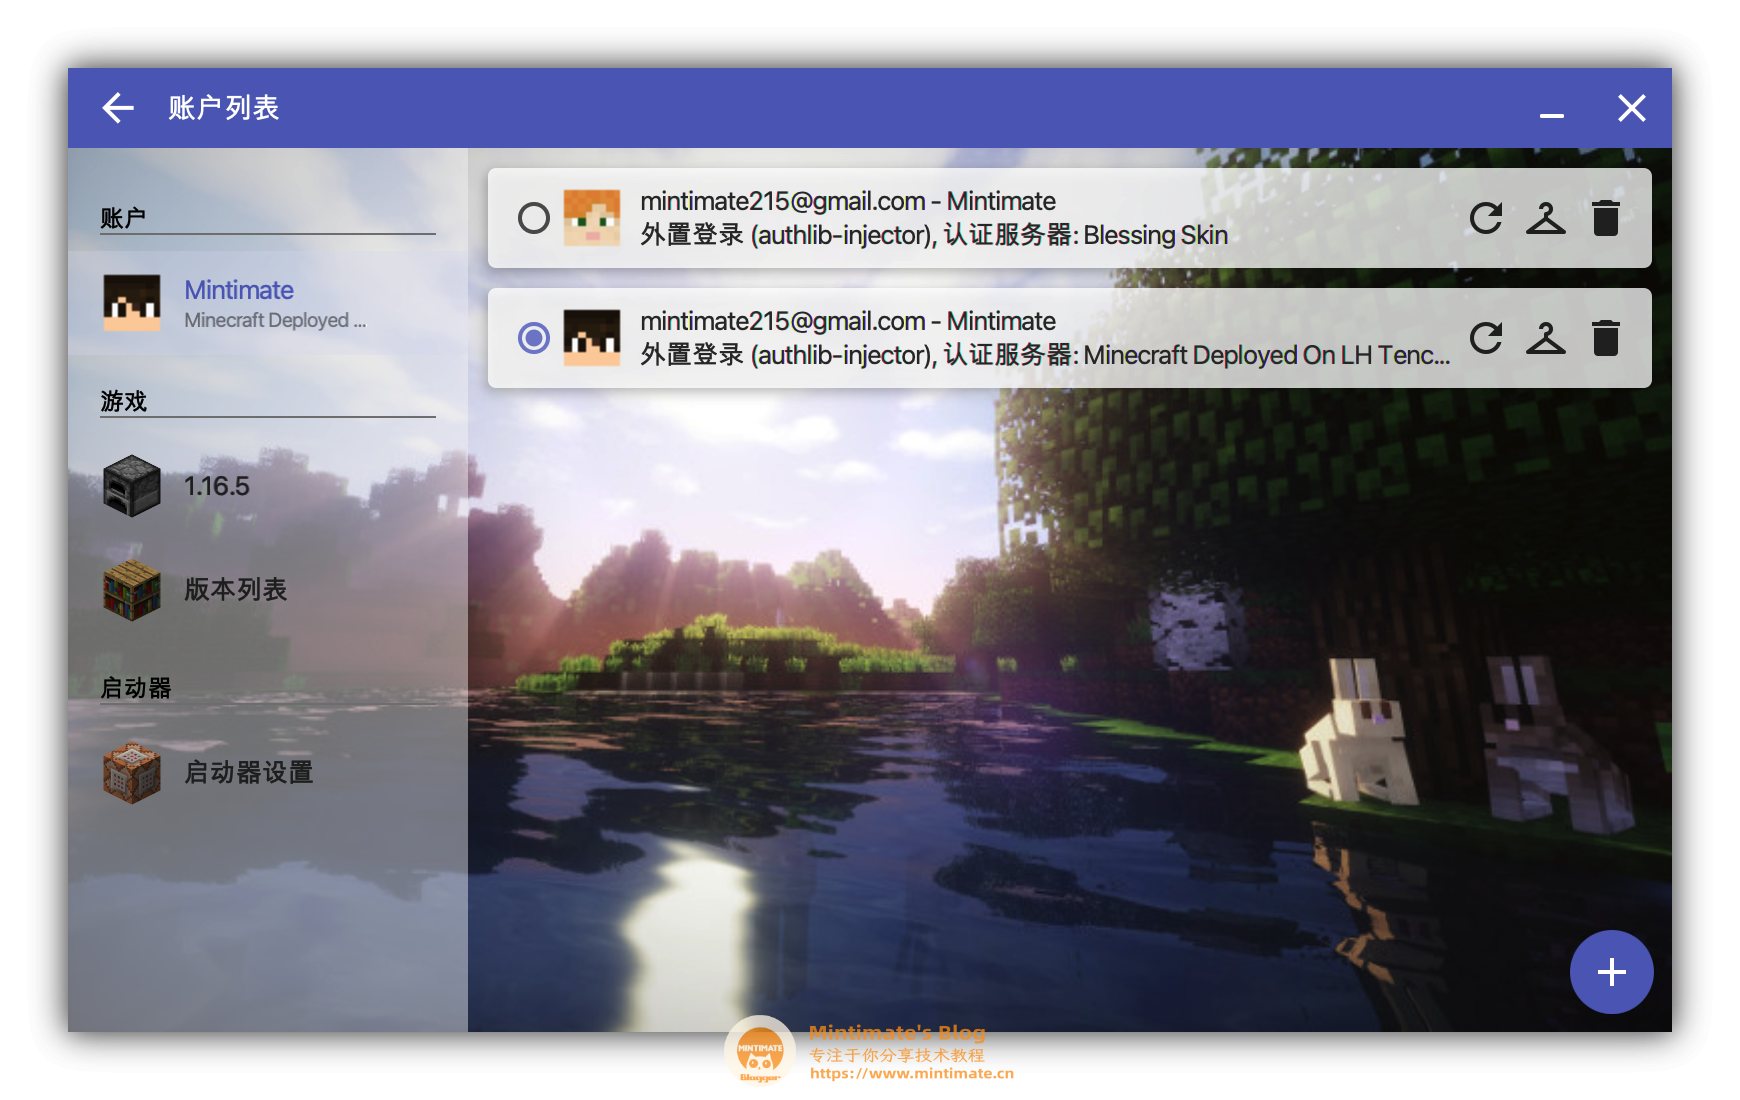
这样,就可以看见自己的角色了(皮肤站上,事先要创建一个角色嗷):
END
嘿嘿,有多少人看到最后了呢?
最后,如果你还有什么不懂的地方,又不想百度的话。可以让我们远程帮忙嗷,但是有条件嗷,我们一般只辅助一下人群:
- 使用我们推广链接买的腾讯云轻量应用服务器。
- 请我们喝奶茶或咖啡的用户。
我们也不知道,这样做冷门教程并用爱发电能持续多久……好在,总算帮到一些人:)